How to Build a Seamless AWS S3 API for Pushing Data in 5 Easy Steps
Hi, Nice seeing you here I am a Software Engineer with a background in Computer Science having in-depth knowledge of Backend Development, Frontend Development and DevOps. I Love building and deploying systems with my knowledge and create a product that is easily accessible to all. Really appreciate your time.
STEP 0: Creating an empty Nodejs repository
Go to your desired directory and run the below command to setup an empty directory with package.json
npm init -y
STEP 1: Creating a server
To create an express server we have to install express
STEP 1.1: Installing Express
npm i express
the above command will install the express library to your project.
STEP 1.2: Setting up the server
Create a new javascript file - you can name it anything, for the sake of simplicity let's call it server.js A node server can be set up by just three lines of code as :
const express = require("express");
const app = express();

app.listen(3000, () => {
    console.log(`App is up and running at port 3000`);
})
STEP 1.3: Install and configure dotenv
we will be using some high confidentiality passwords/keys in the project, so it will be beneficial to not save them as such in the project but to create a non-versioned file and store them in that.
to have this kind of feature we have to install dotenv
npm i dotenv
after that create a .env file in your project and for now, add the value of PORT there, we will use the value of port from there.
.env will look something like this, it stores data in key-value format.
PORT=3000
now to use this value of PORT from .env, we have to configure dotenv in the server.js file and use the value.
const express = require("express");
// This line is setting up the .env so that we can use it in our code
require("dotenv").config();

const app = express();
const port = process.env.PORT // This is how we can use it

app.listen(port, () => {
    console.log(`App is up and running at port ${port}`);
})
STEP 2: Initial setup in AWS
Now, to be able to upload a file to the AWS S3 bucket, we have to use two AWS services, which are: S3 and IAM.
STEP 2.1: Creating an S3 bucket
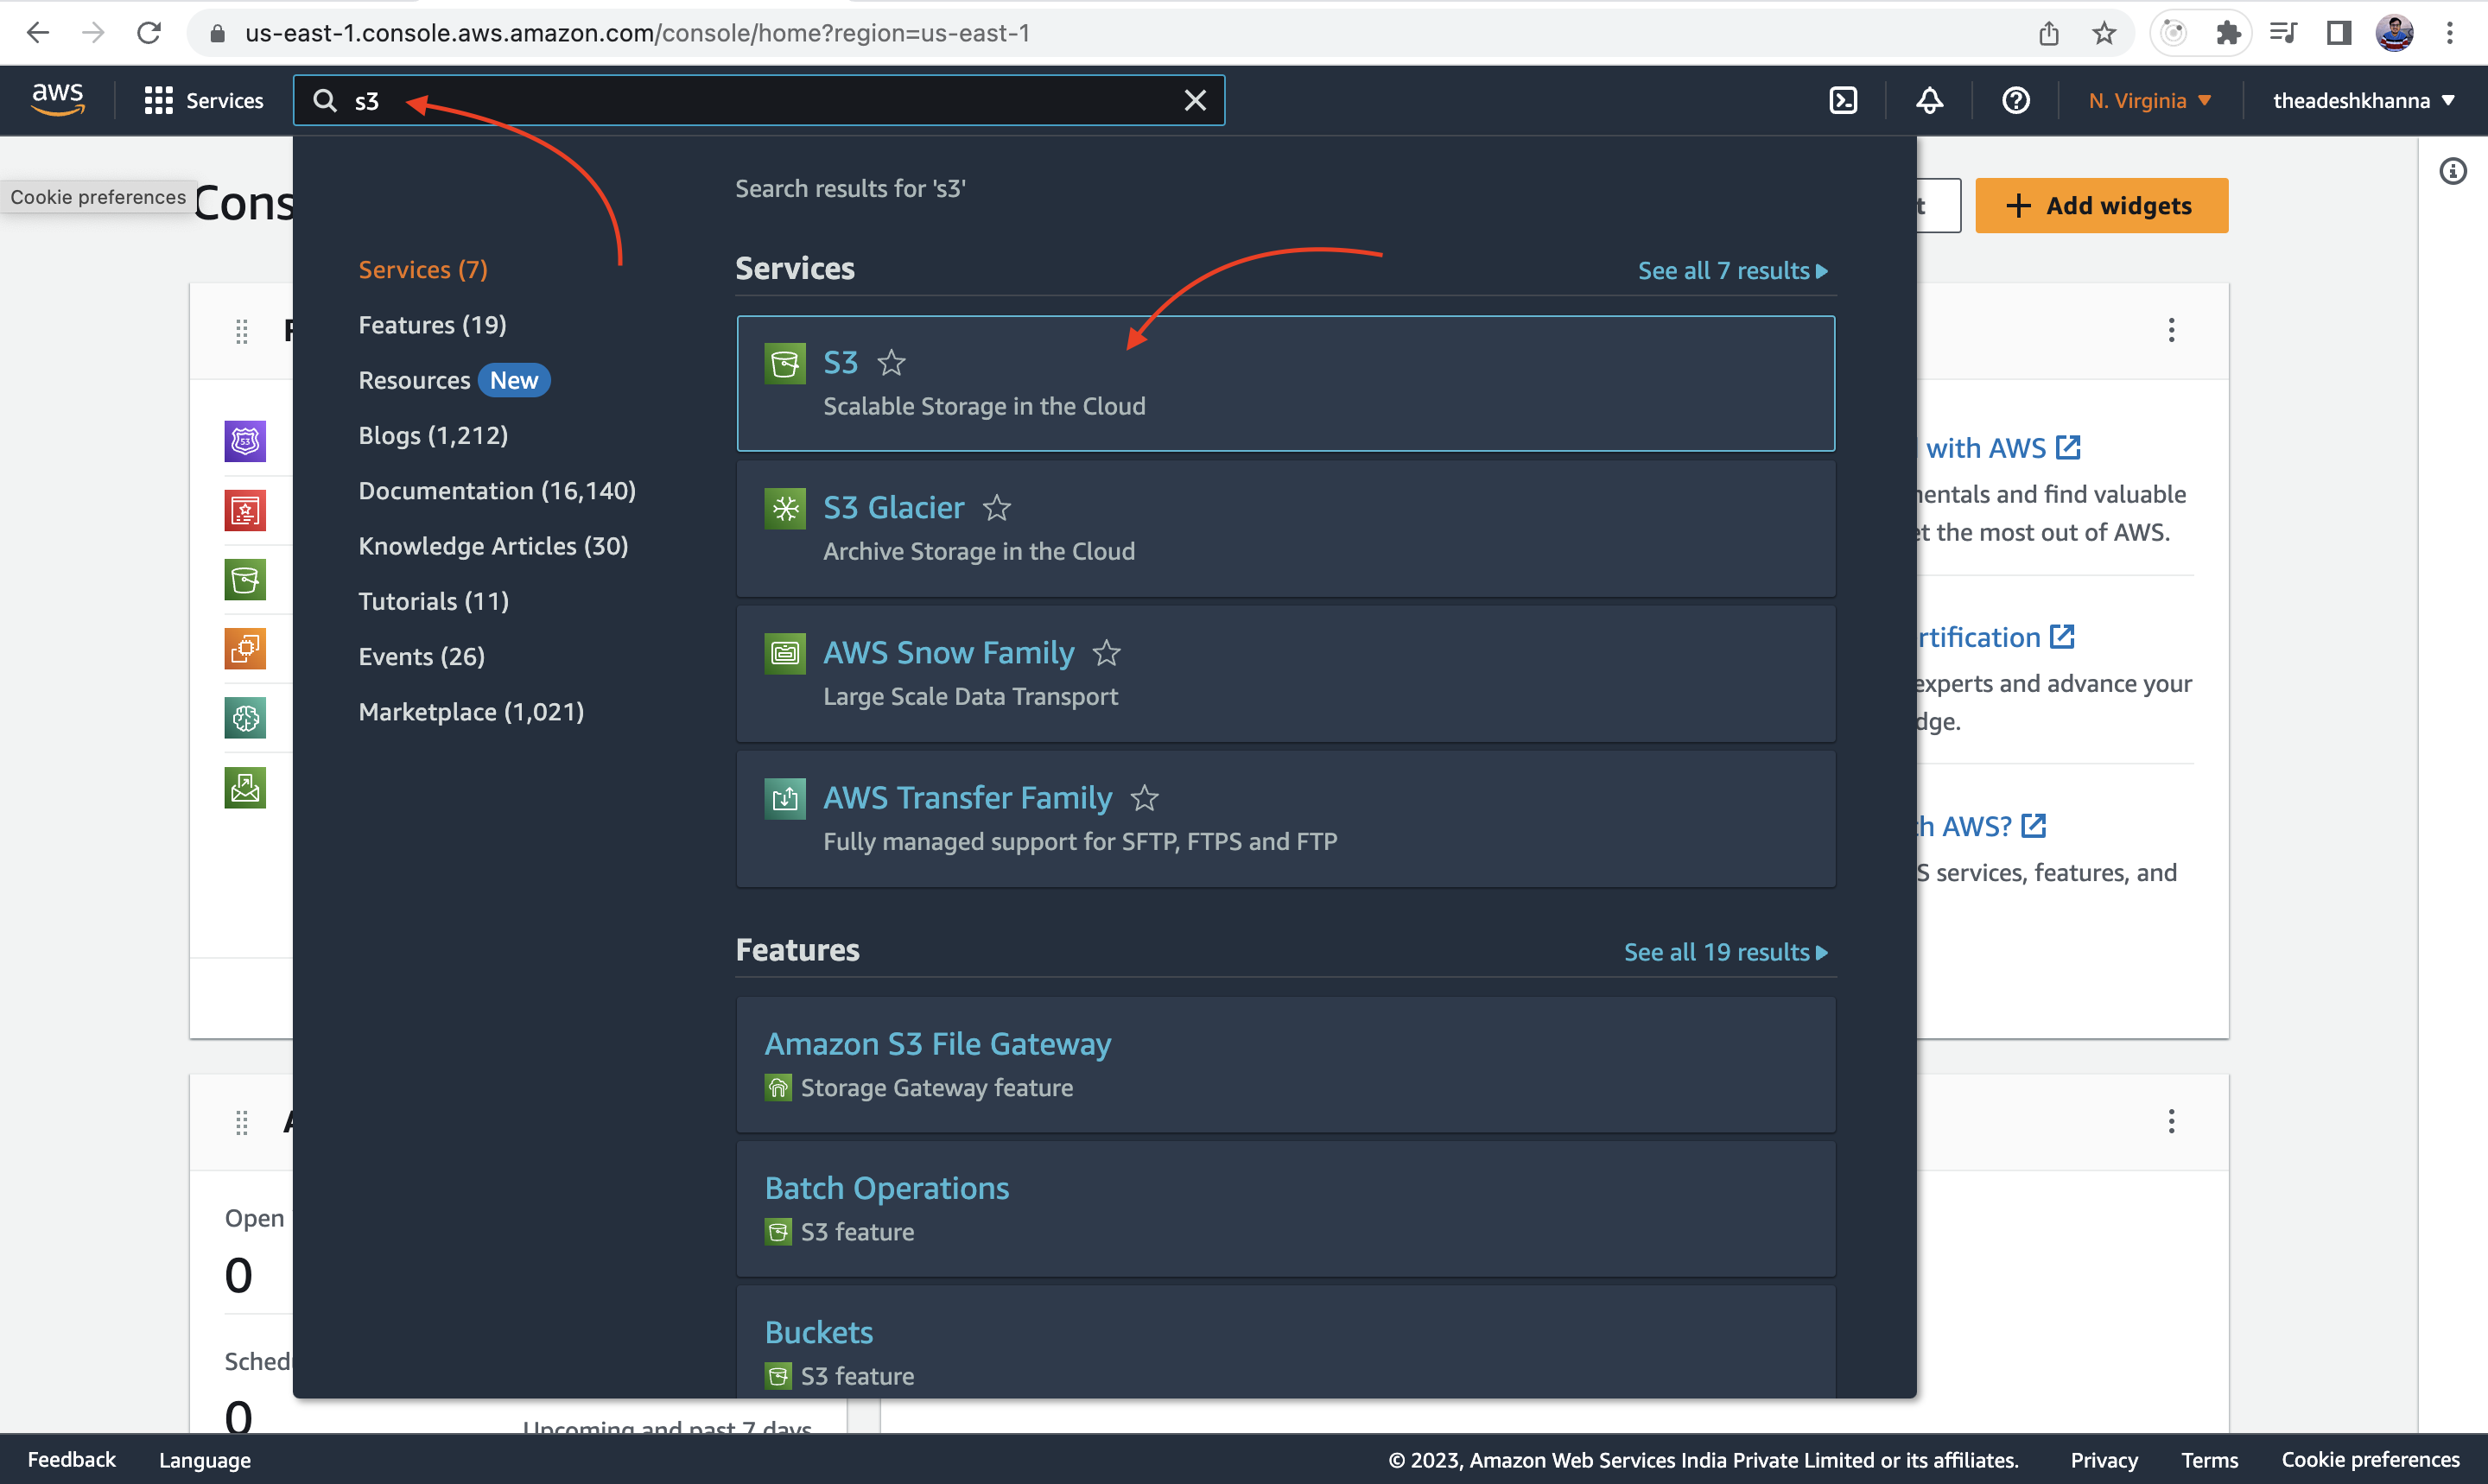
Now, to create an S3 bucket, open aws, log in and search for S3 and click on it as shown in the image.
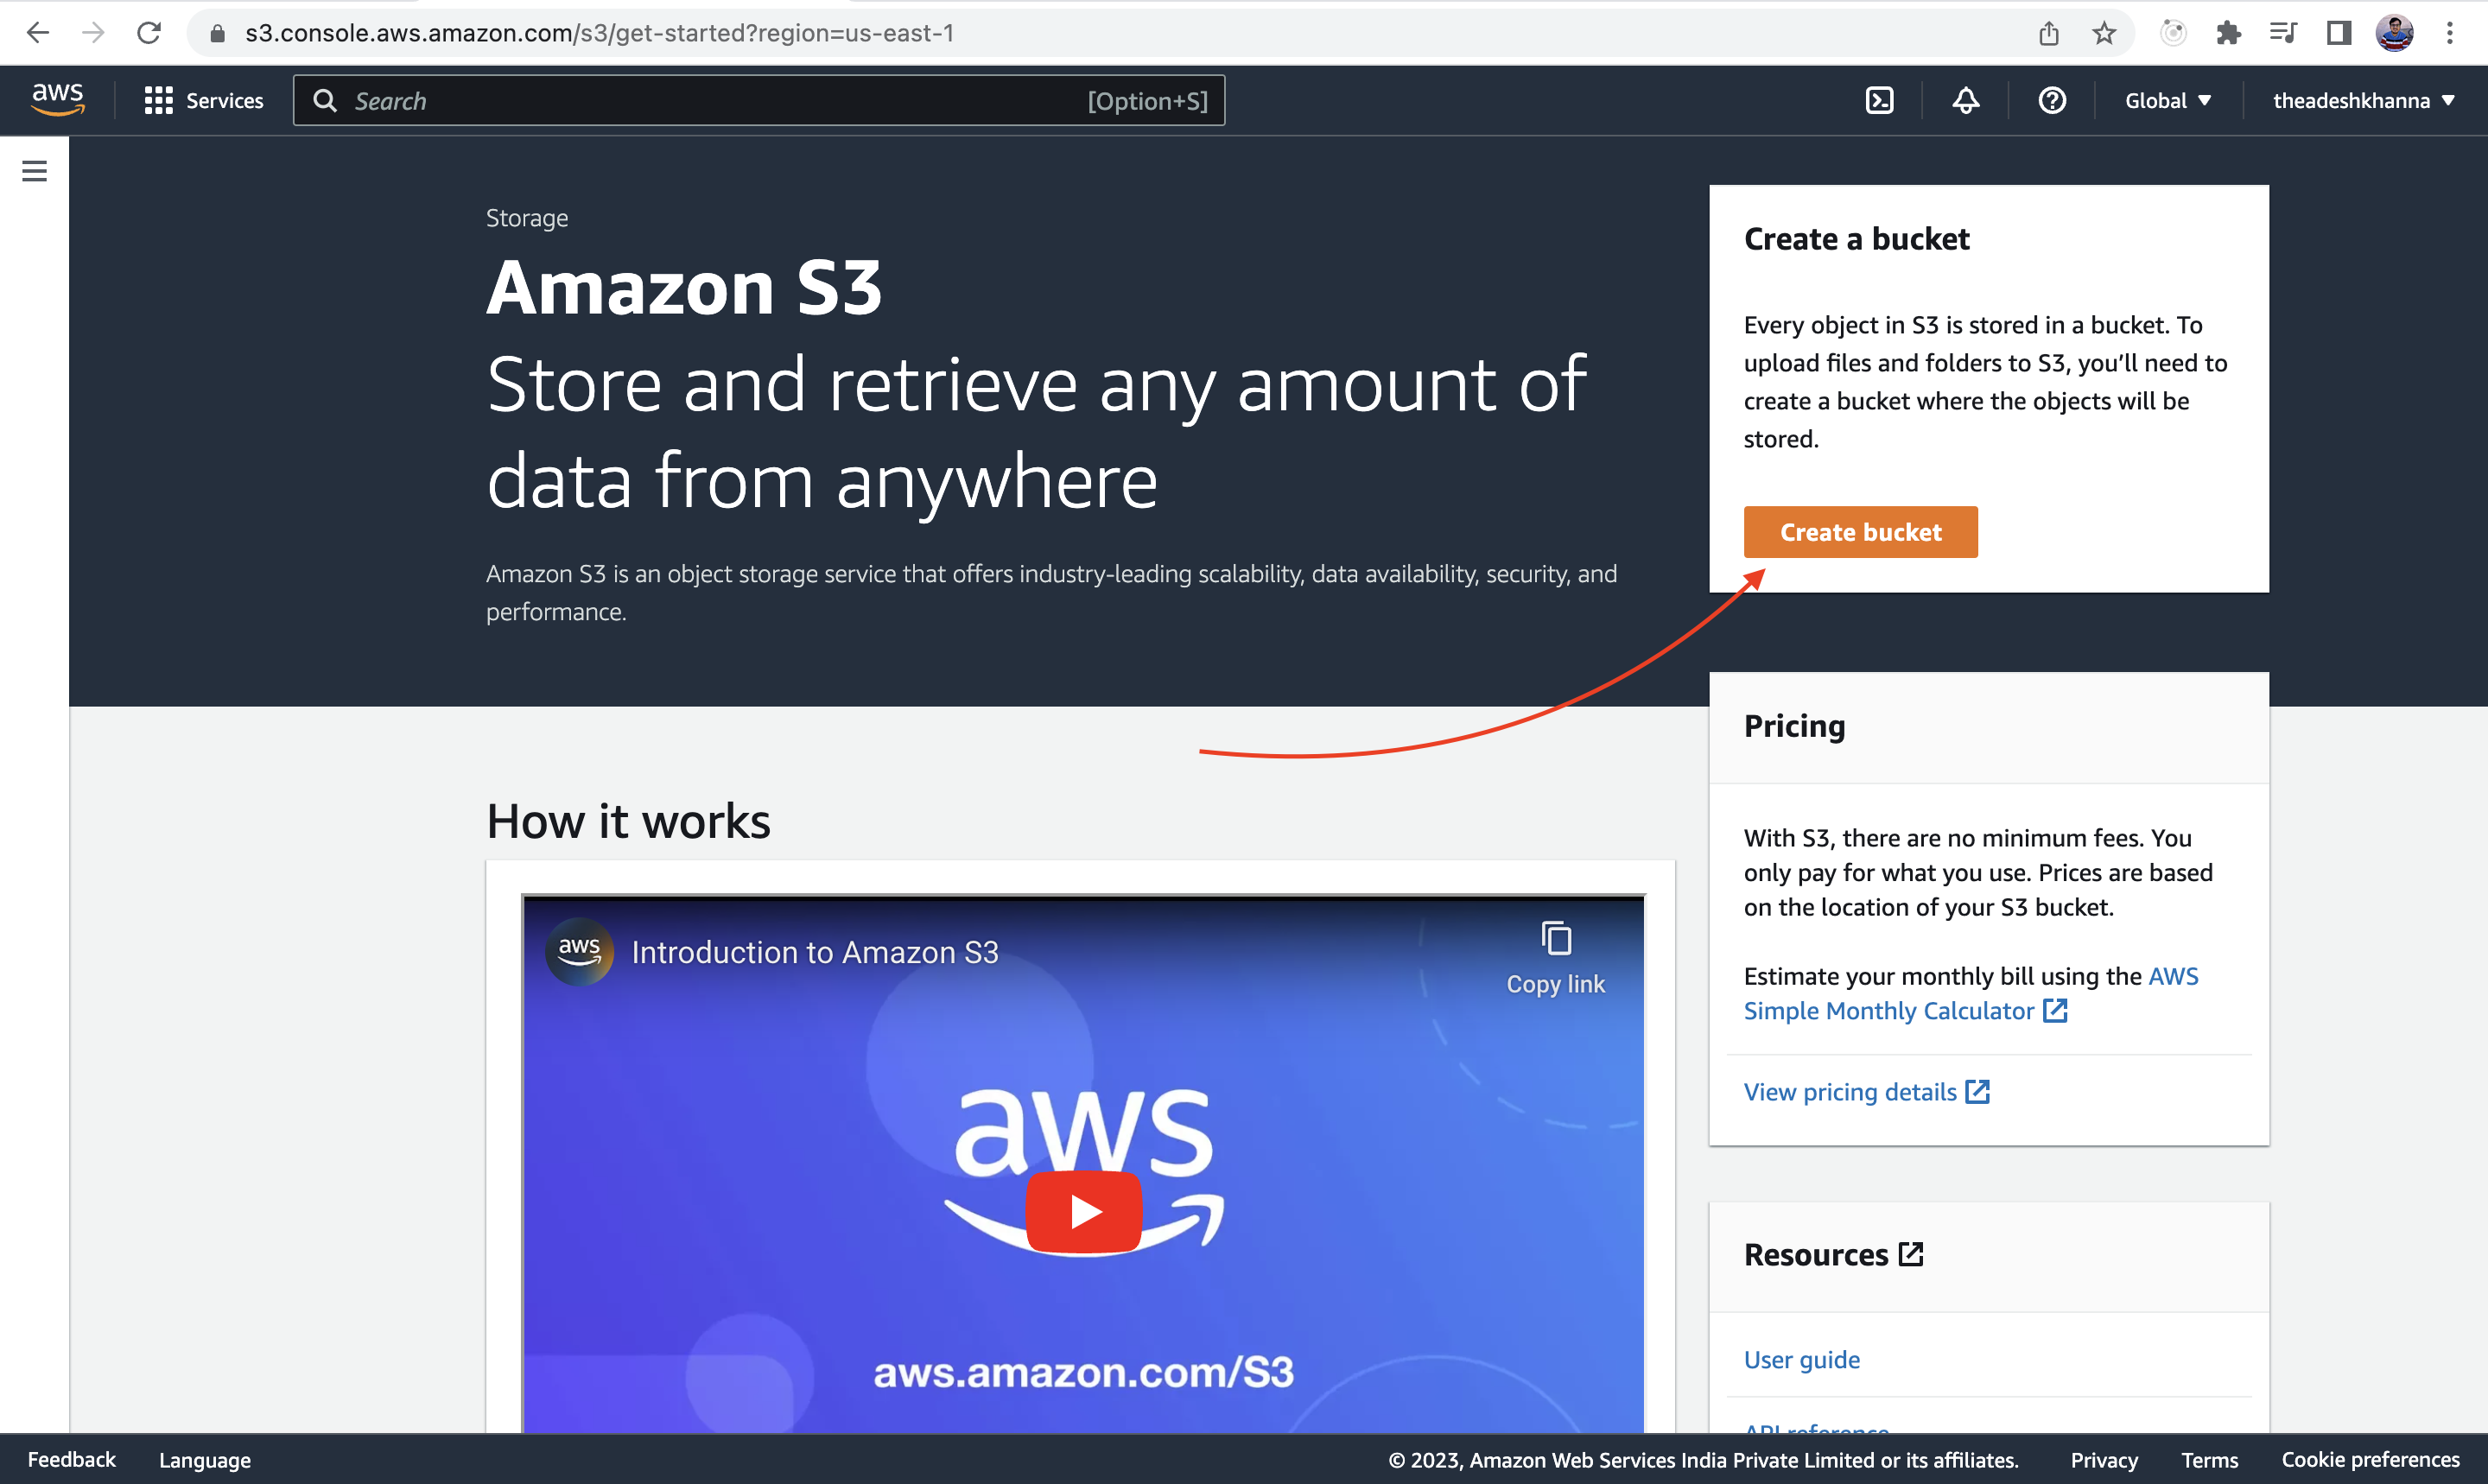
Now, we have to create a bucket inside the S3 service where we will store the data. Click on Create a bucket to create the bucket.
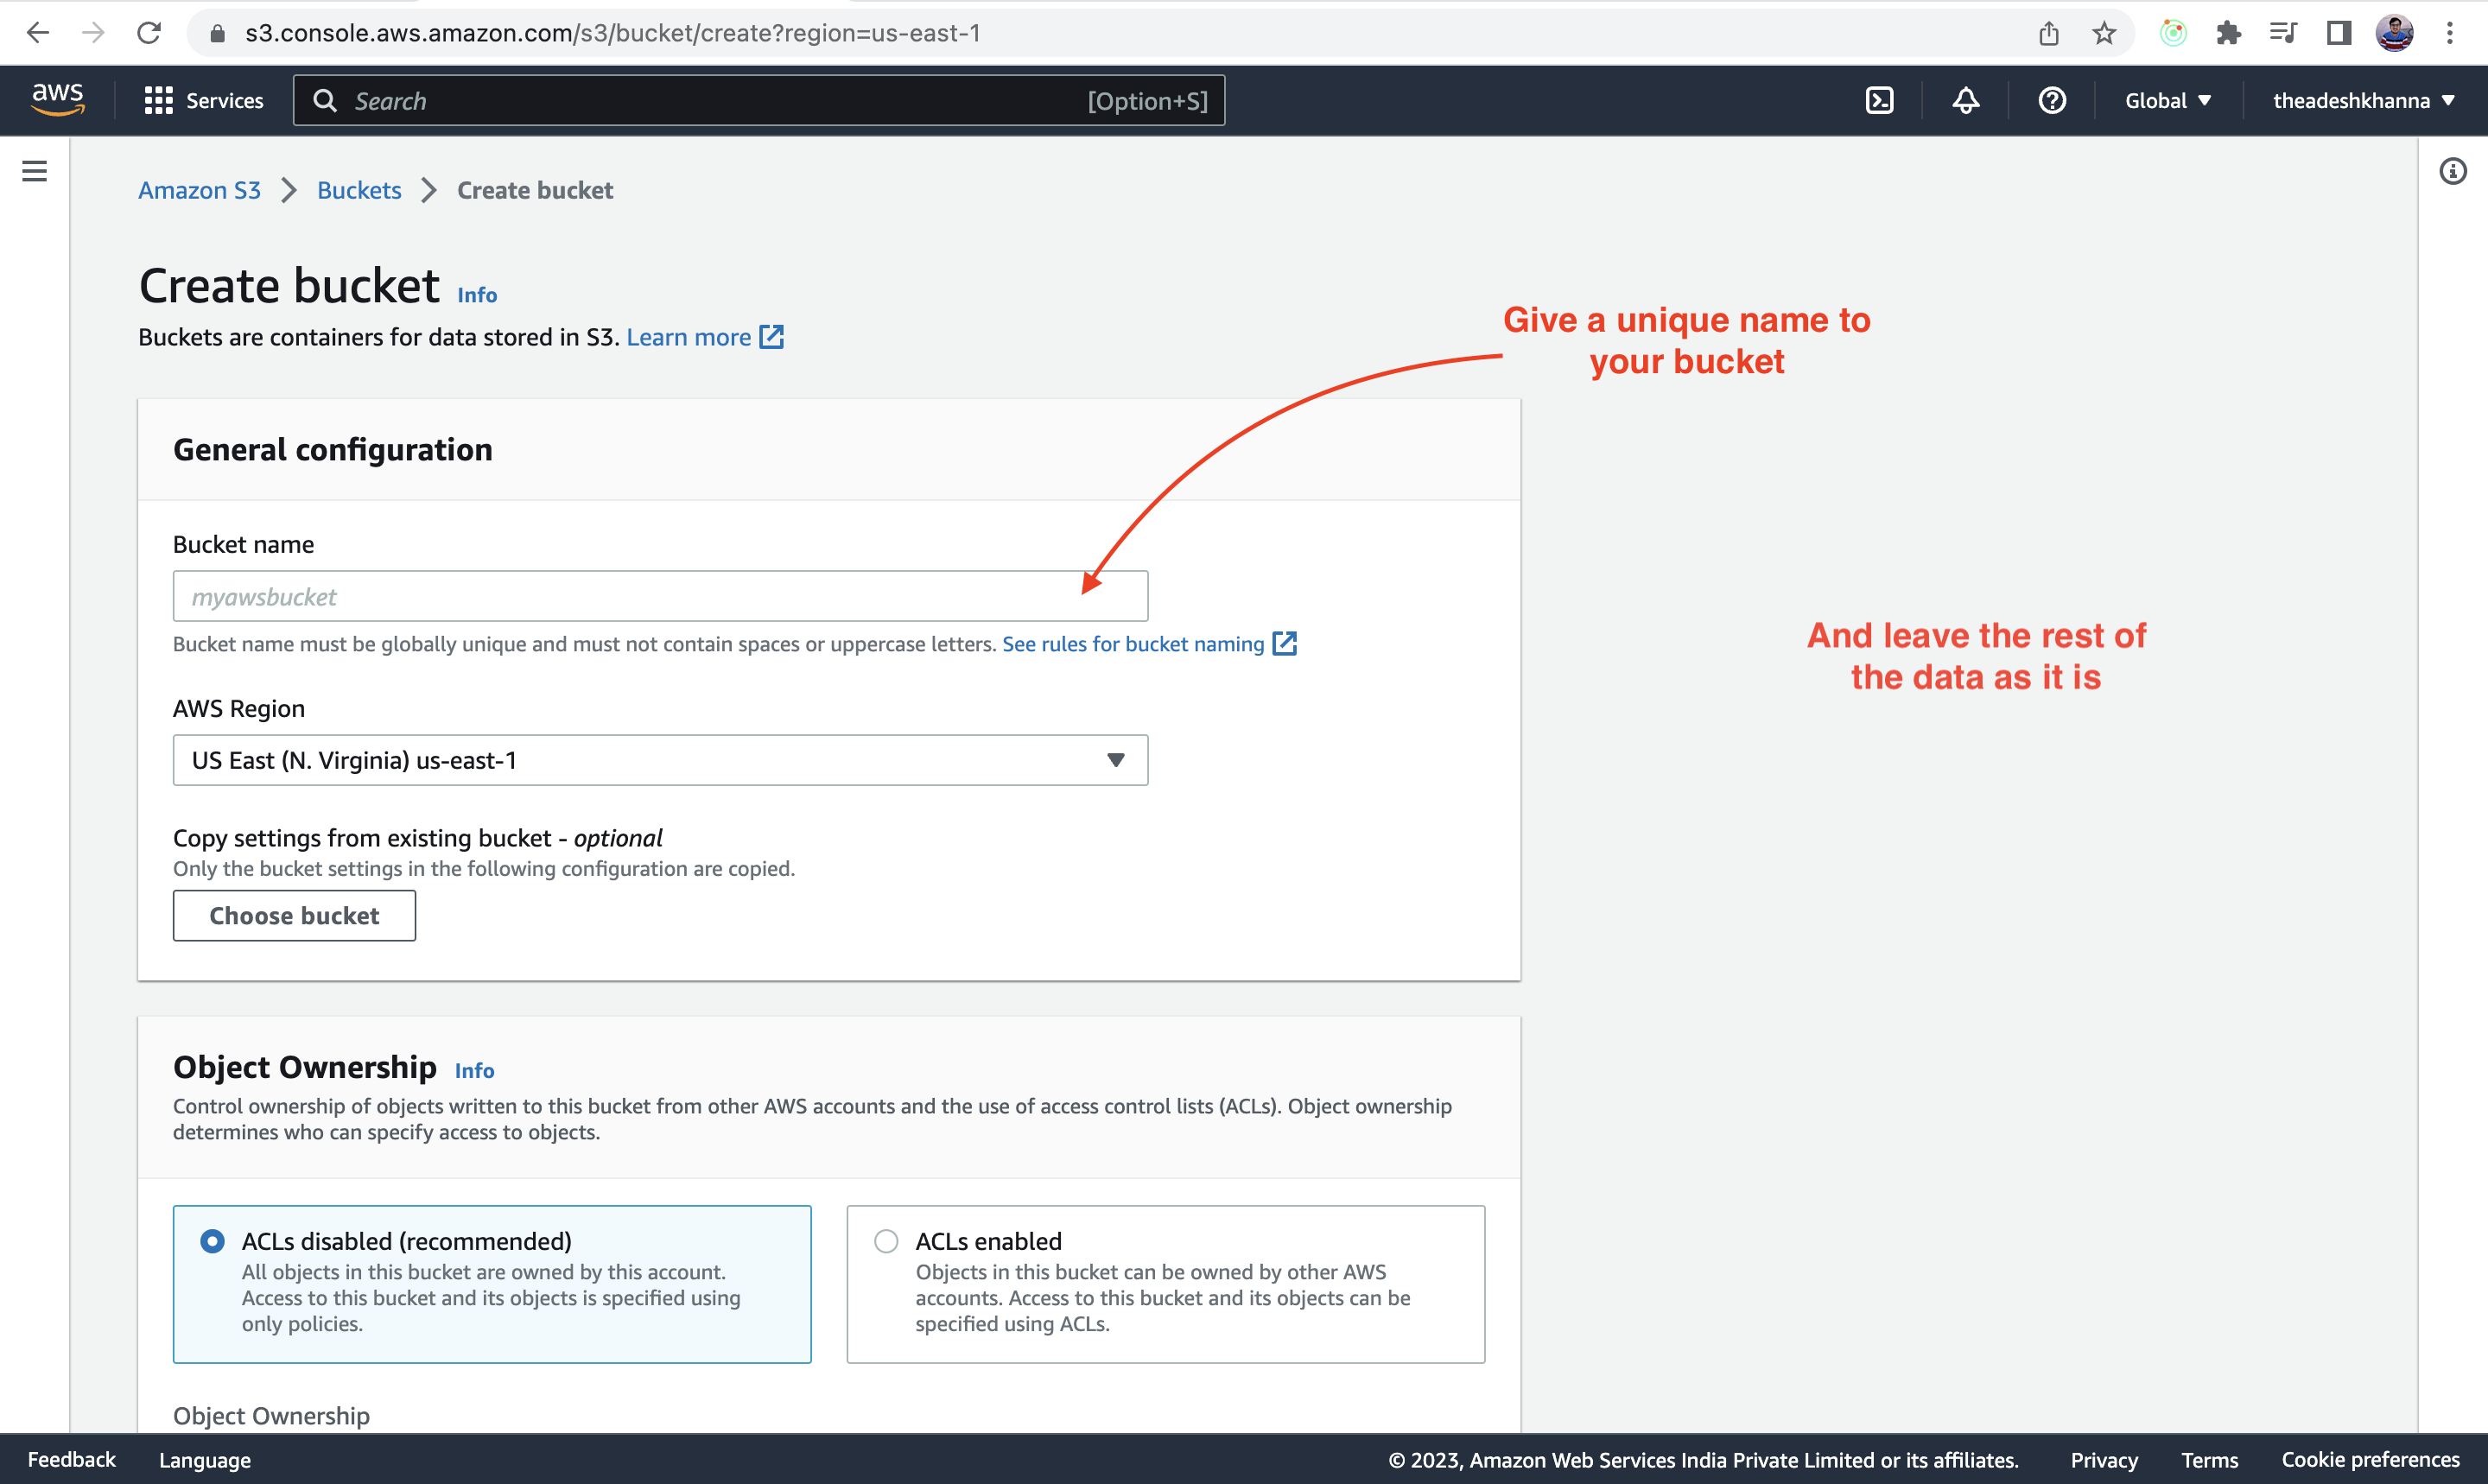
Give a name to your bucket, and leave the default settings as is.
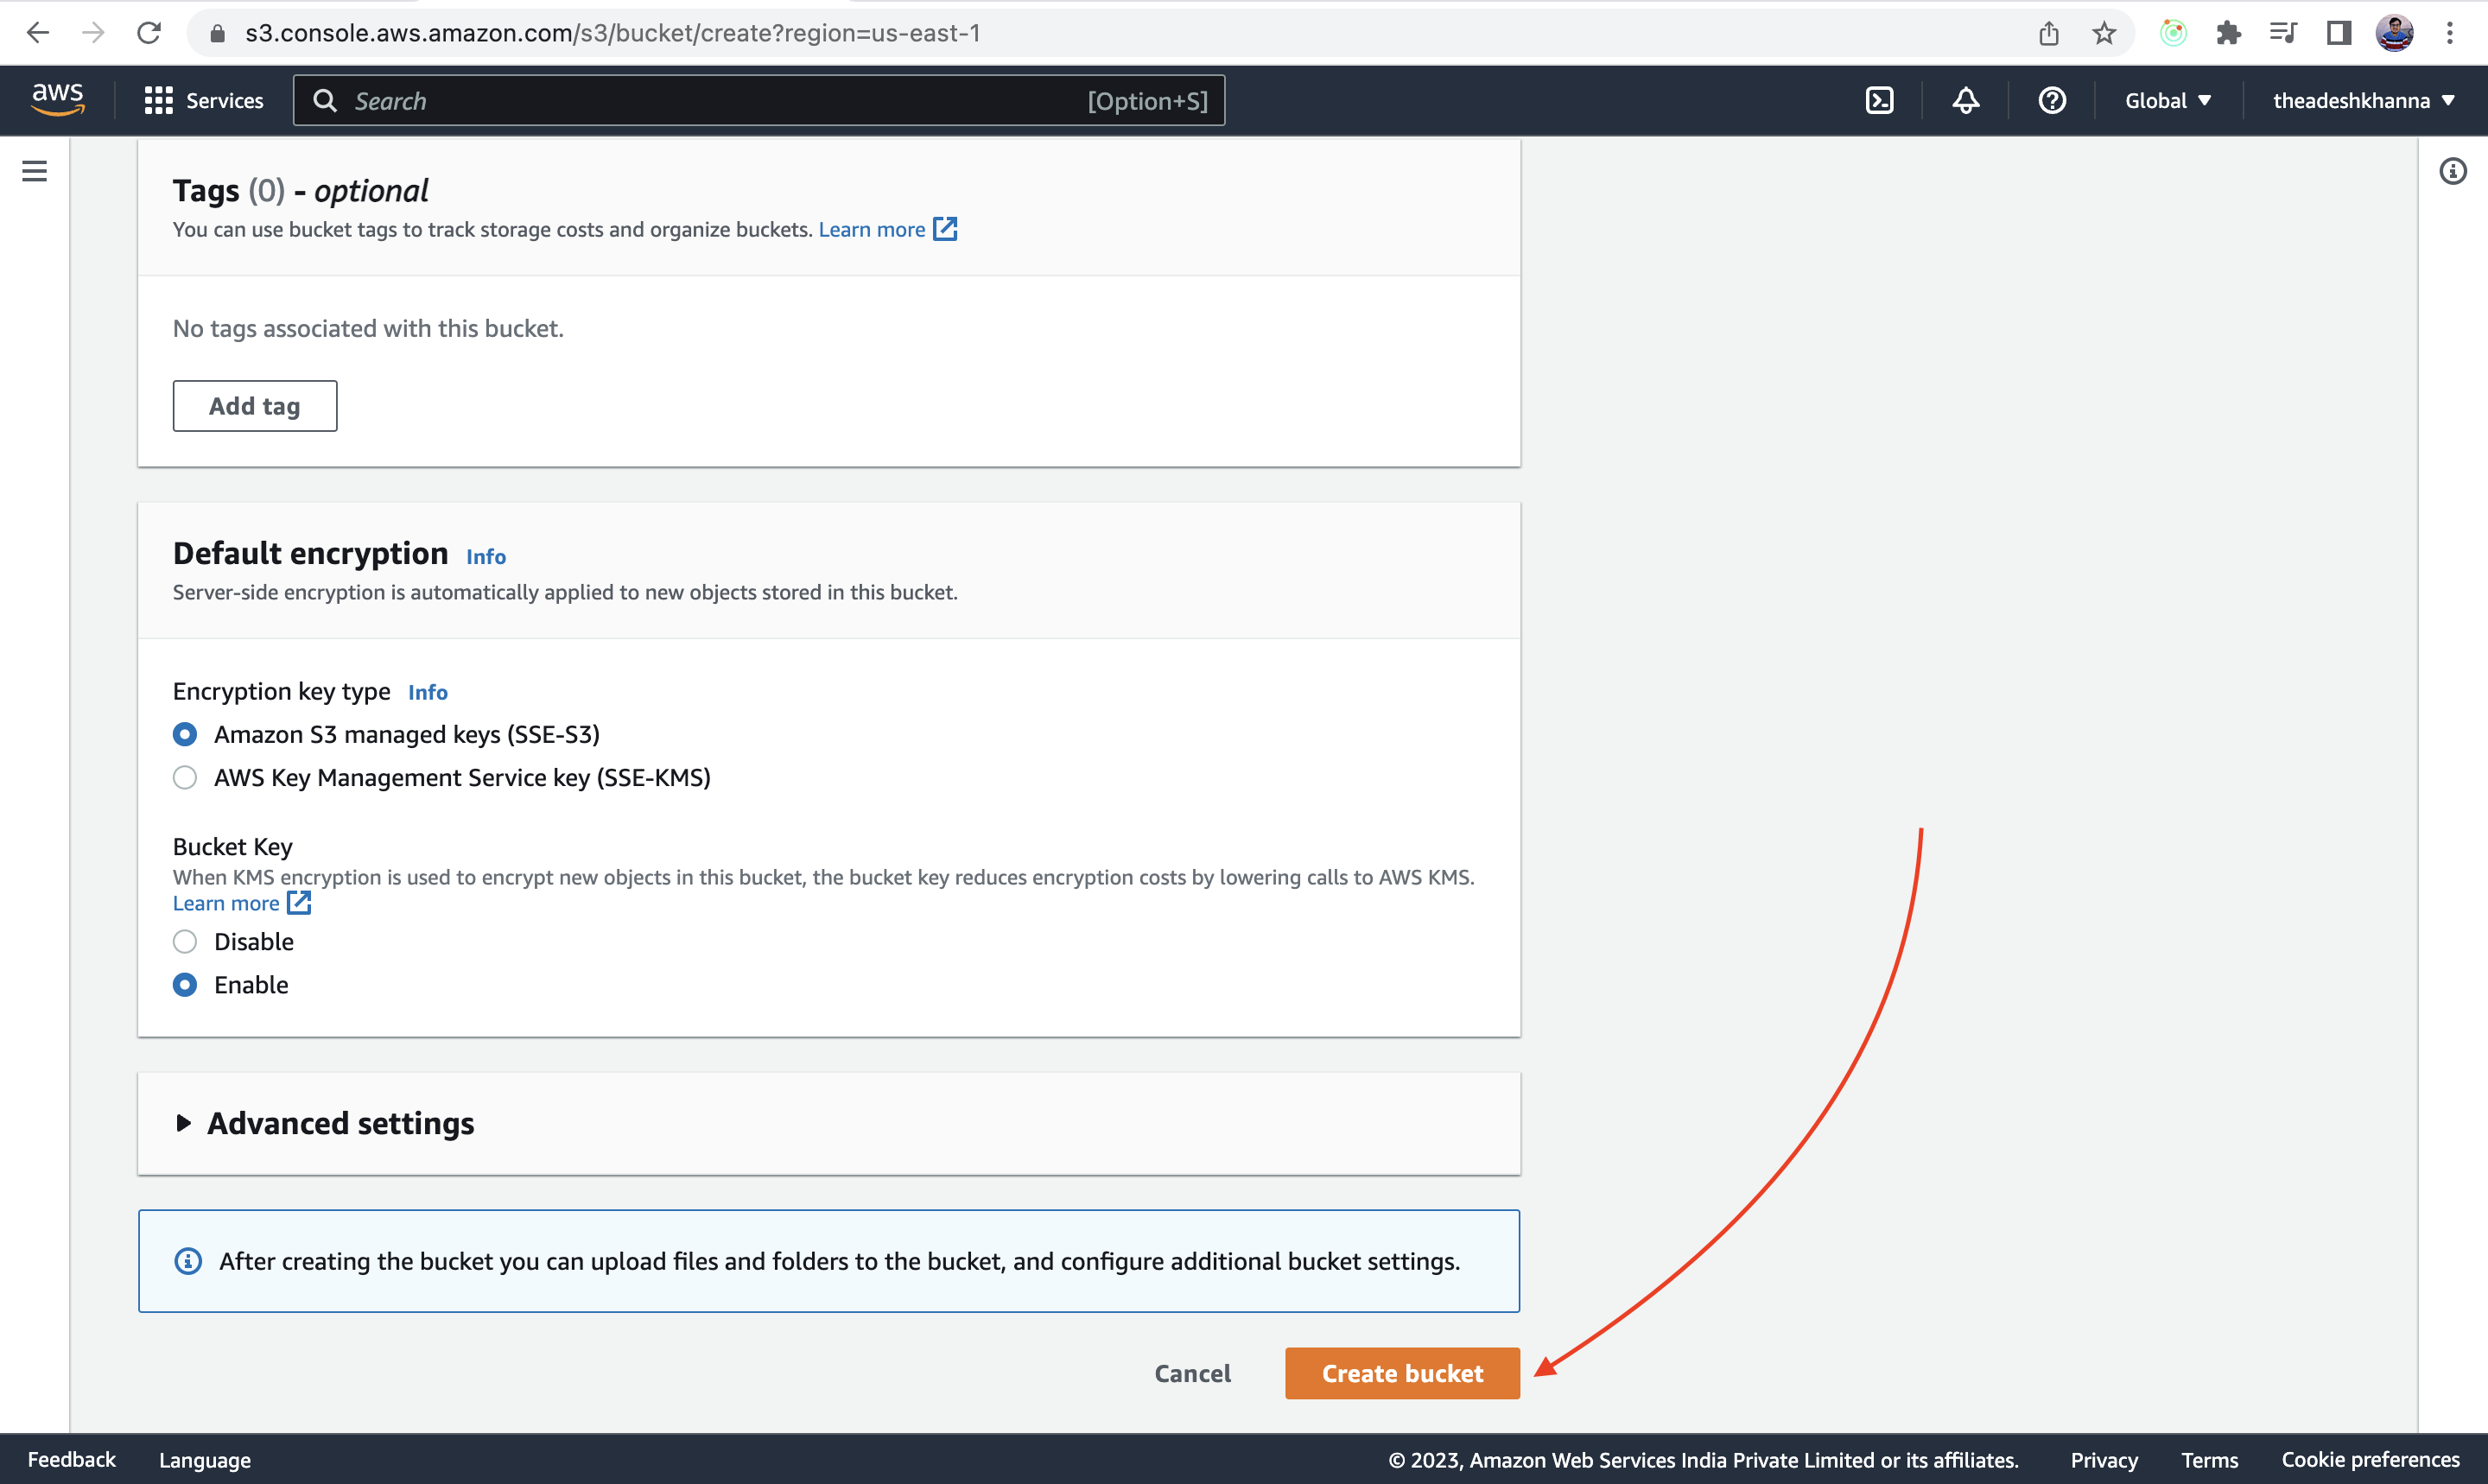
After that, click on Create bucket
Now, a new bucket with the name that you have entered will be visible on the S3 dashboard.

STEP 2.2: Creating an IAM policy
To be able to upload any data inside our private S3 bucket, we have to create an IAM policy and a user associated with it.
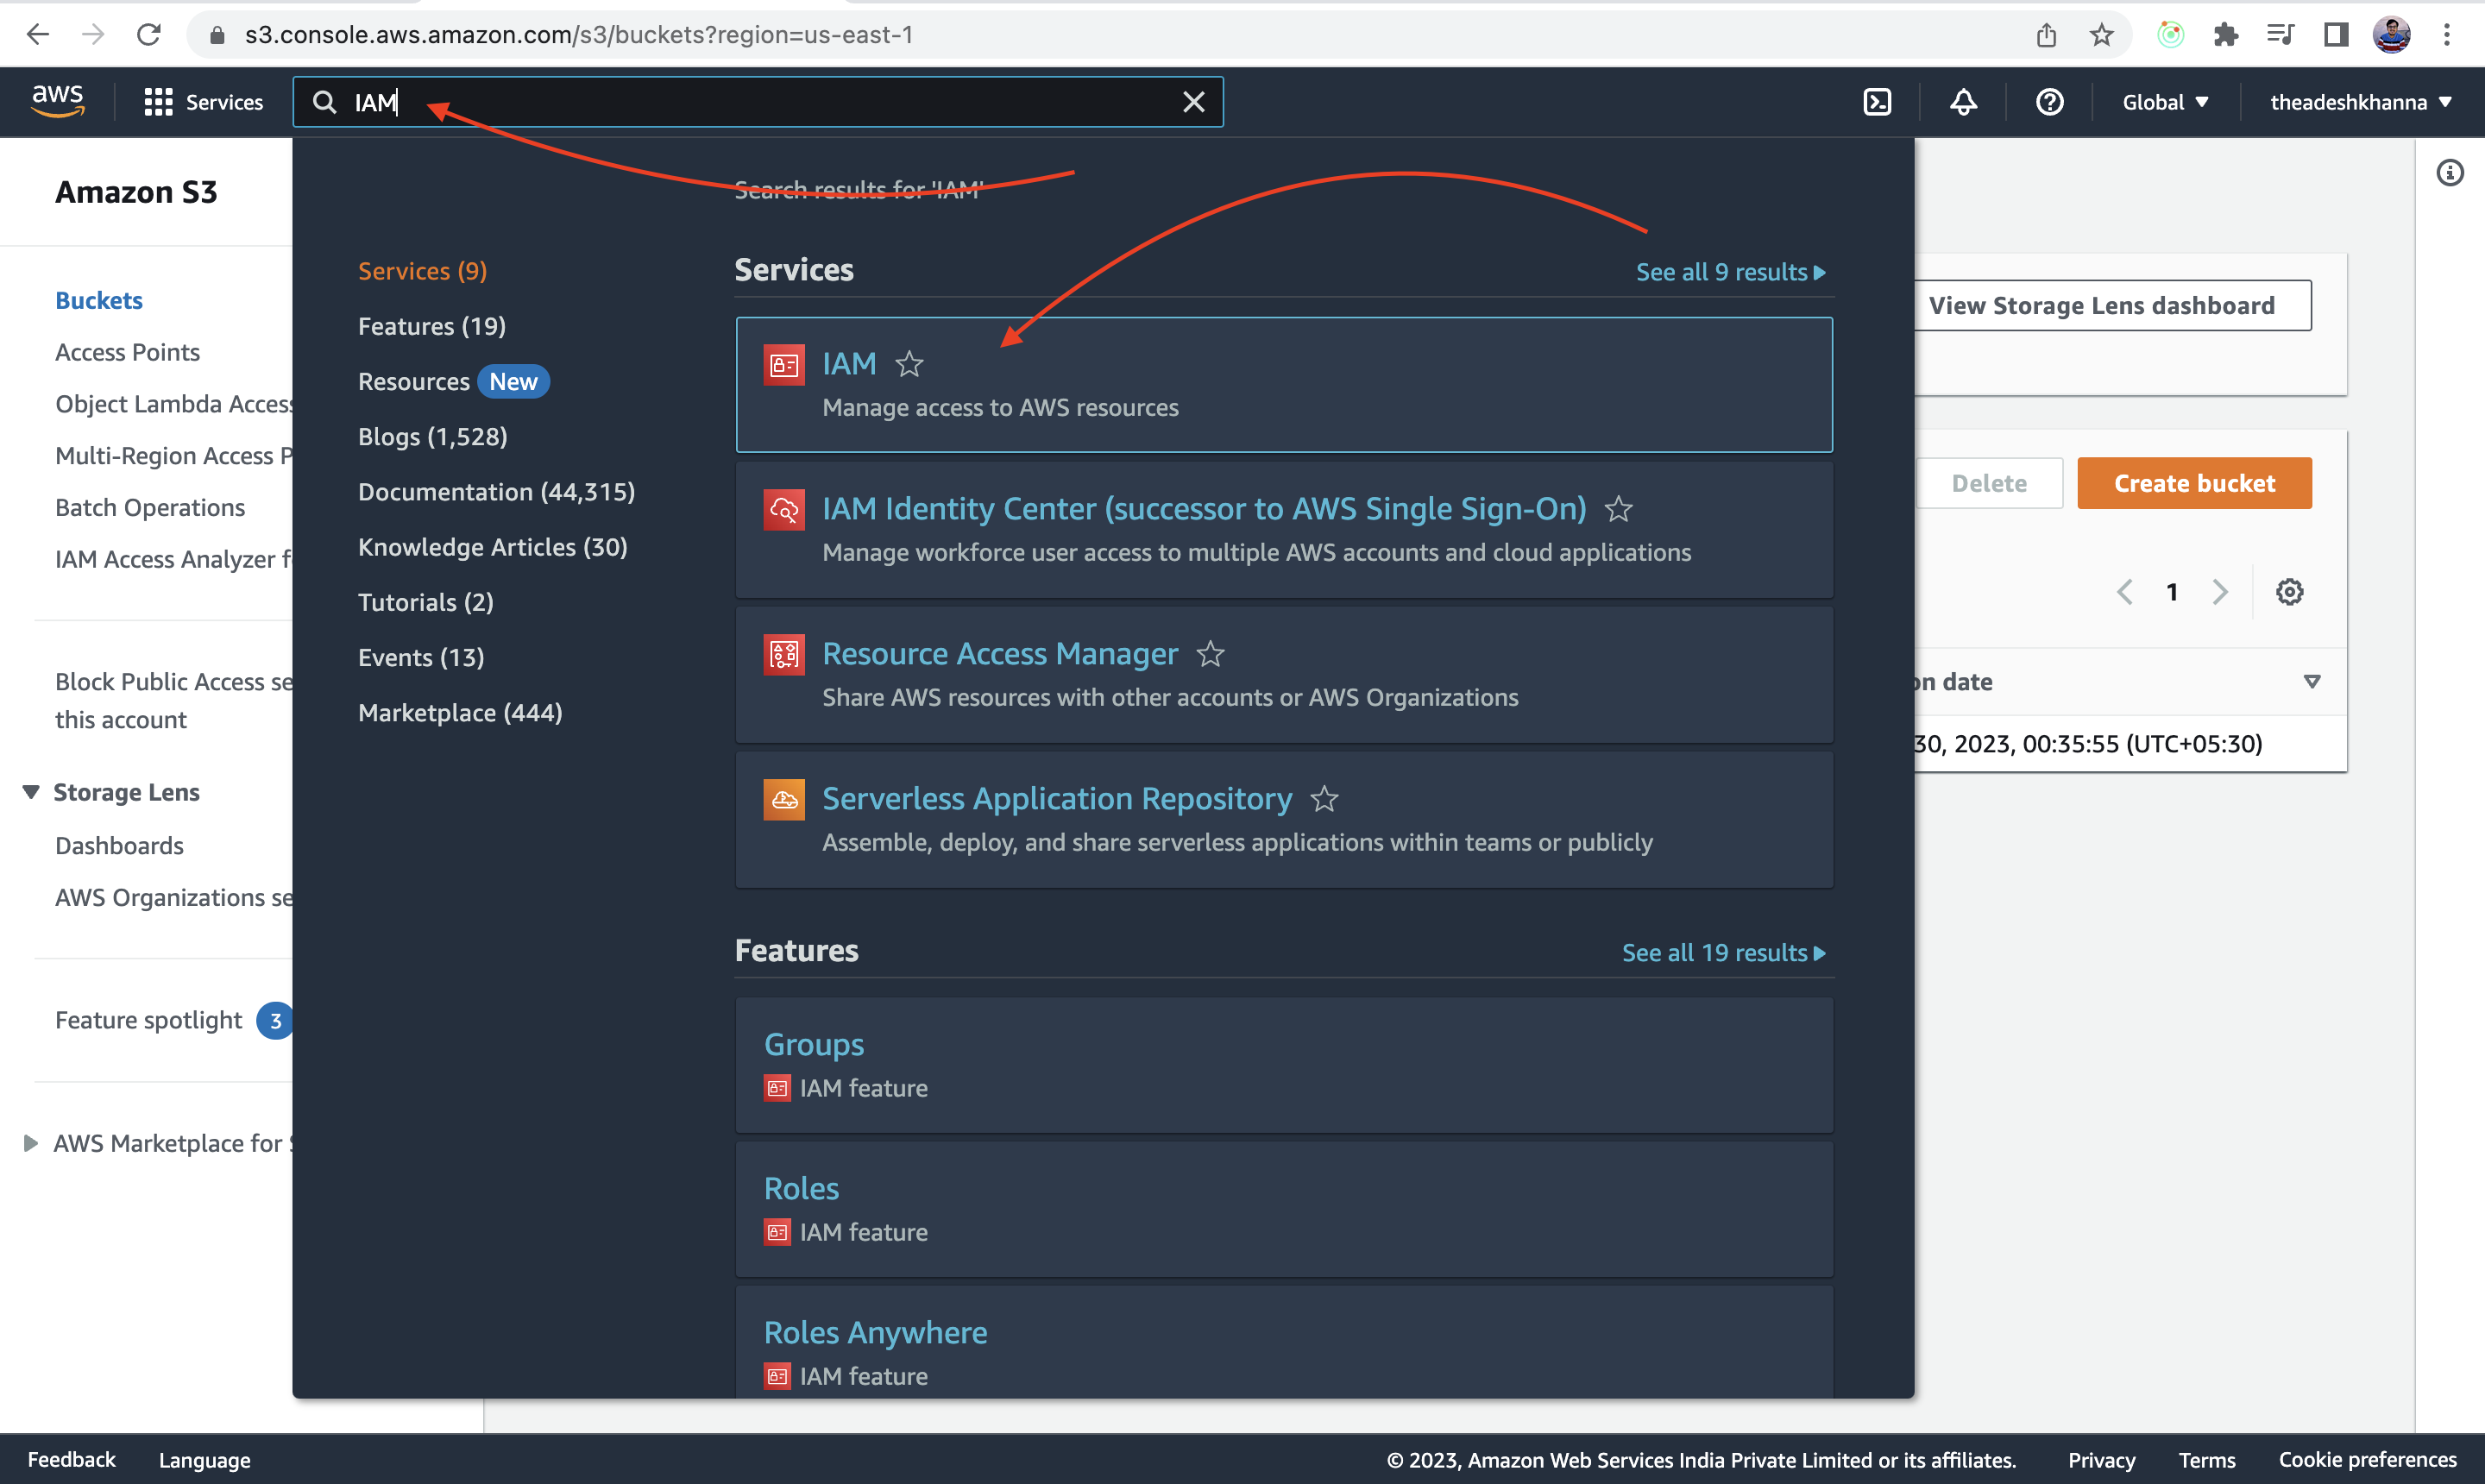
To do so, again search for IAM in the search bar, and click on it
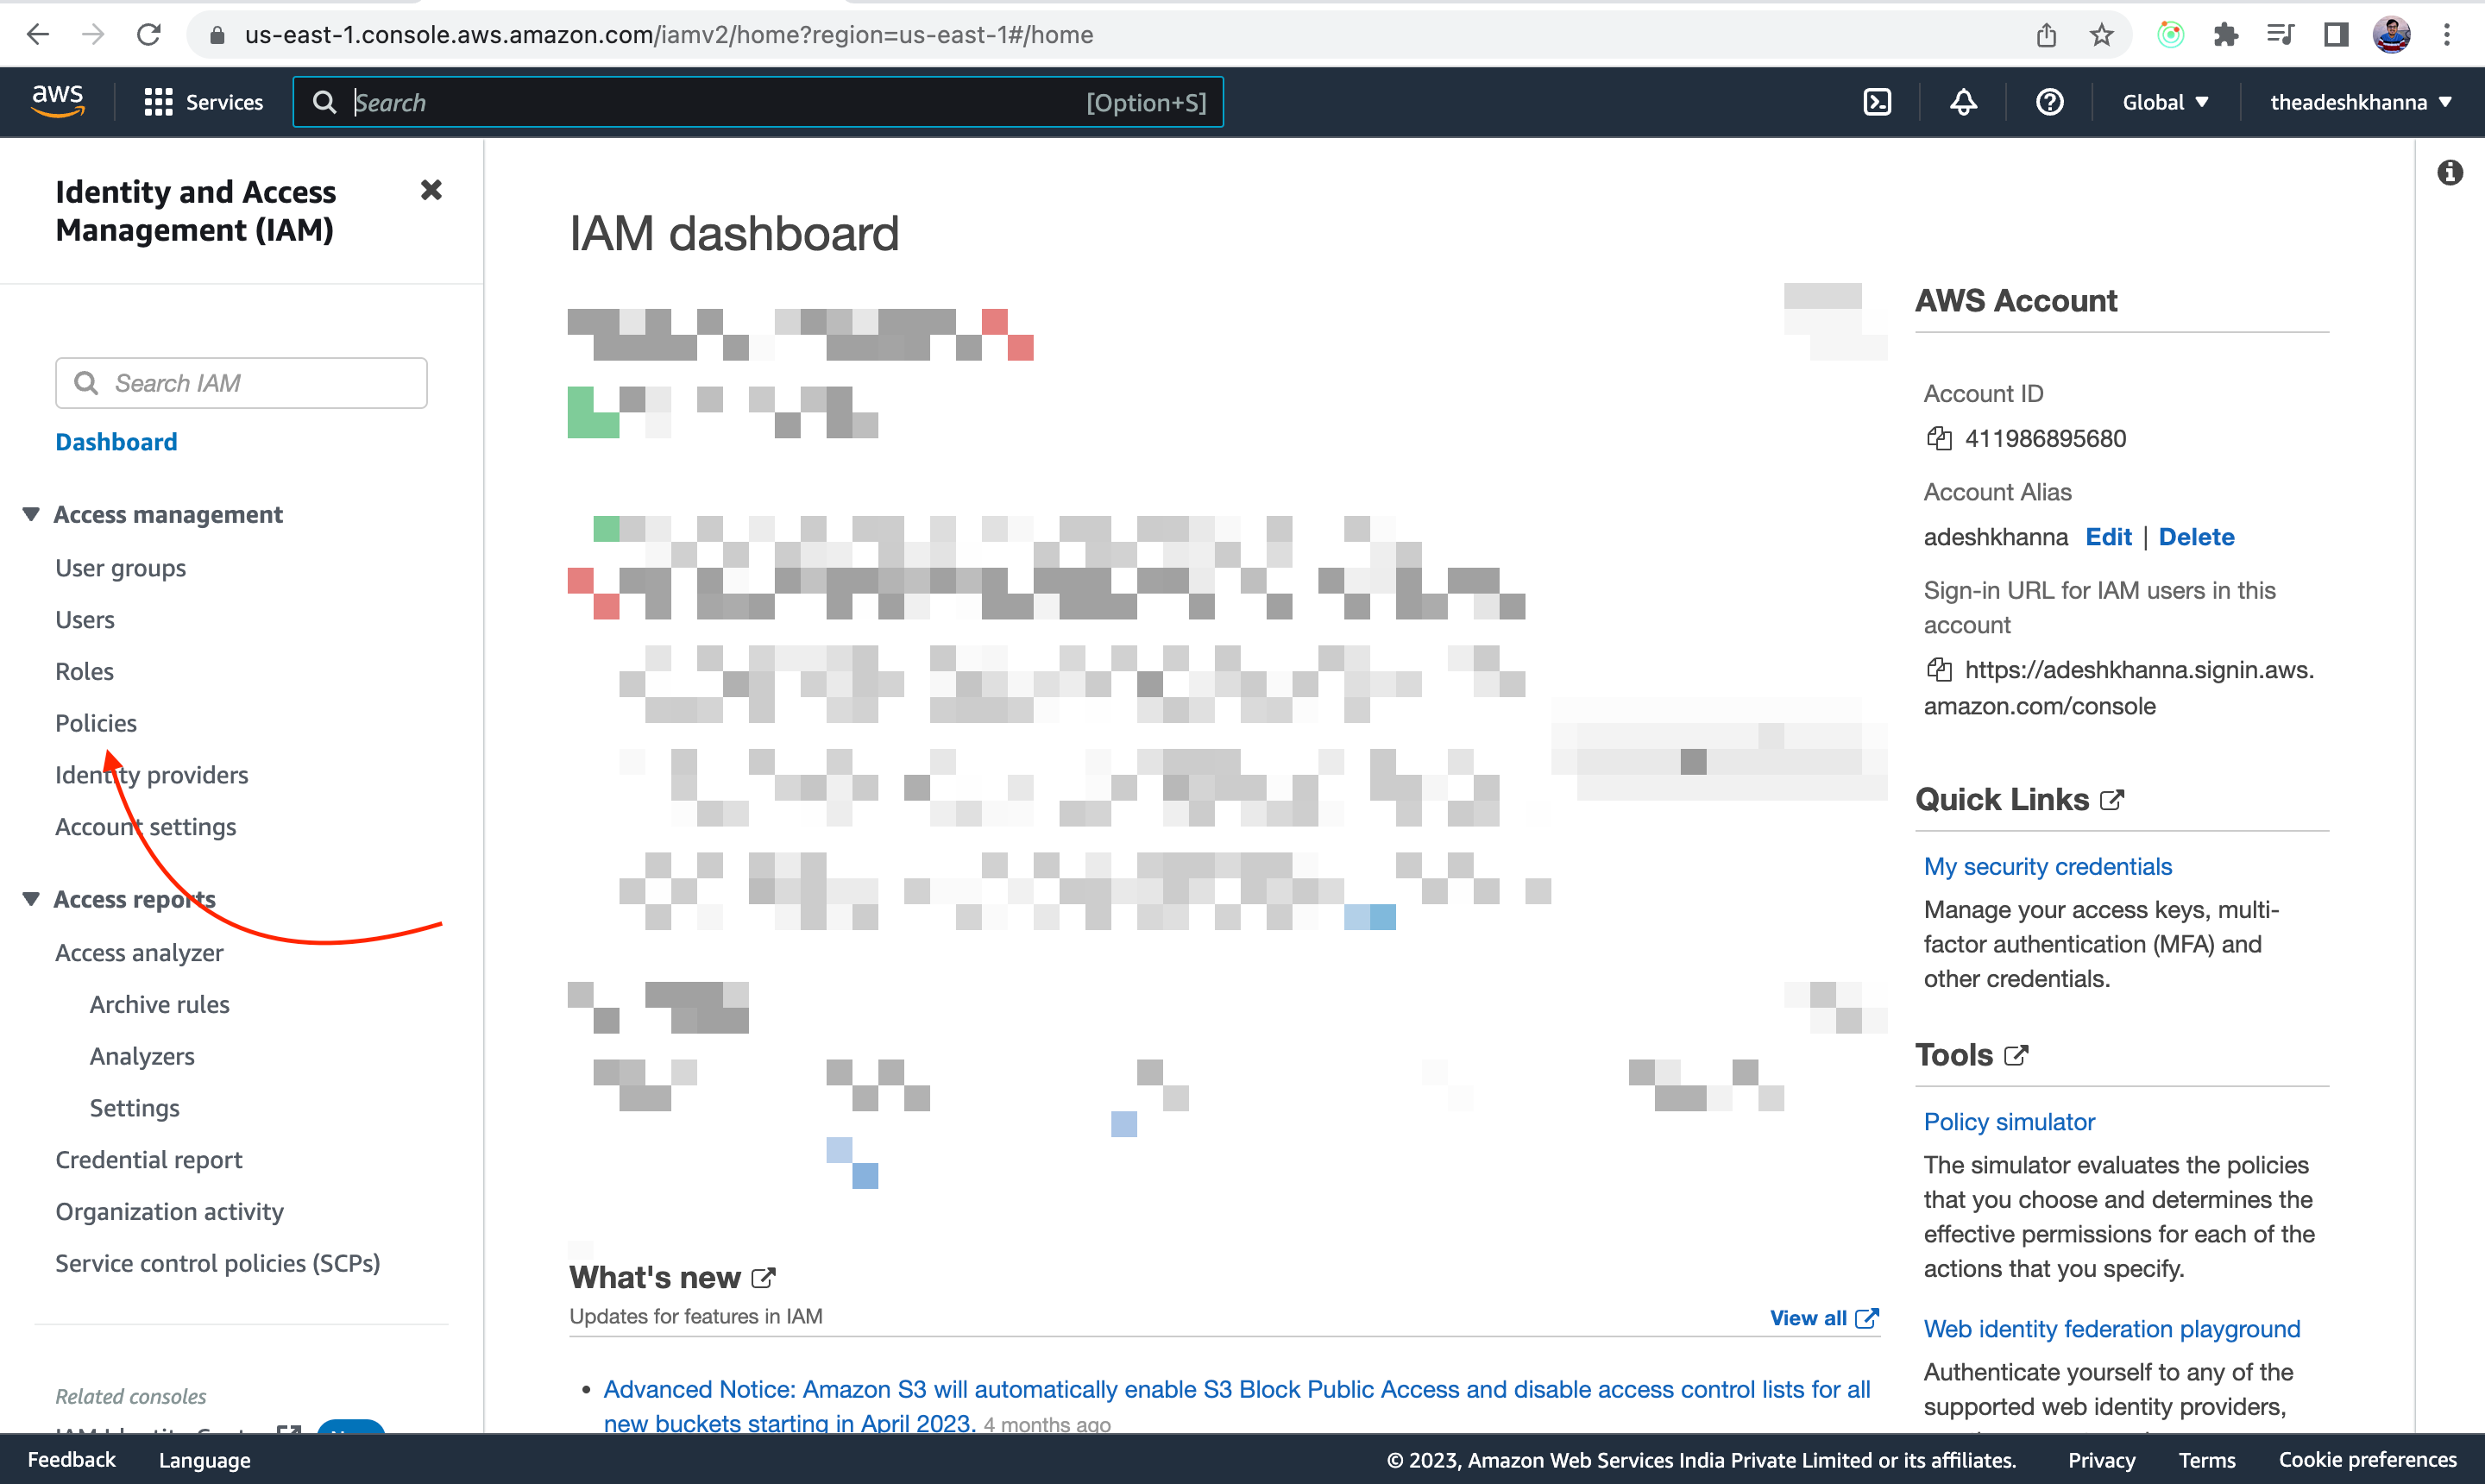
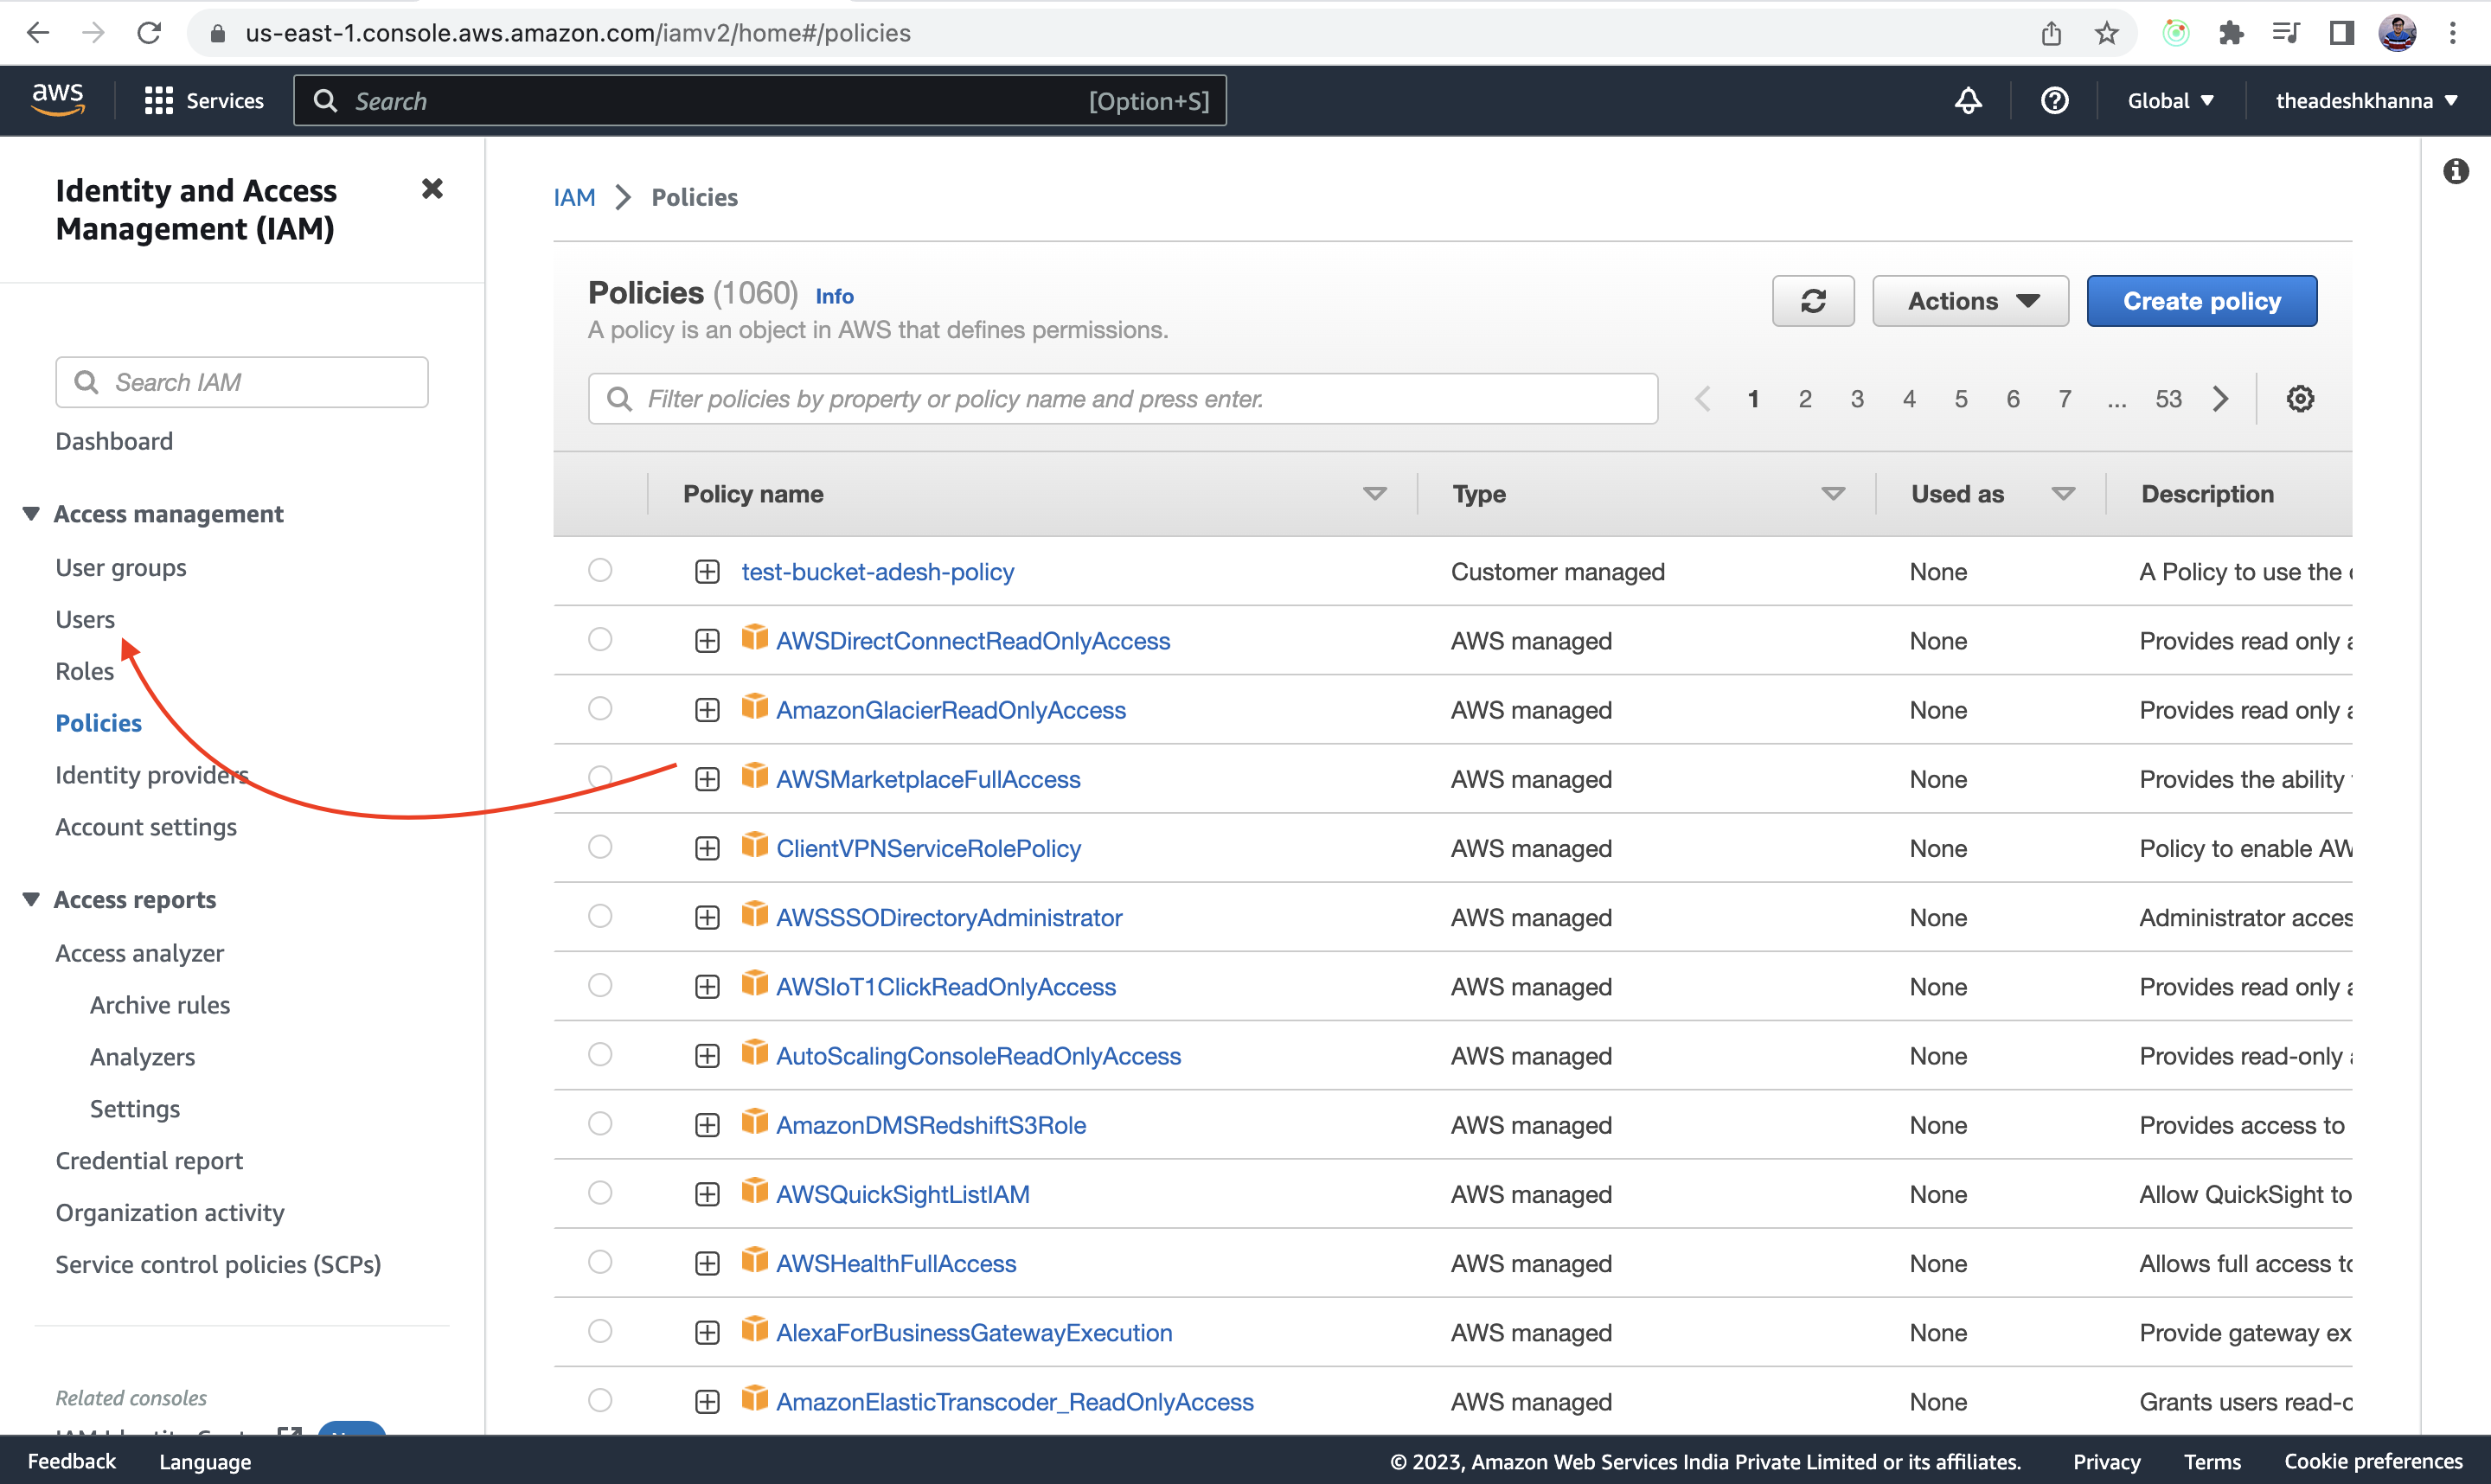
Inside the IAM dashboard, head over to the Policies section
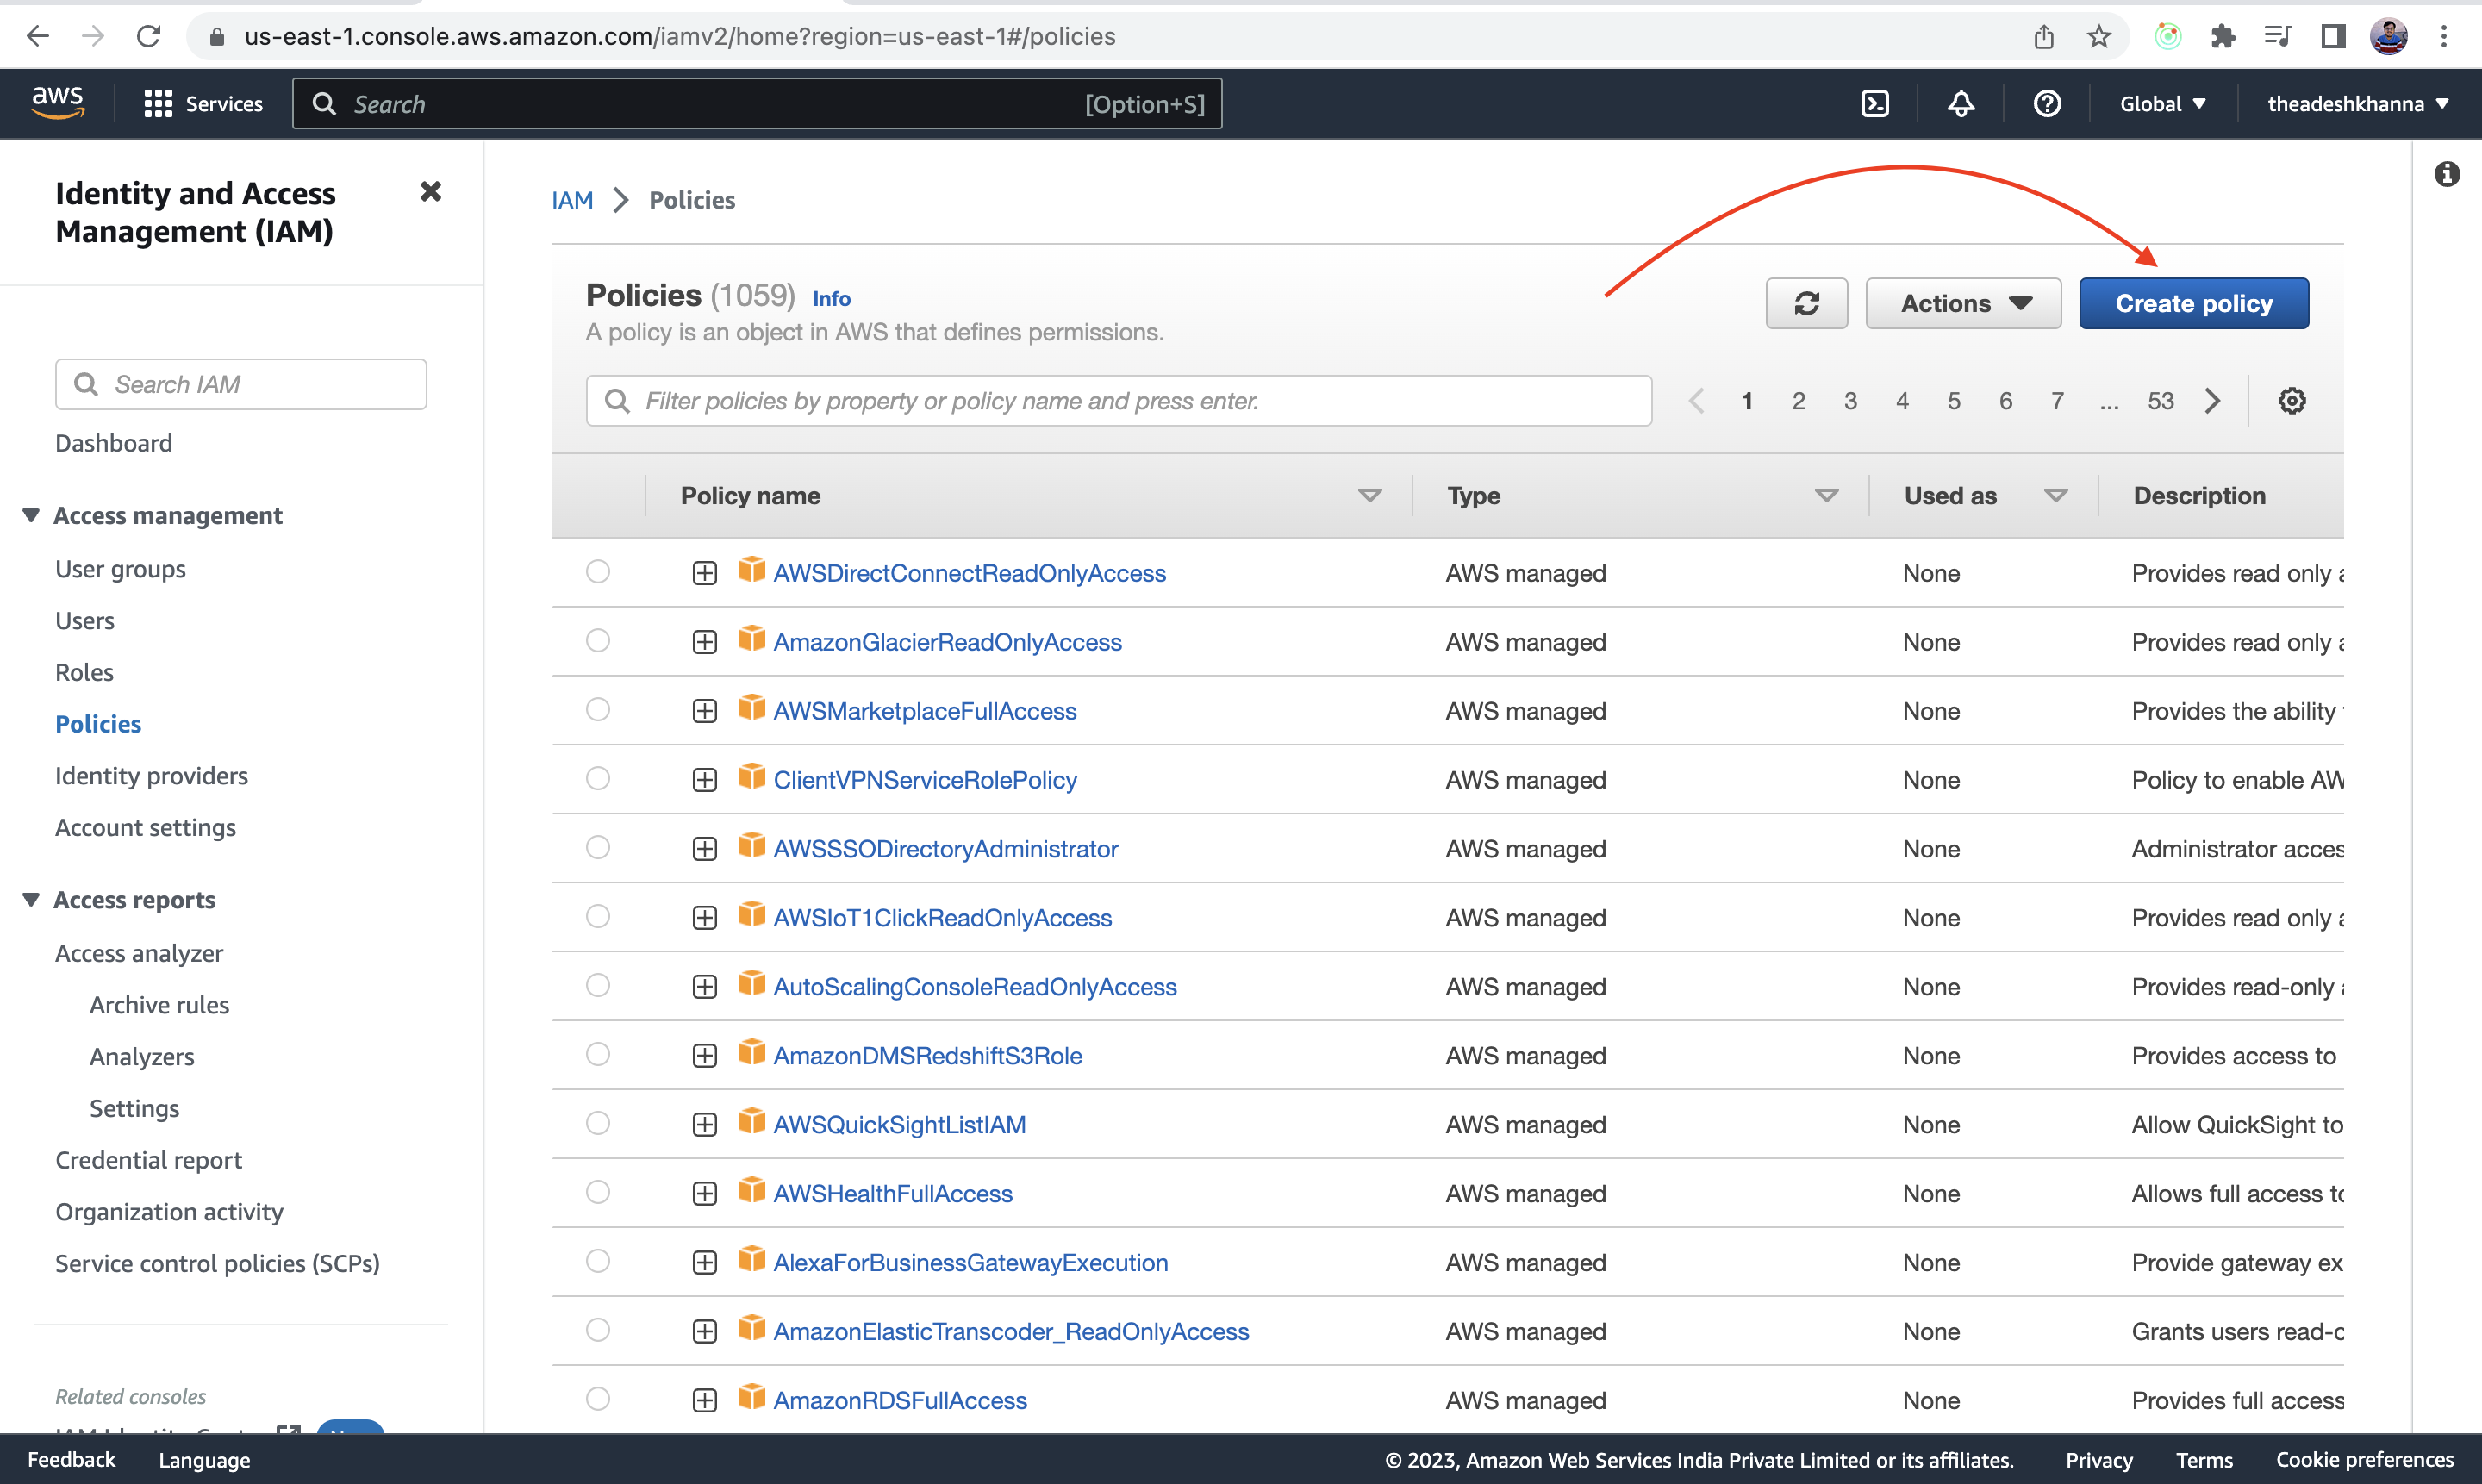
Click on Create Policy as we have to create a new policy
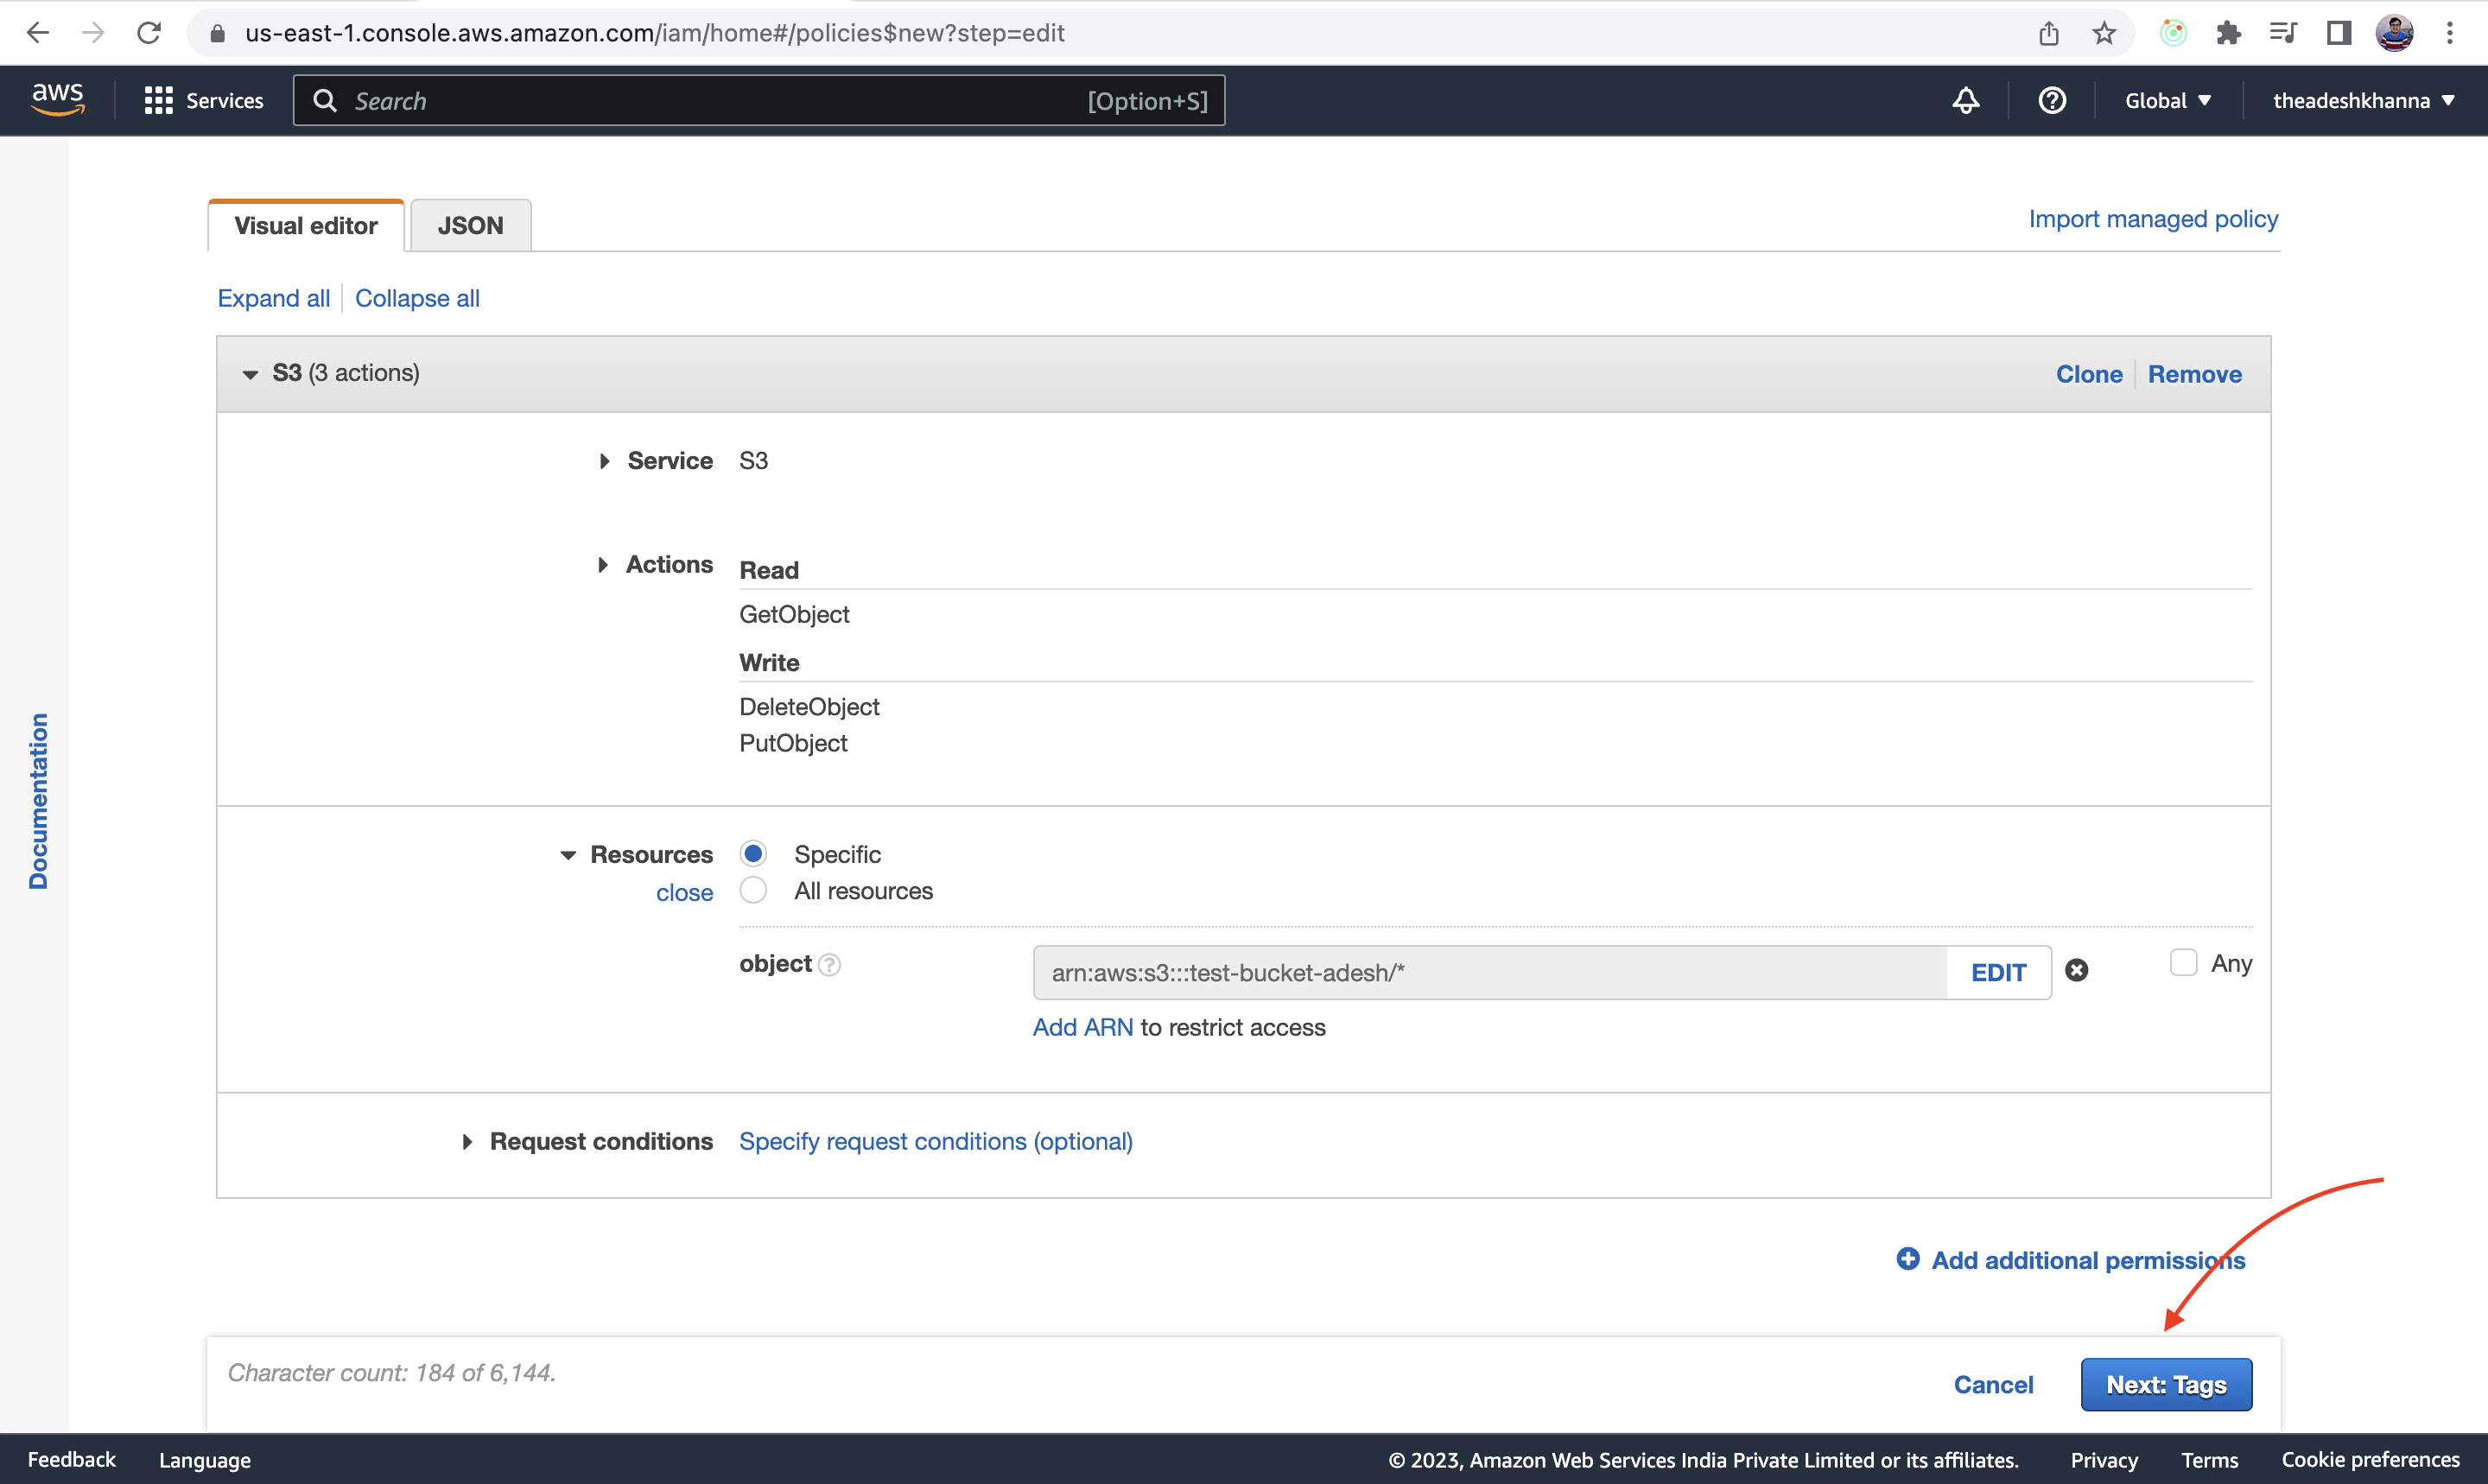
Now,
Select S3 as the service, because we have to create the policy for that only
In the Actions dropdown, select all those actions that you want to do, for now: just select getObject (to read/download), DeleteObject(to delete) and putObject(to upload).
Now, inside Resources select Specific and add ARN (Amazon Resource Name).
The purpose of adding ARN is that only those specific resources will be under that policy.

Now to add ARN, Select the name of the bucket that we have created, and inside Object Name click on any, meaning everything inside that bucket will be affected by the policy.

Click on Next
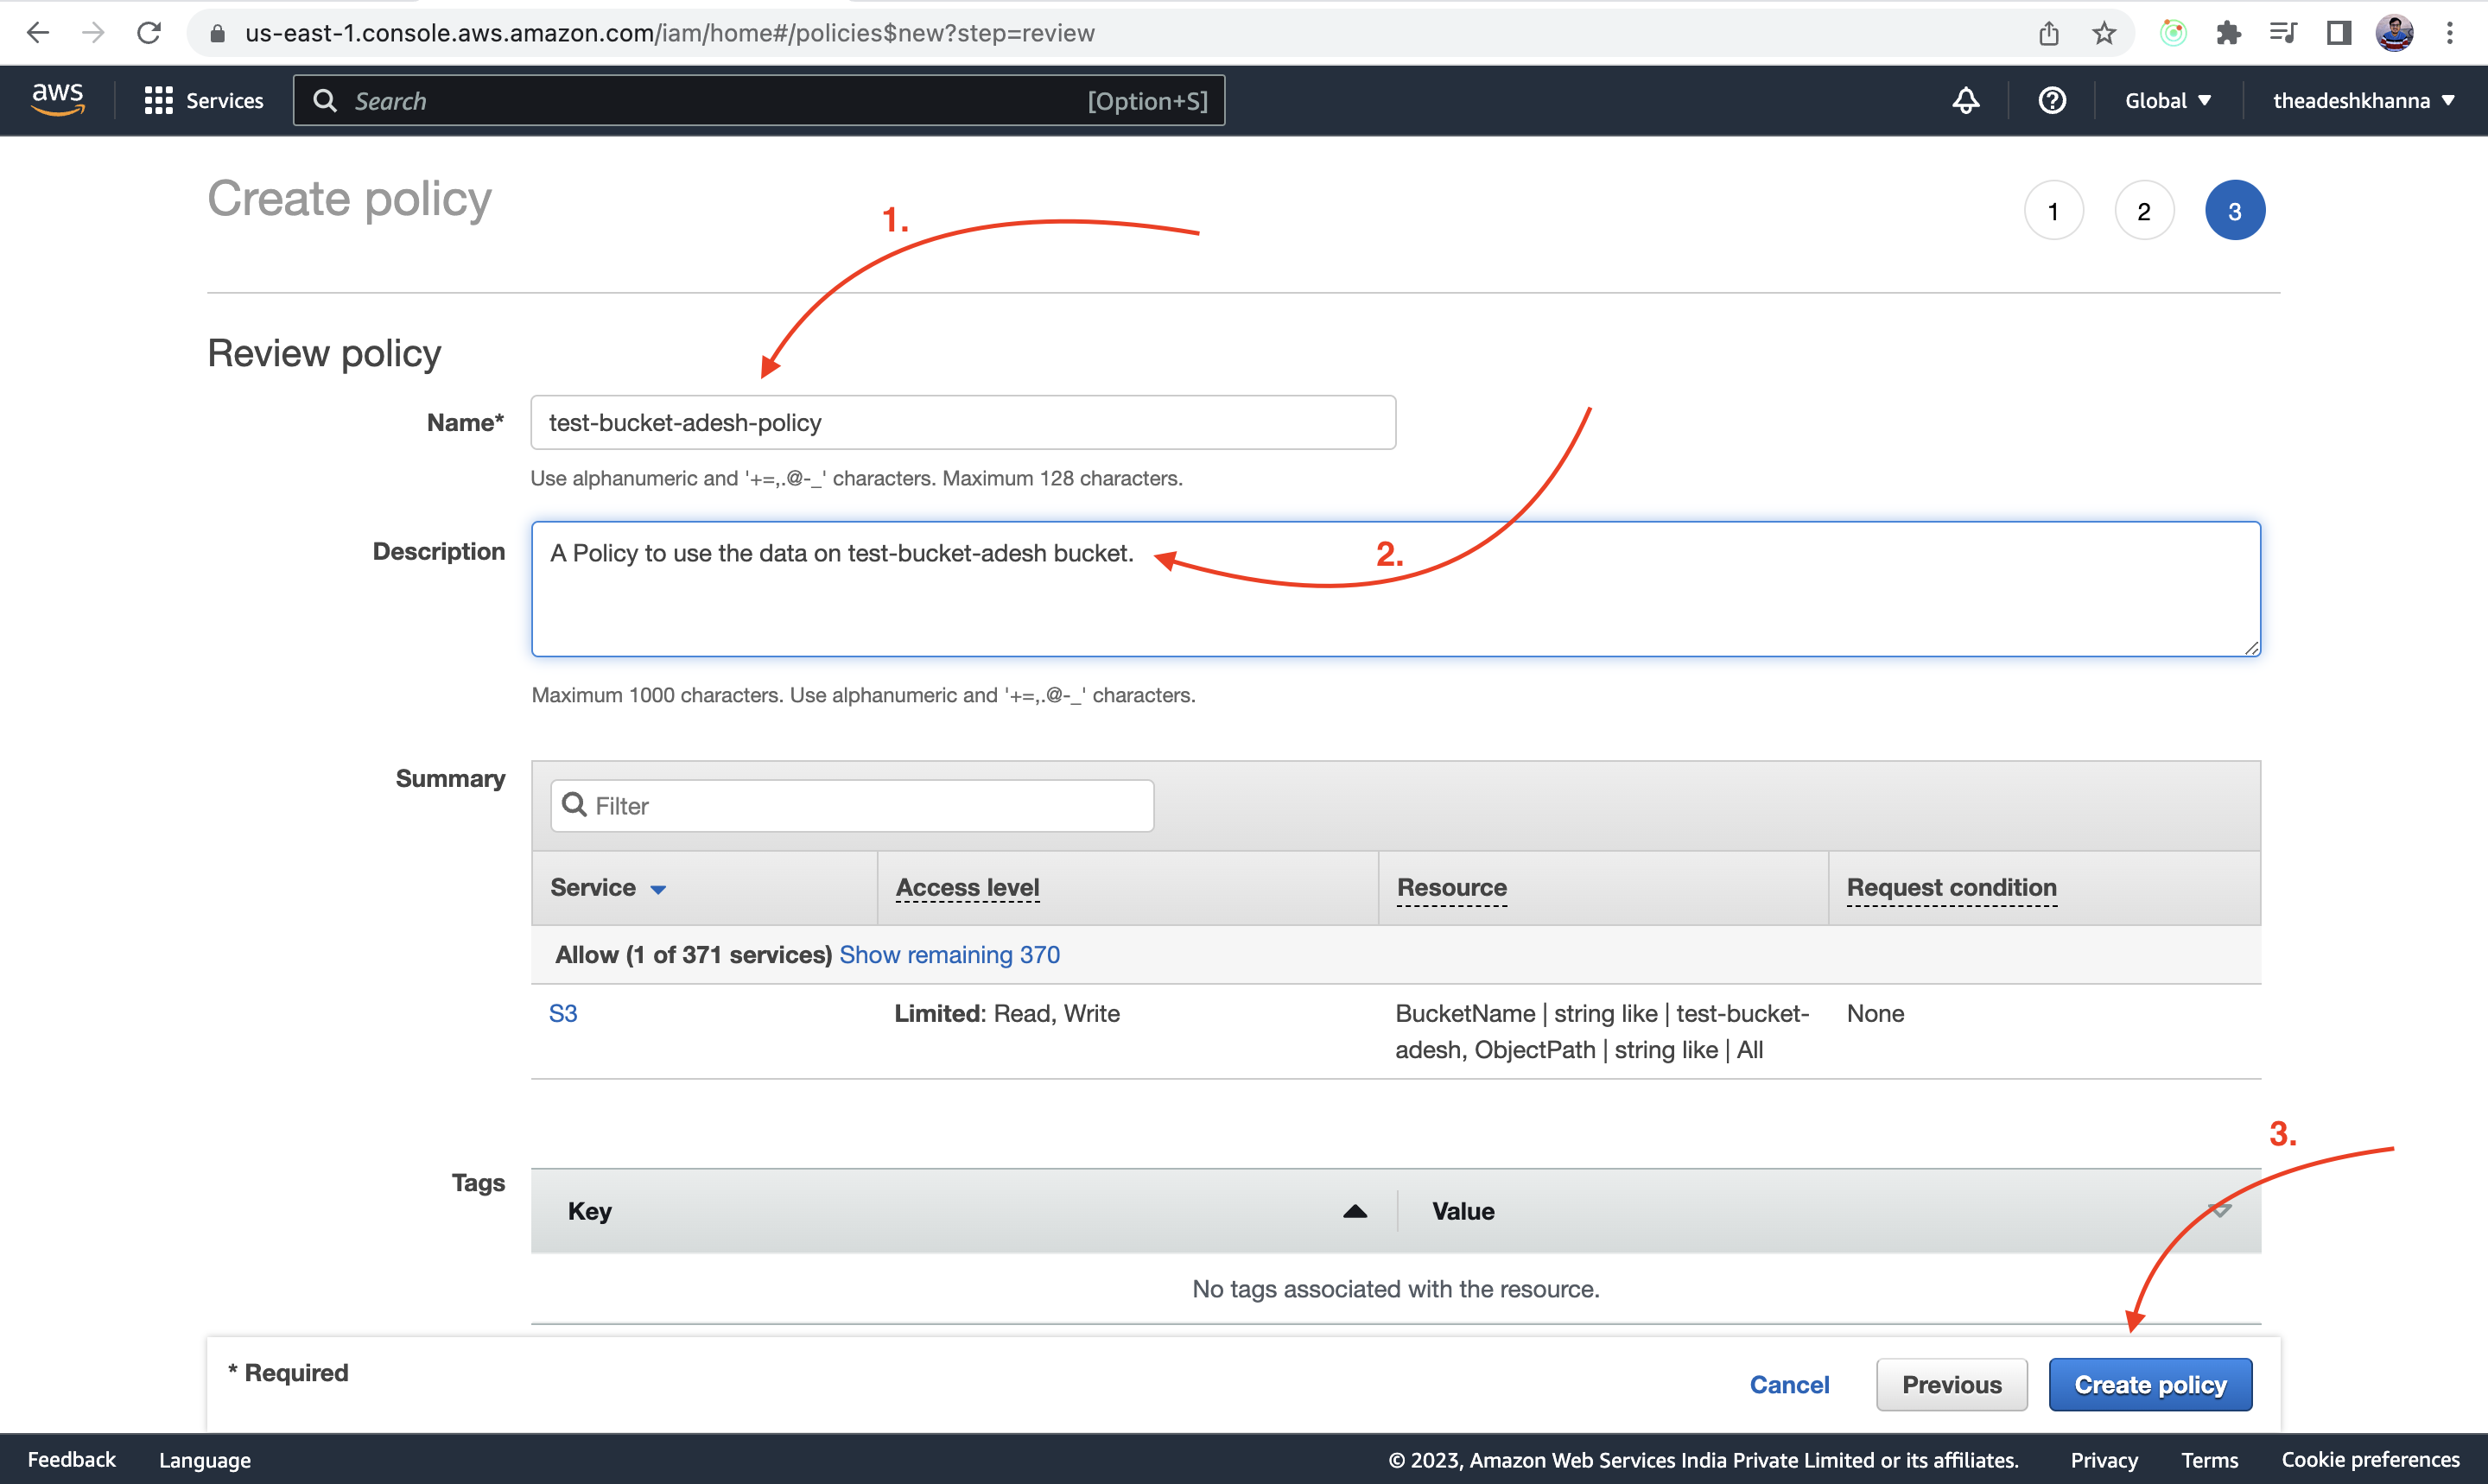
Now,
Give a name to your policy, the best practice is to append
-policy, at the last of your bucket name.Describe your policy.
Click on Create Policy
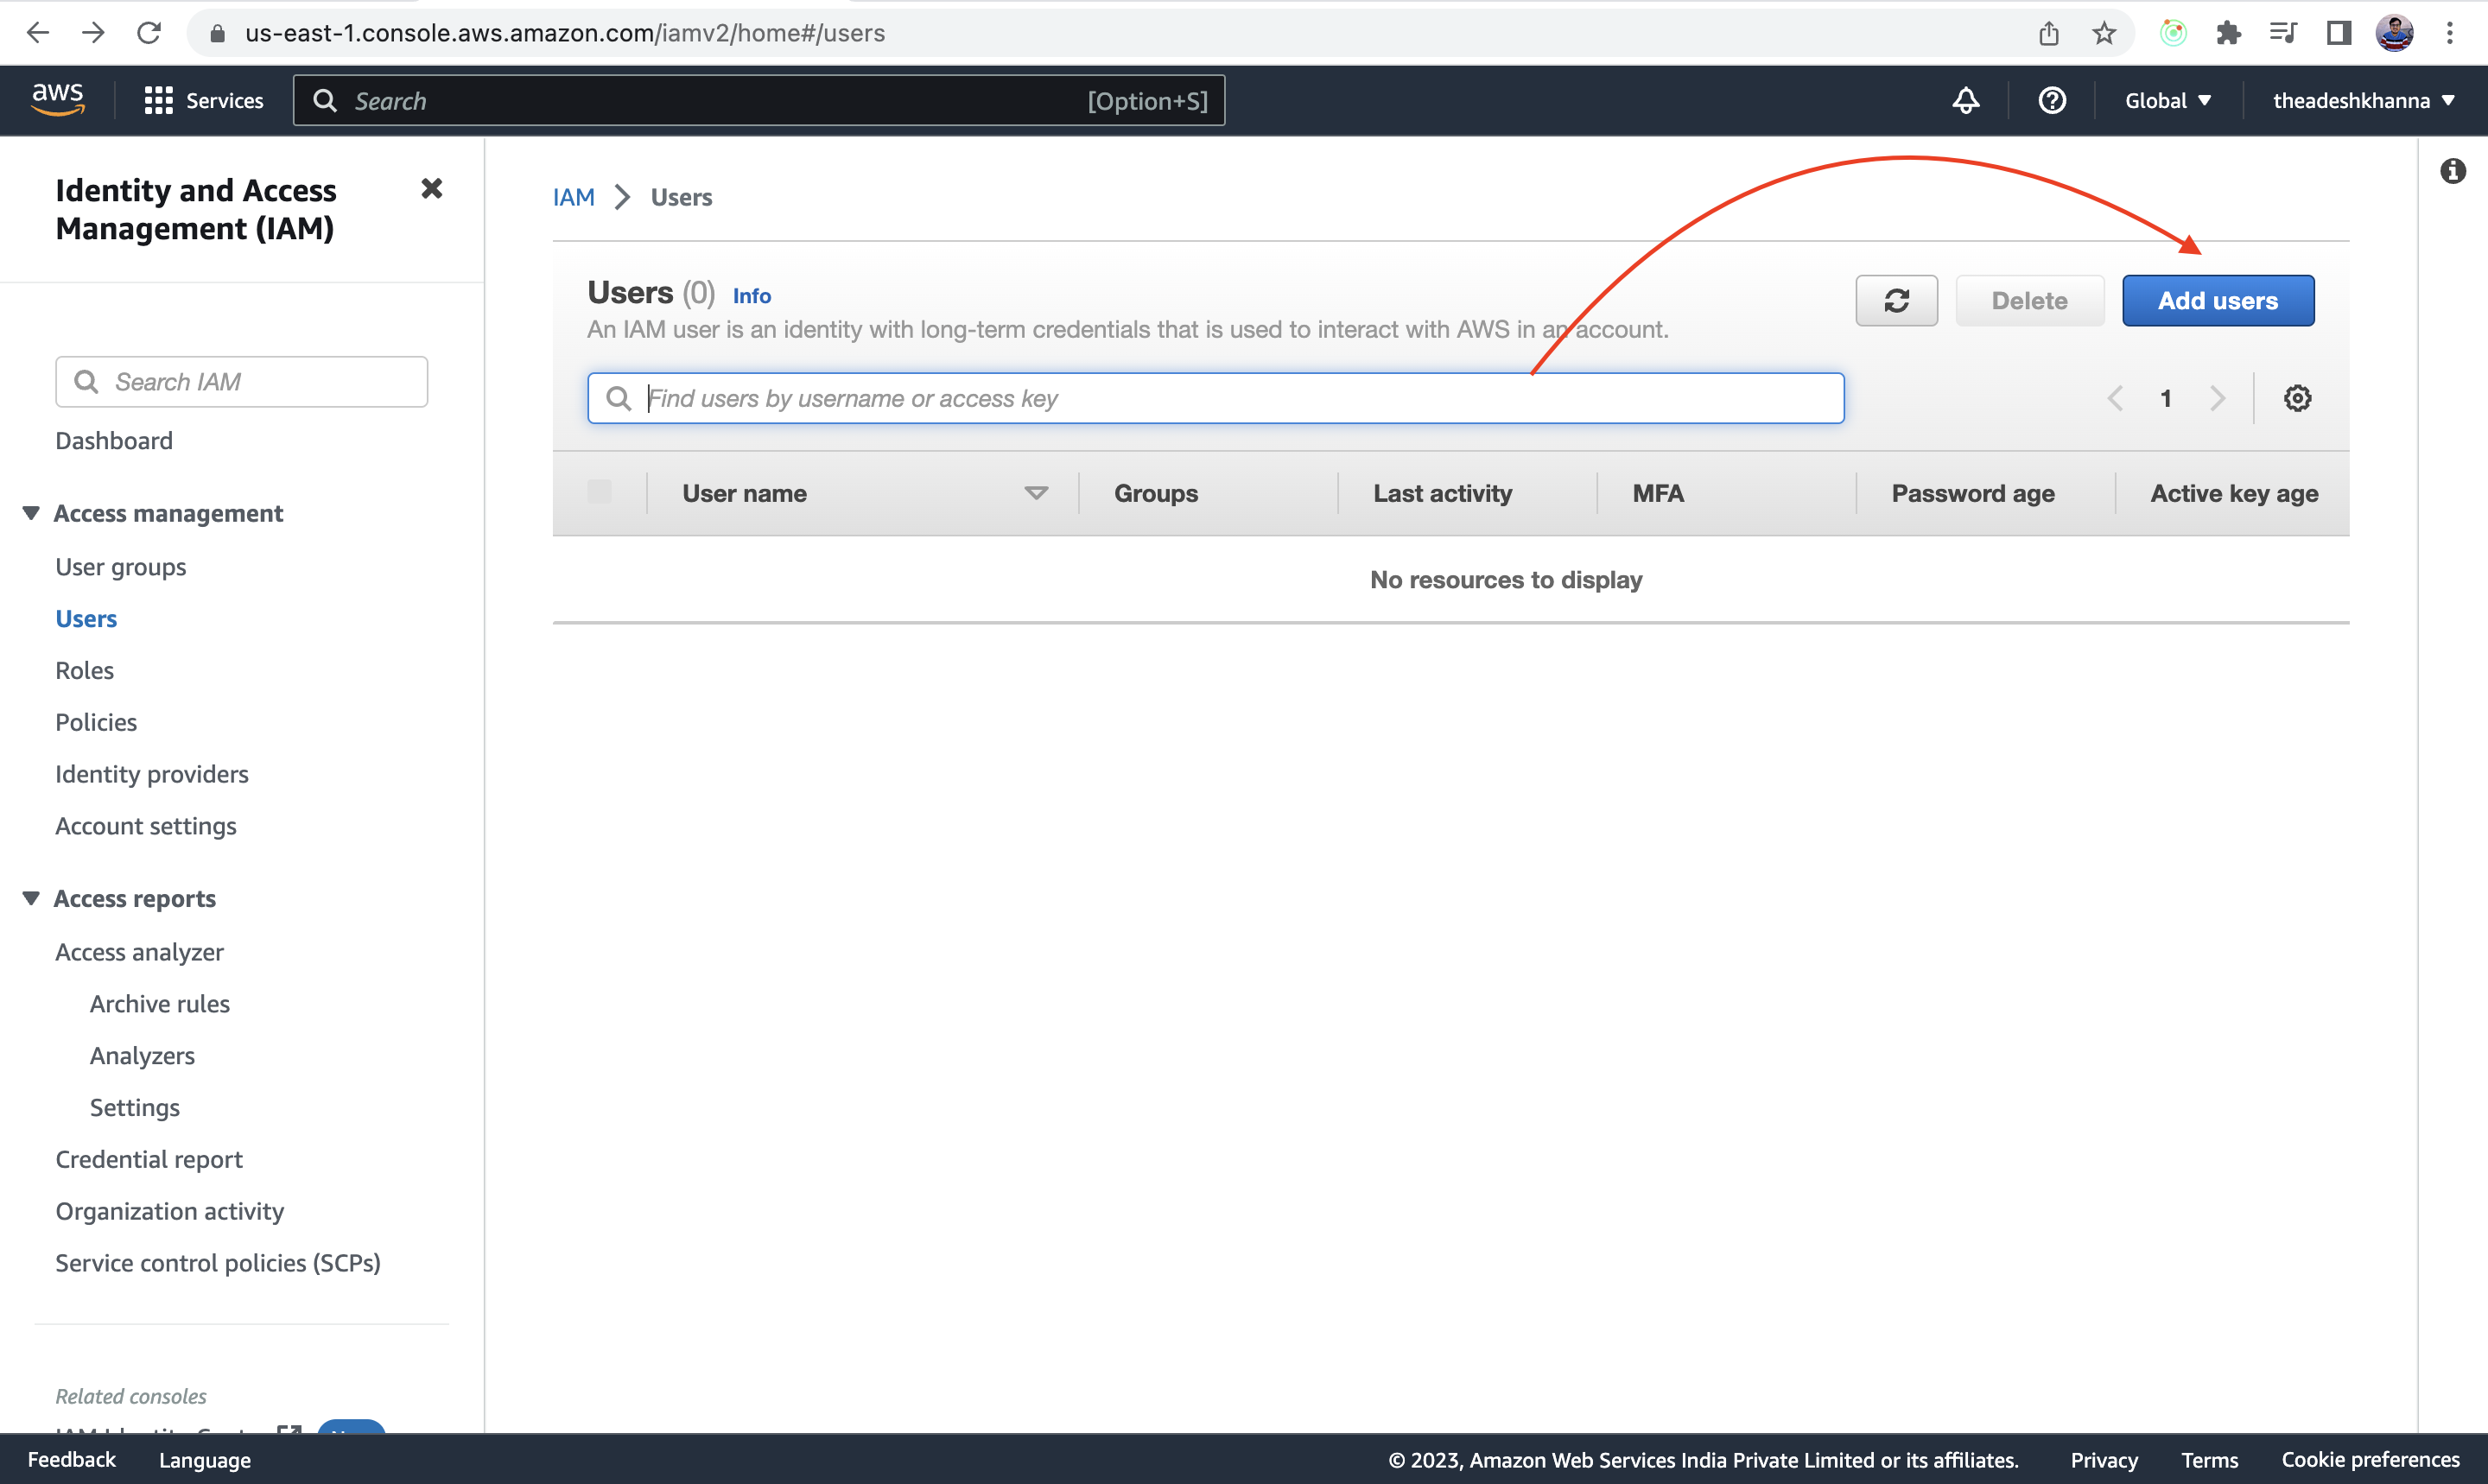
STEP 2.3: Creating an IAM user
Now to use the policy that we have created, we have to create an IAM user, so head over to the Users section.
Click on Add users
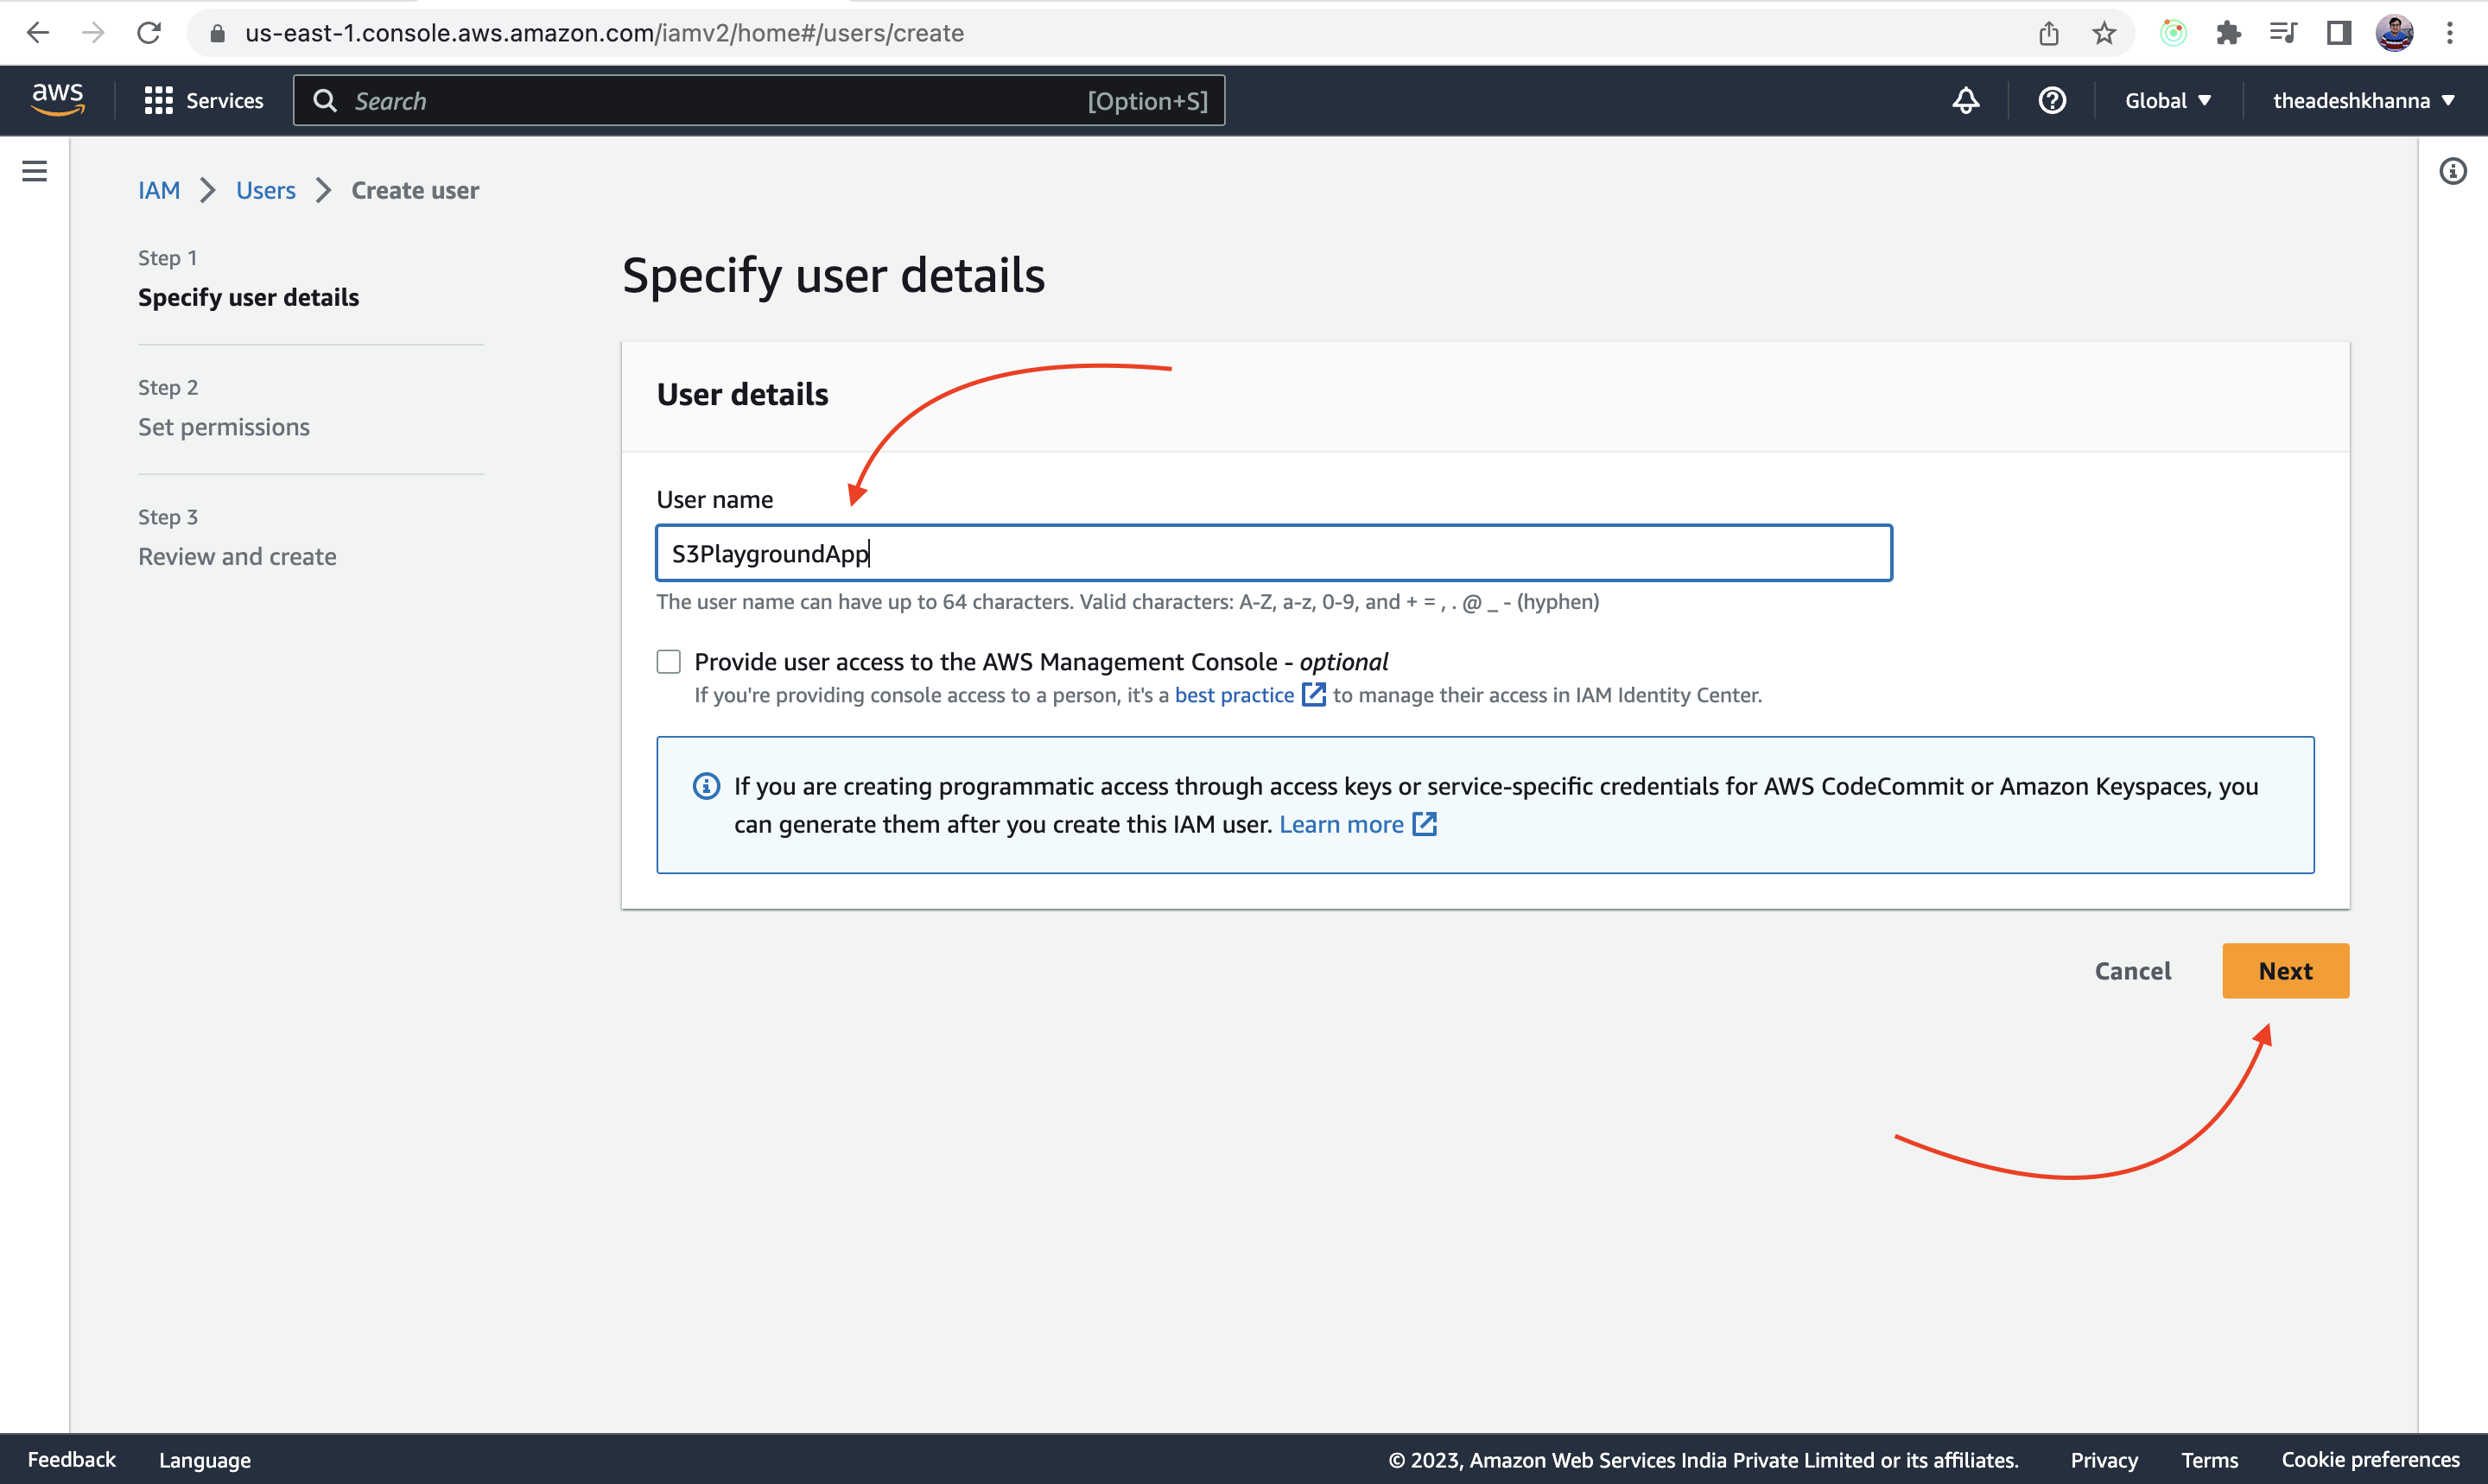
Write the name of the User and click next.
Attach the policy that we have just created to the user that we are creating.
Click on Attach policies directly as Permission Options
Search for the policy and attach it with the user that we are creating.
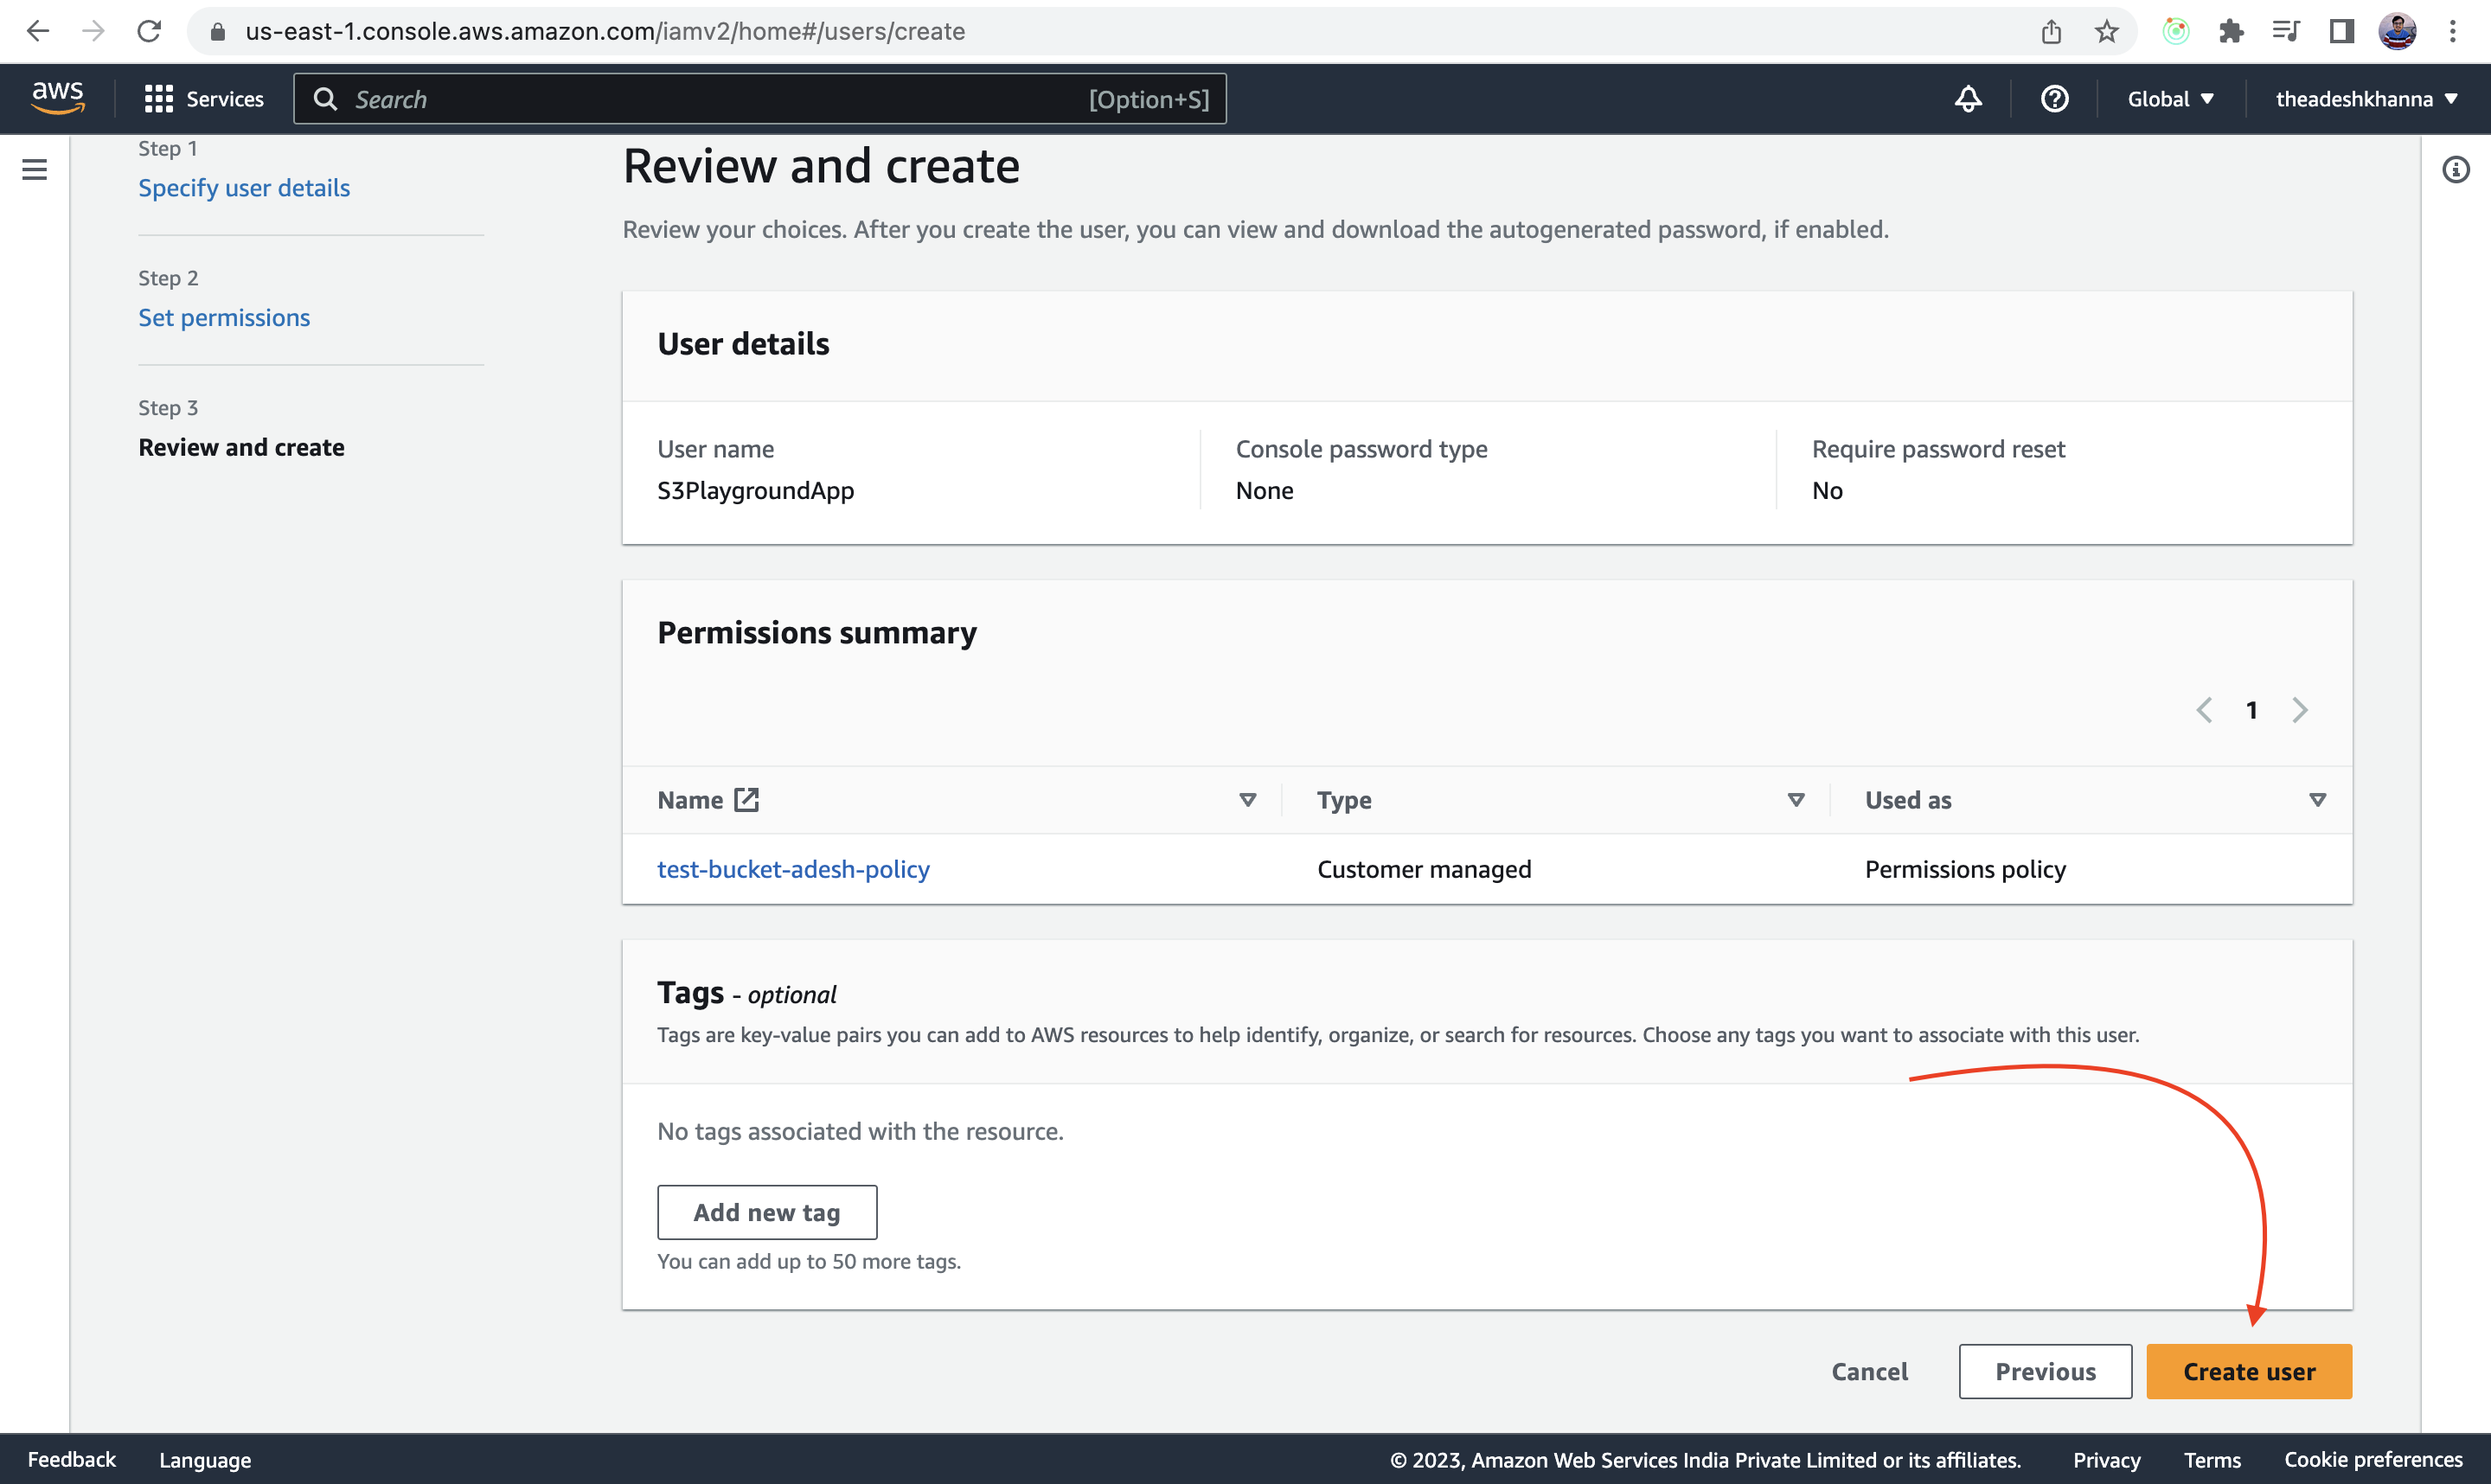
Click on next.

Click on Create User.
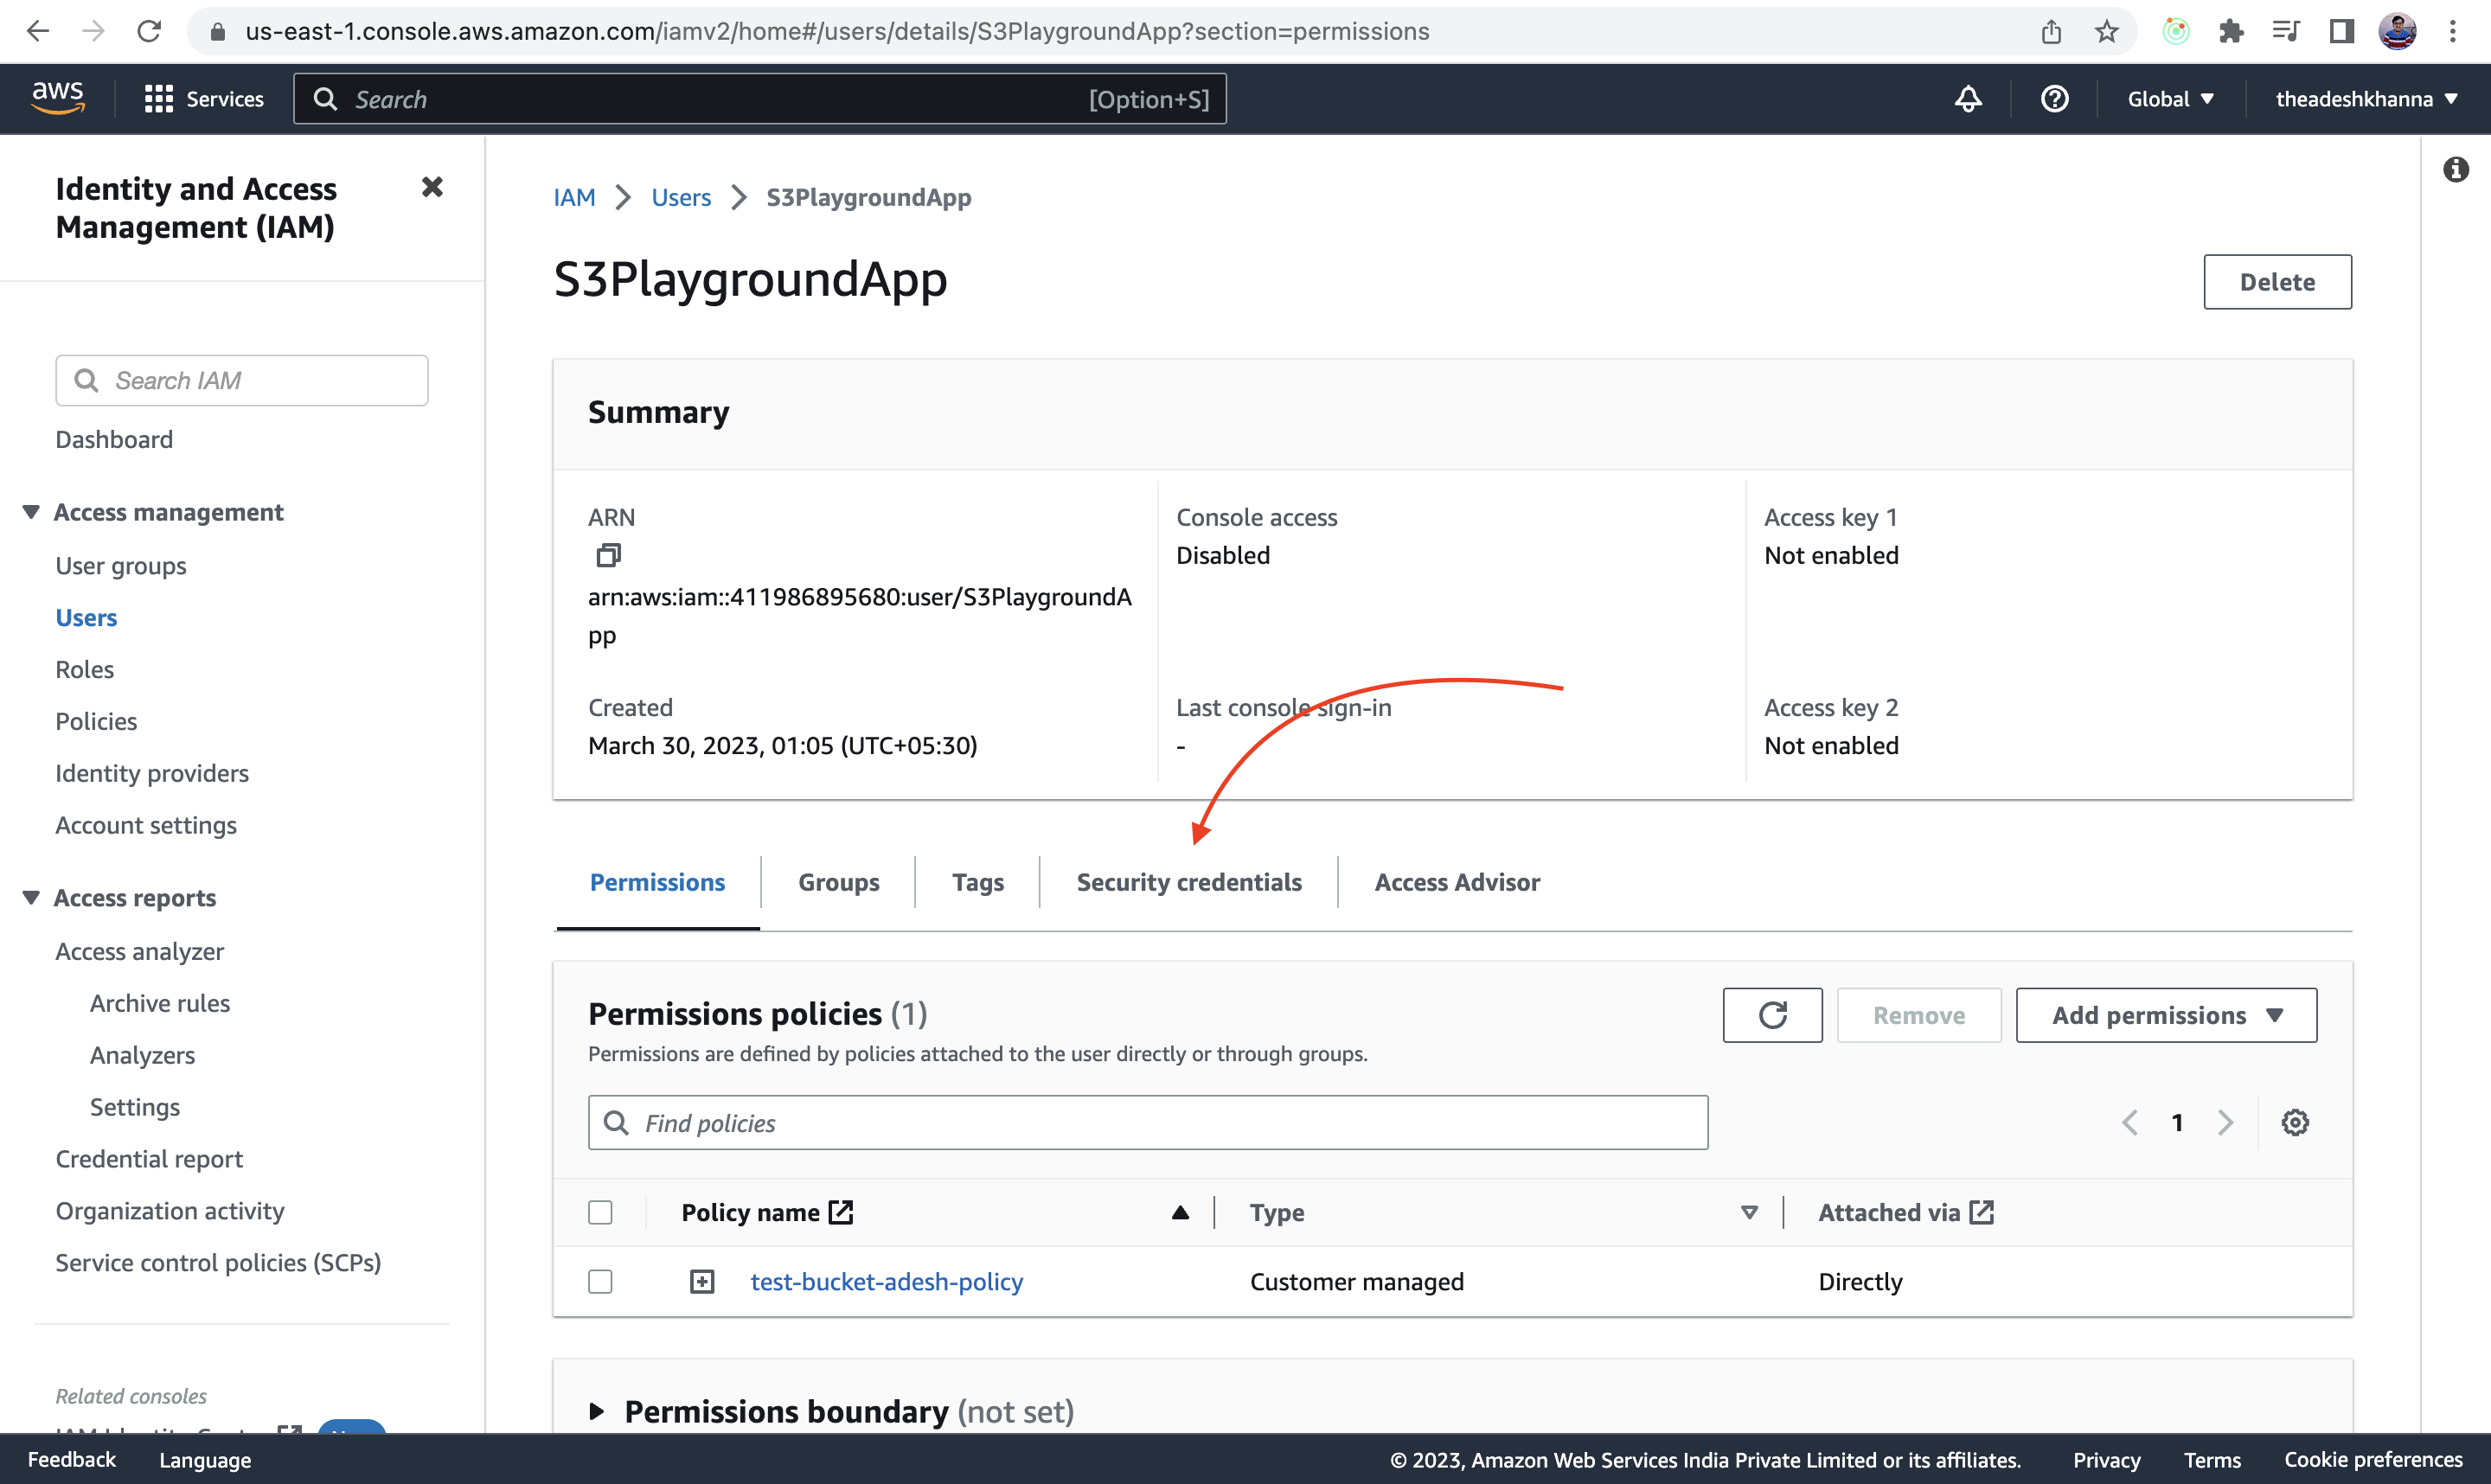
STEP 2.4: Generating the credentials
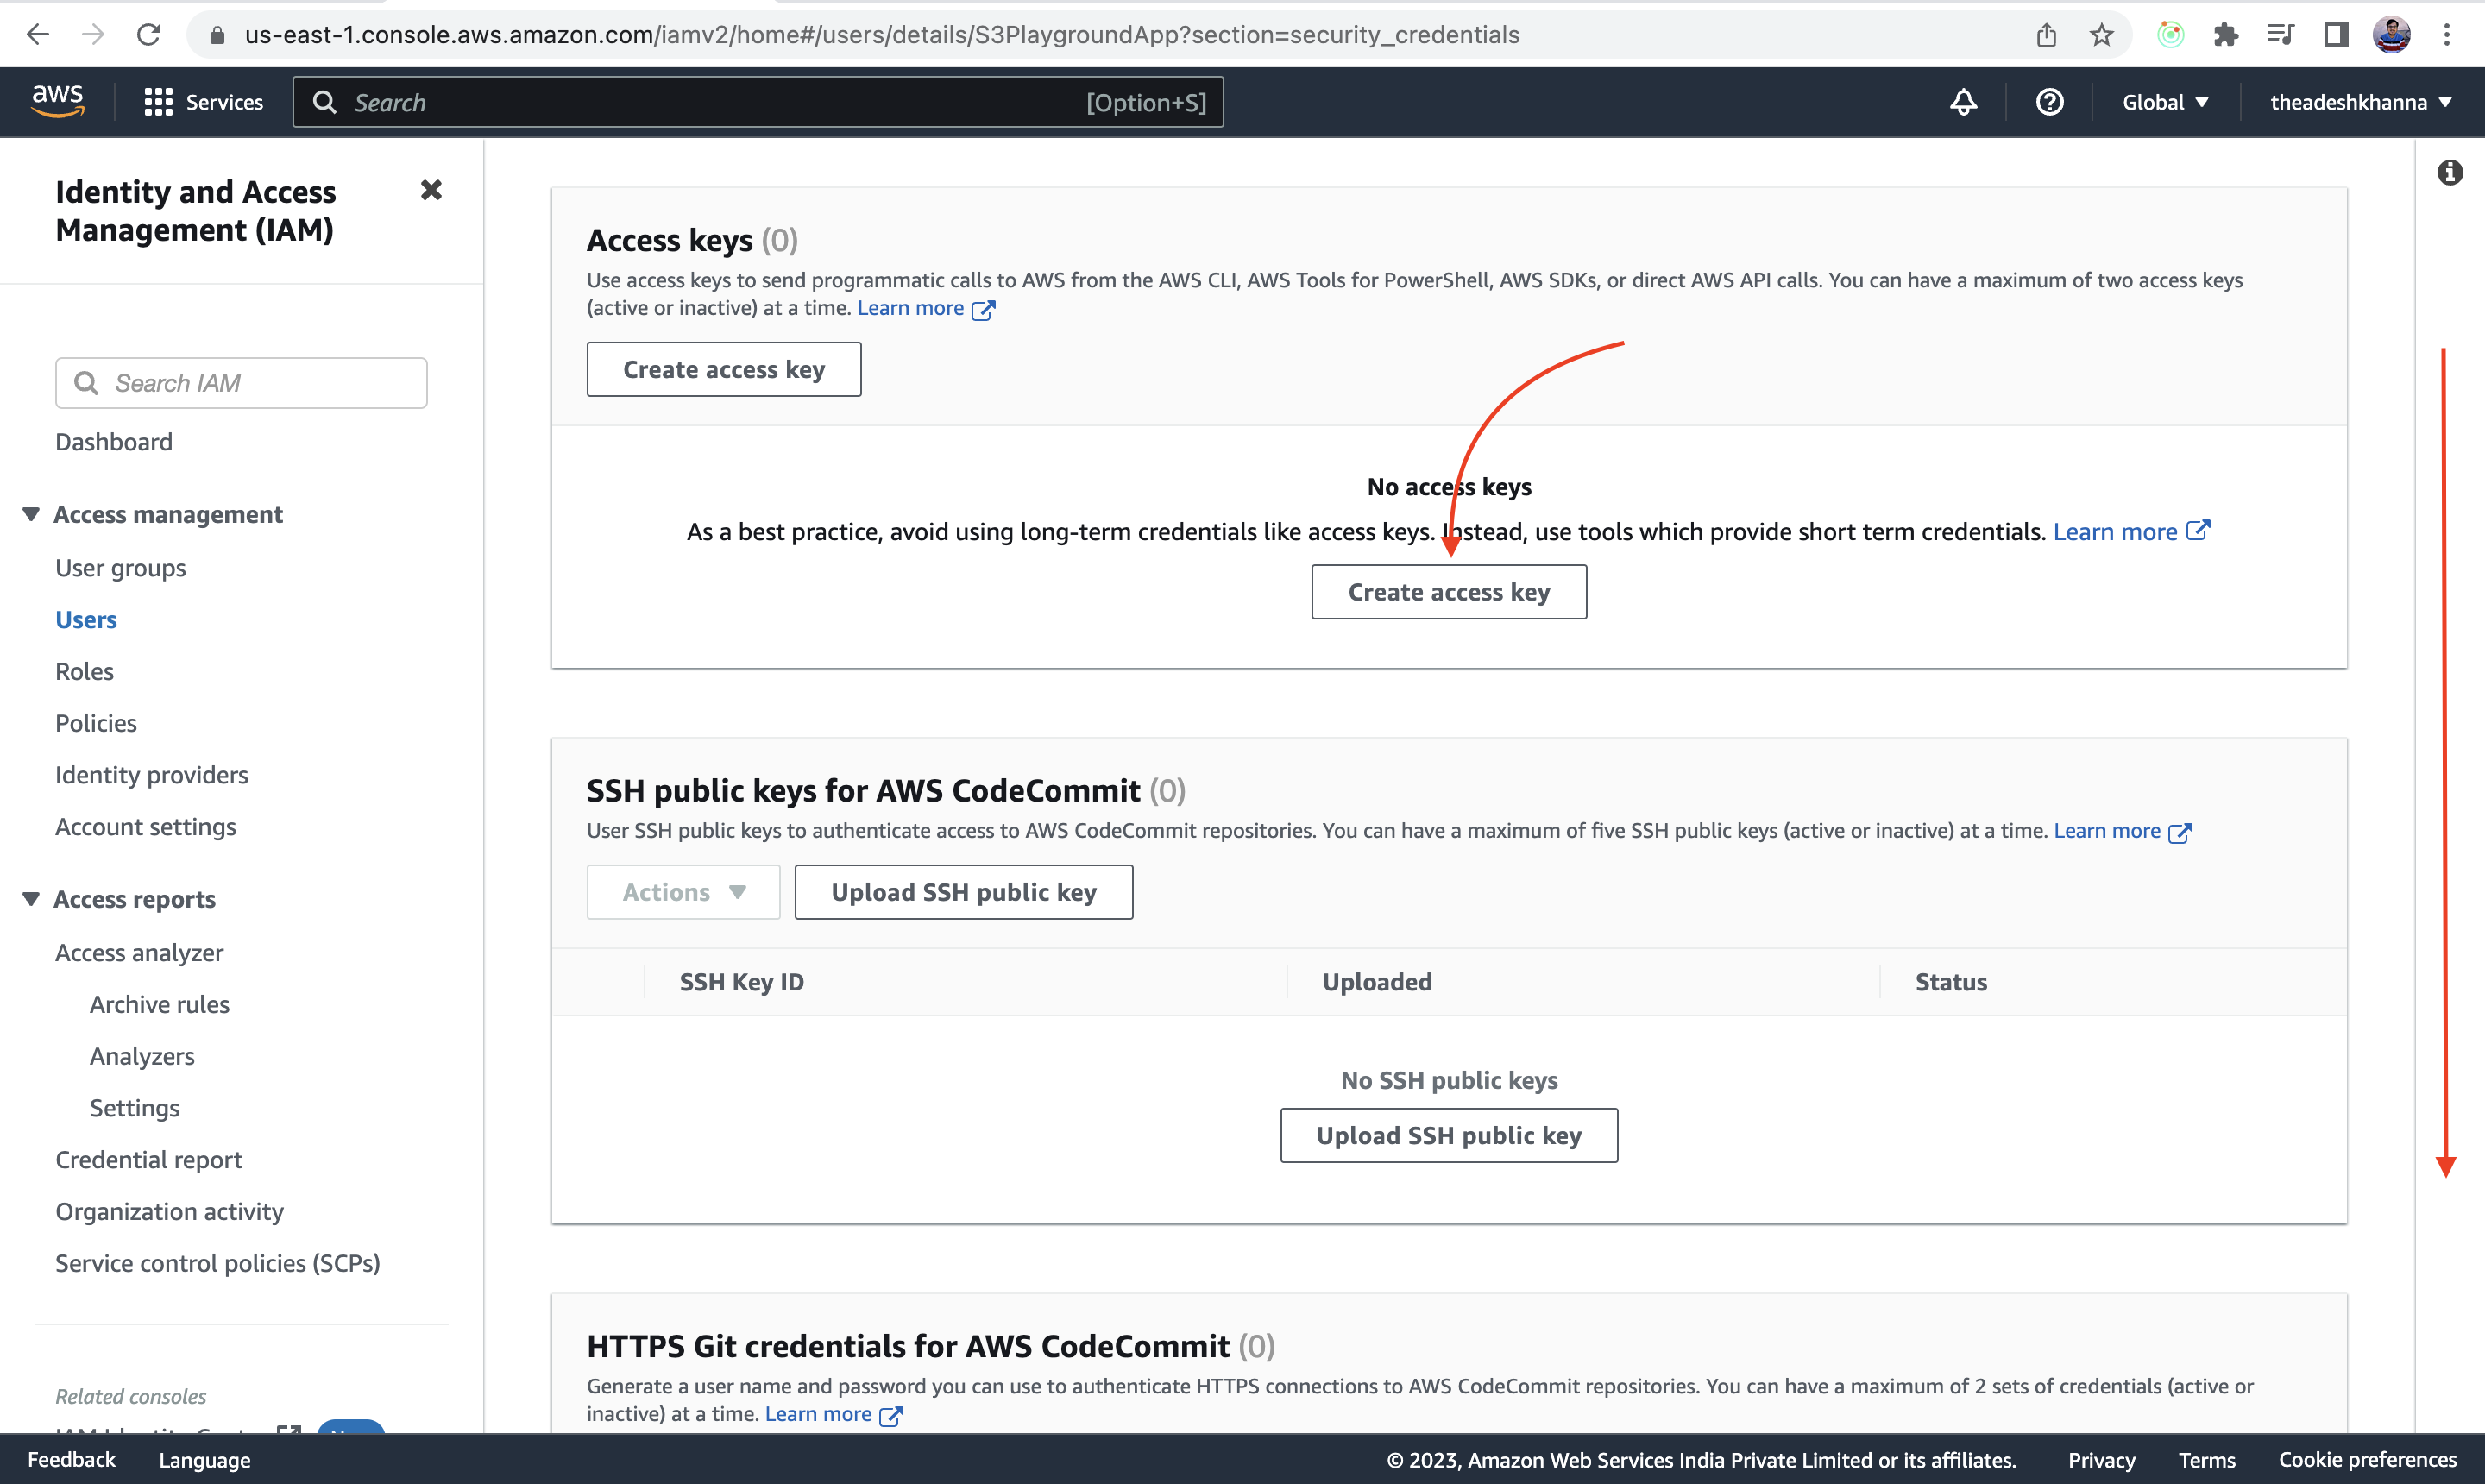
Click on the Security Credentials tab of created User
Click on create access key
Select Other for now and click on next
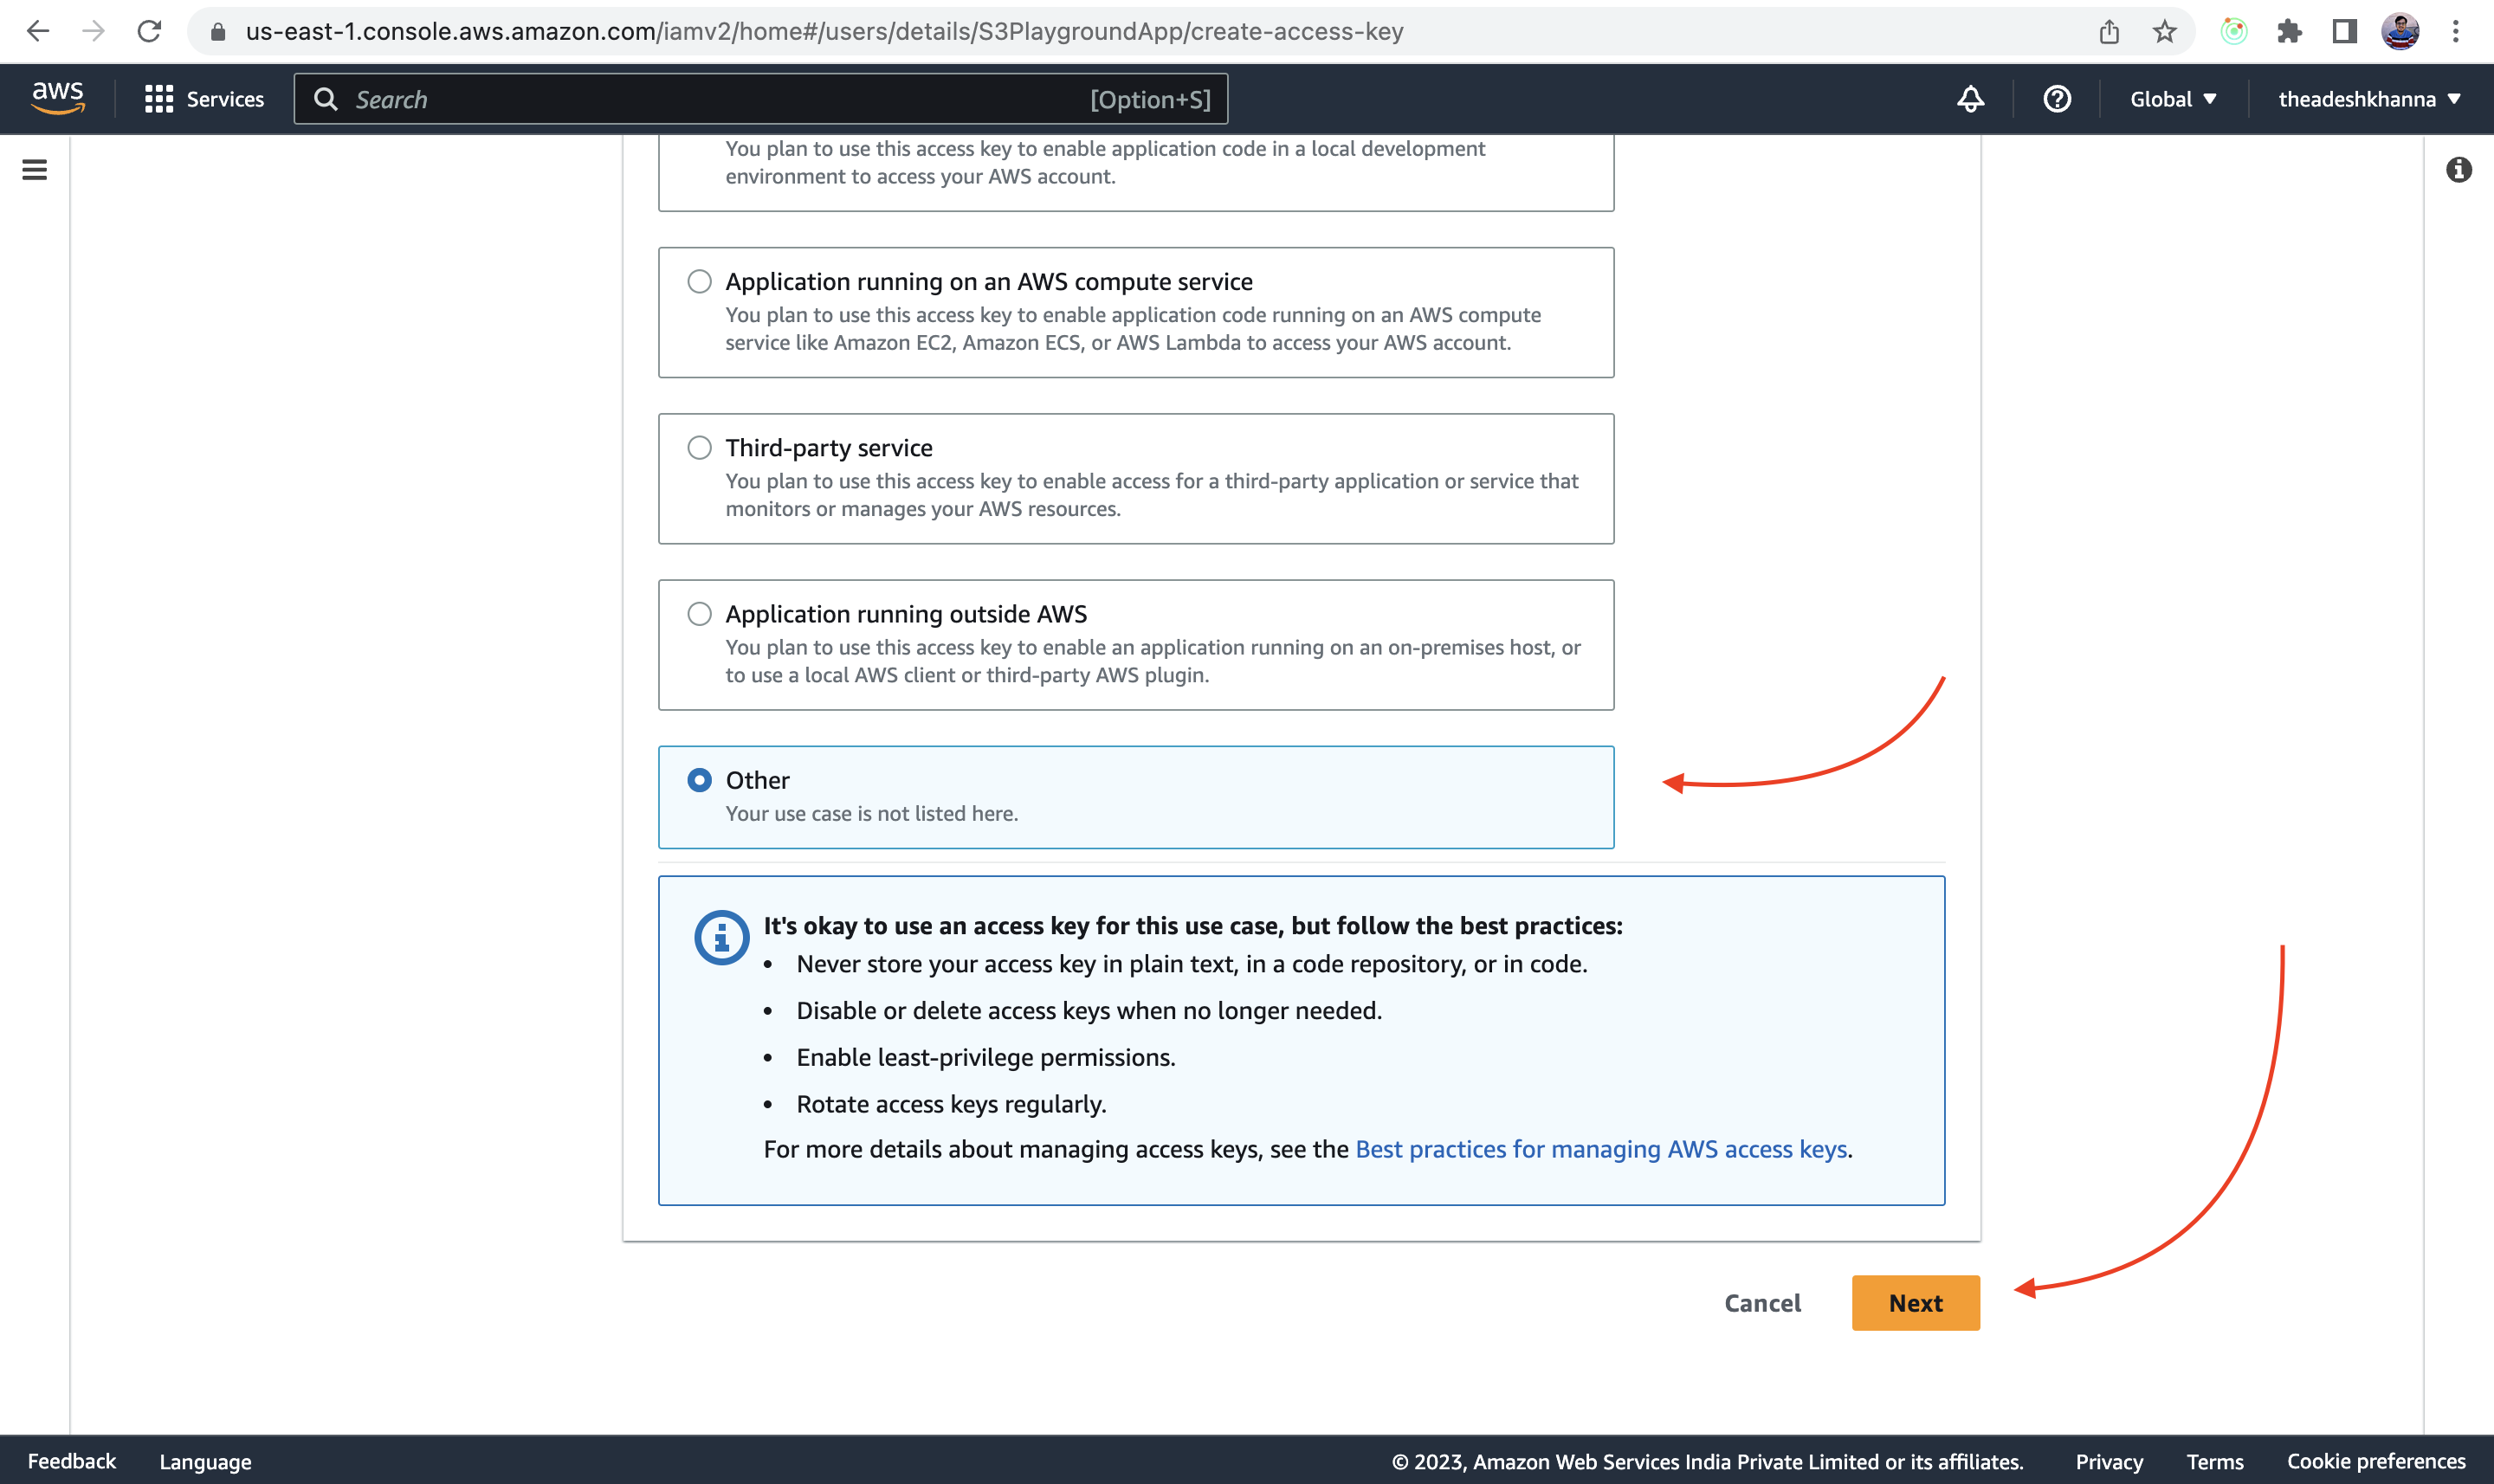
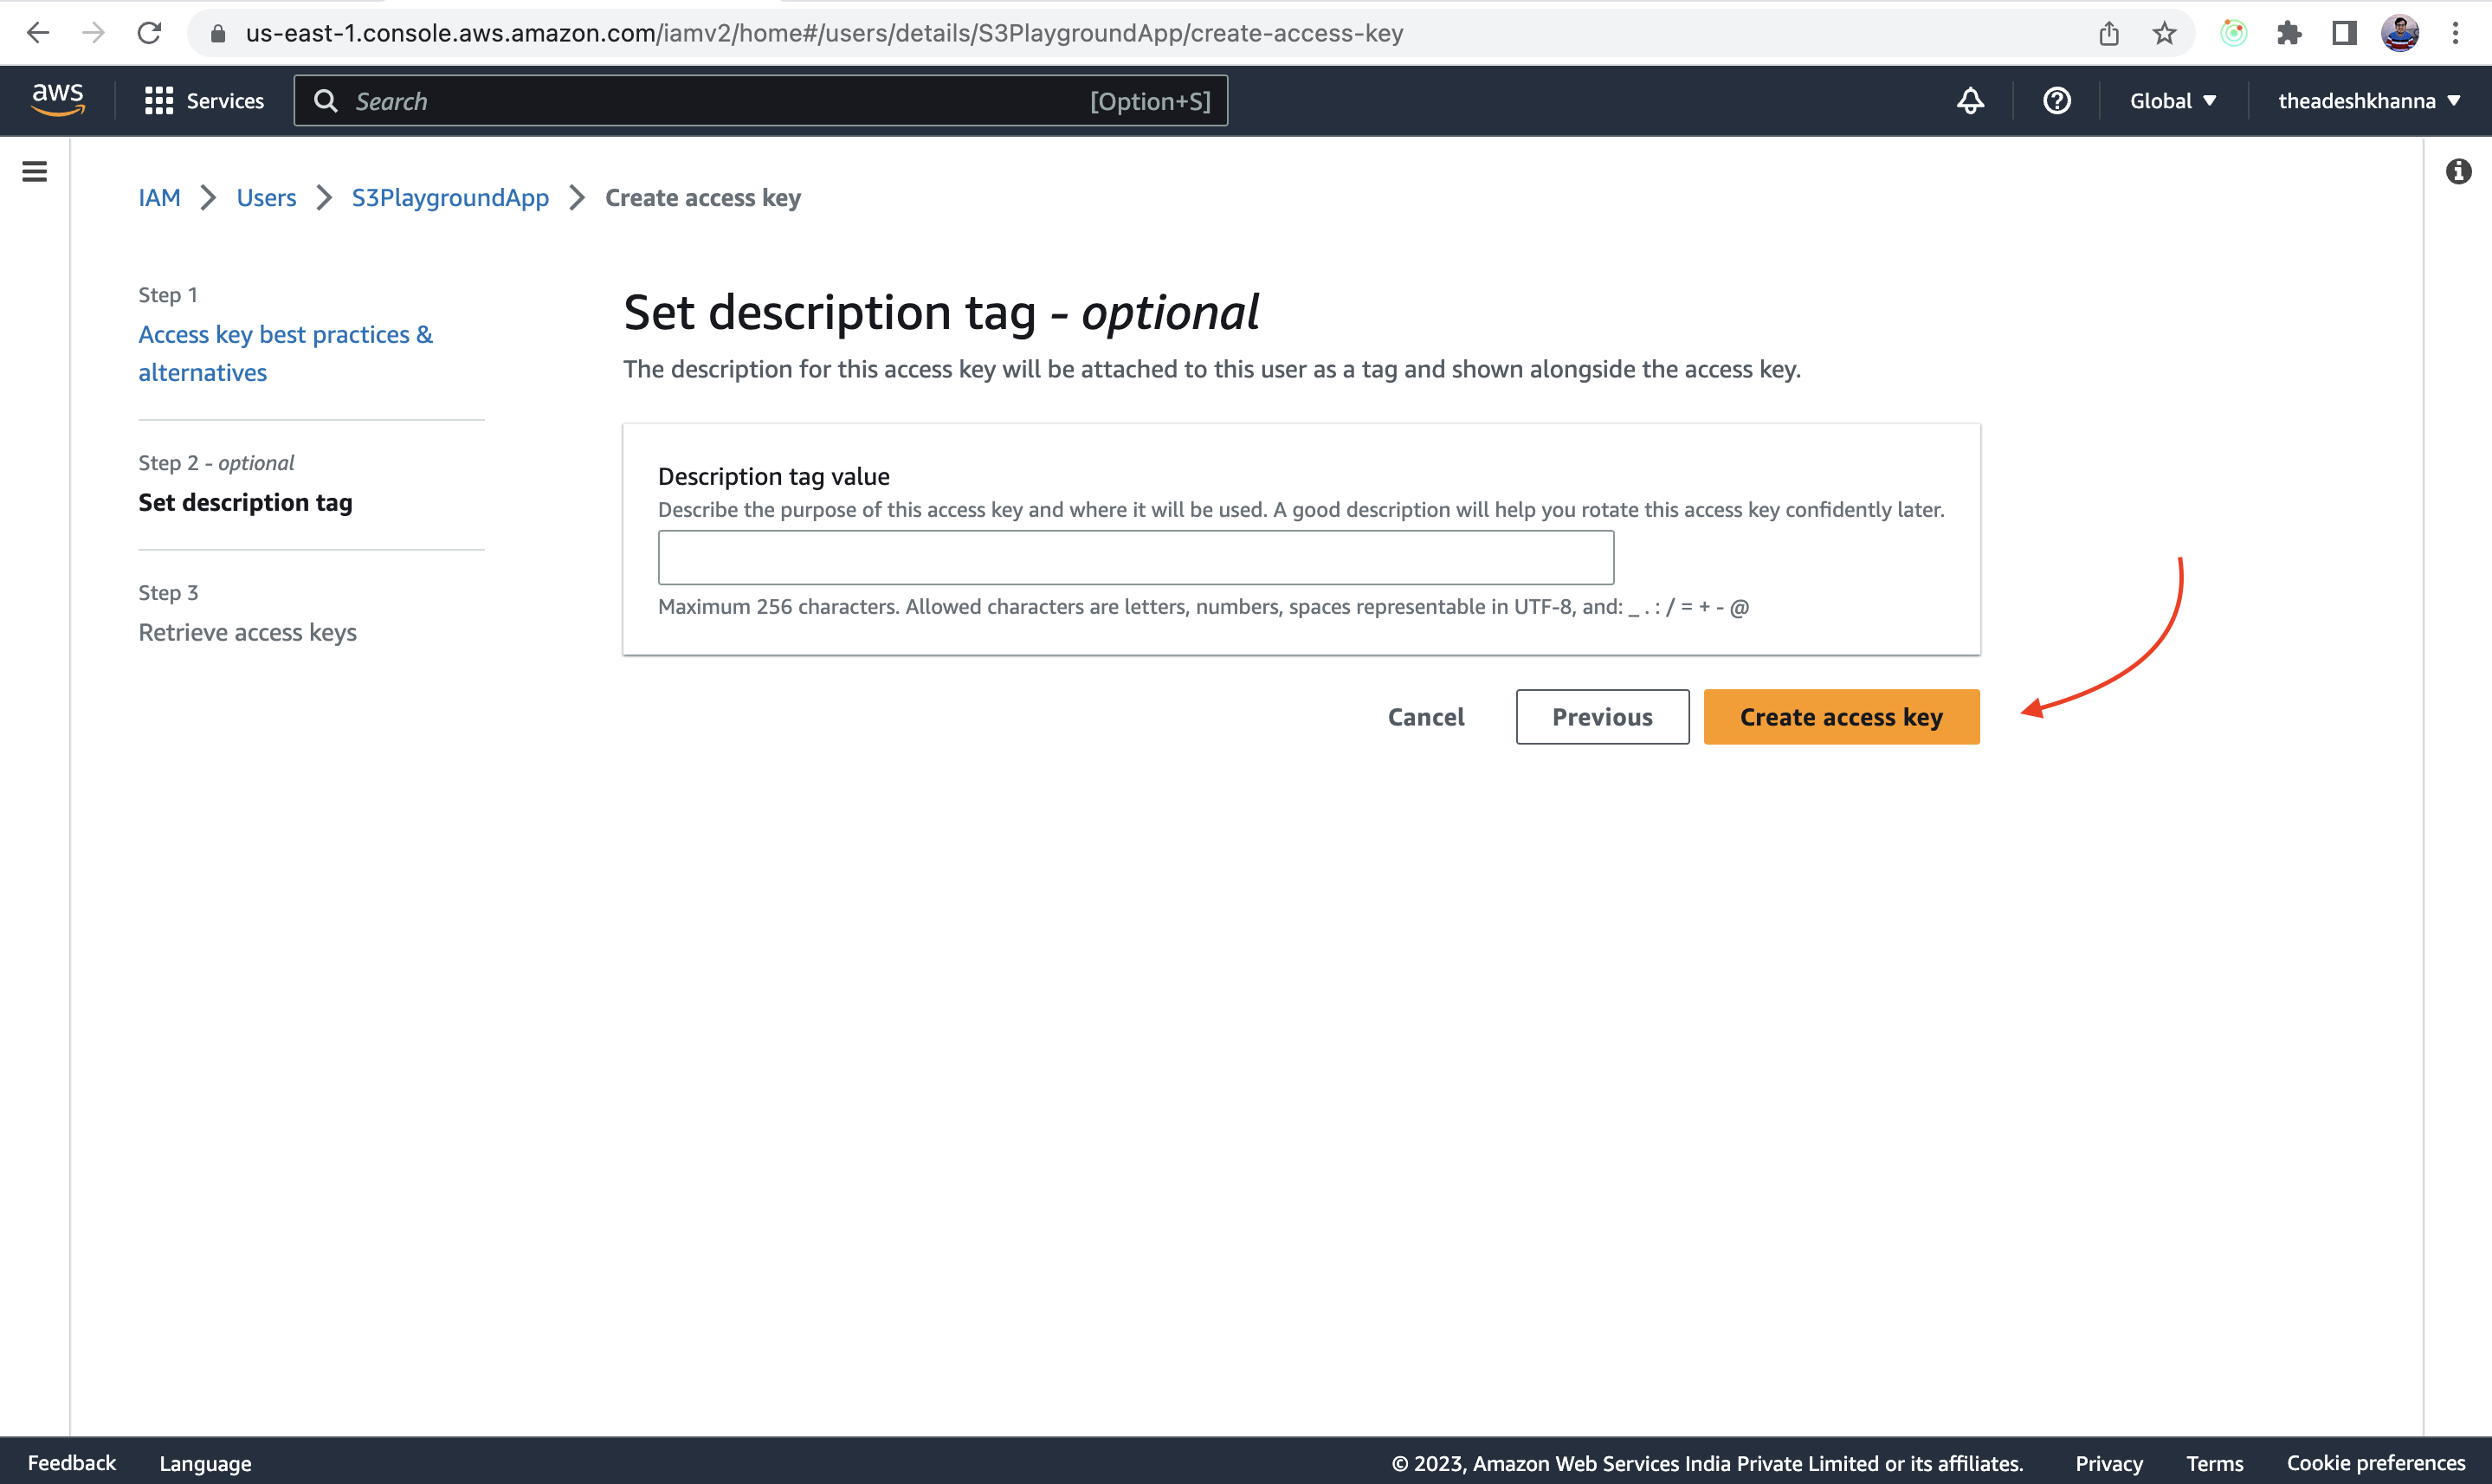
Add a description tag(if needed), and click on Create Access Key
Now, the Access key and Secret access key will be generated, copy them because these will be used by us to authenticate with our S3 bucket to push data into it.
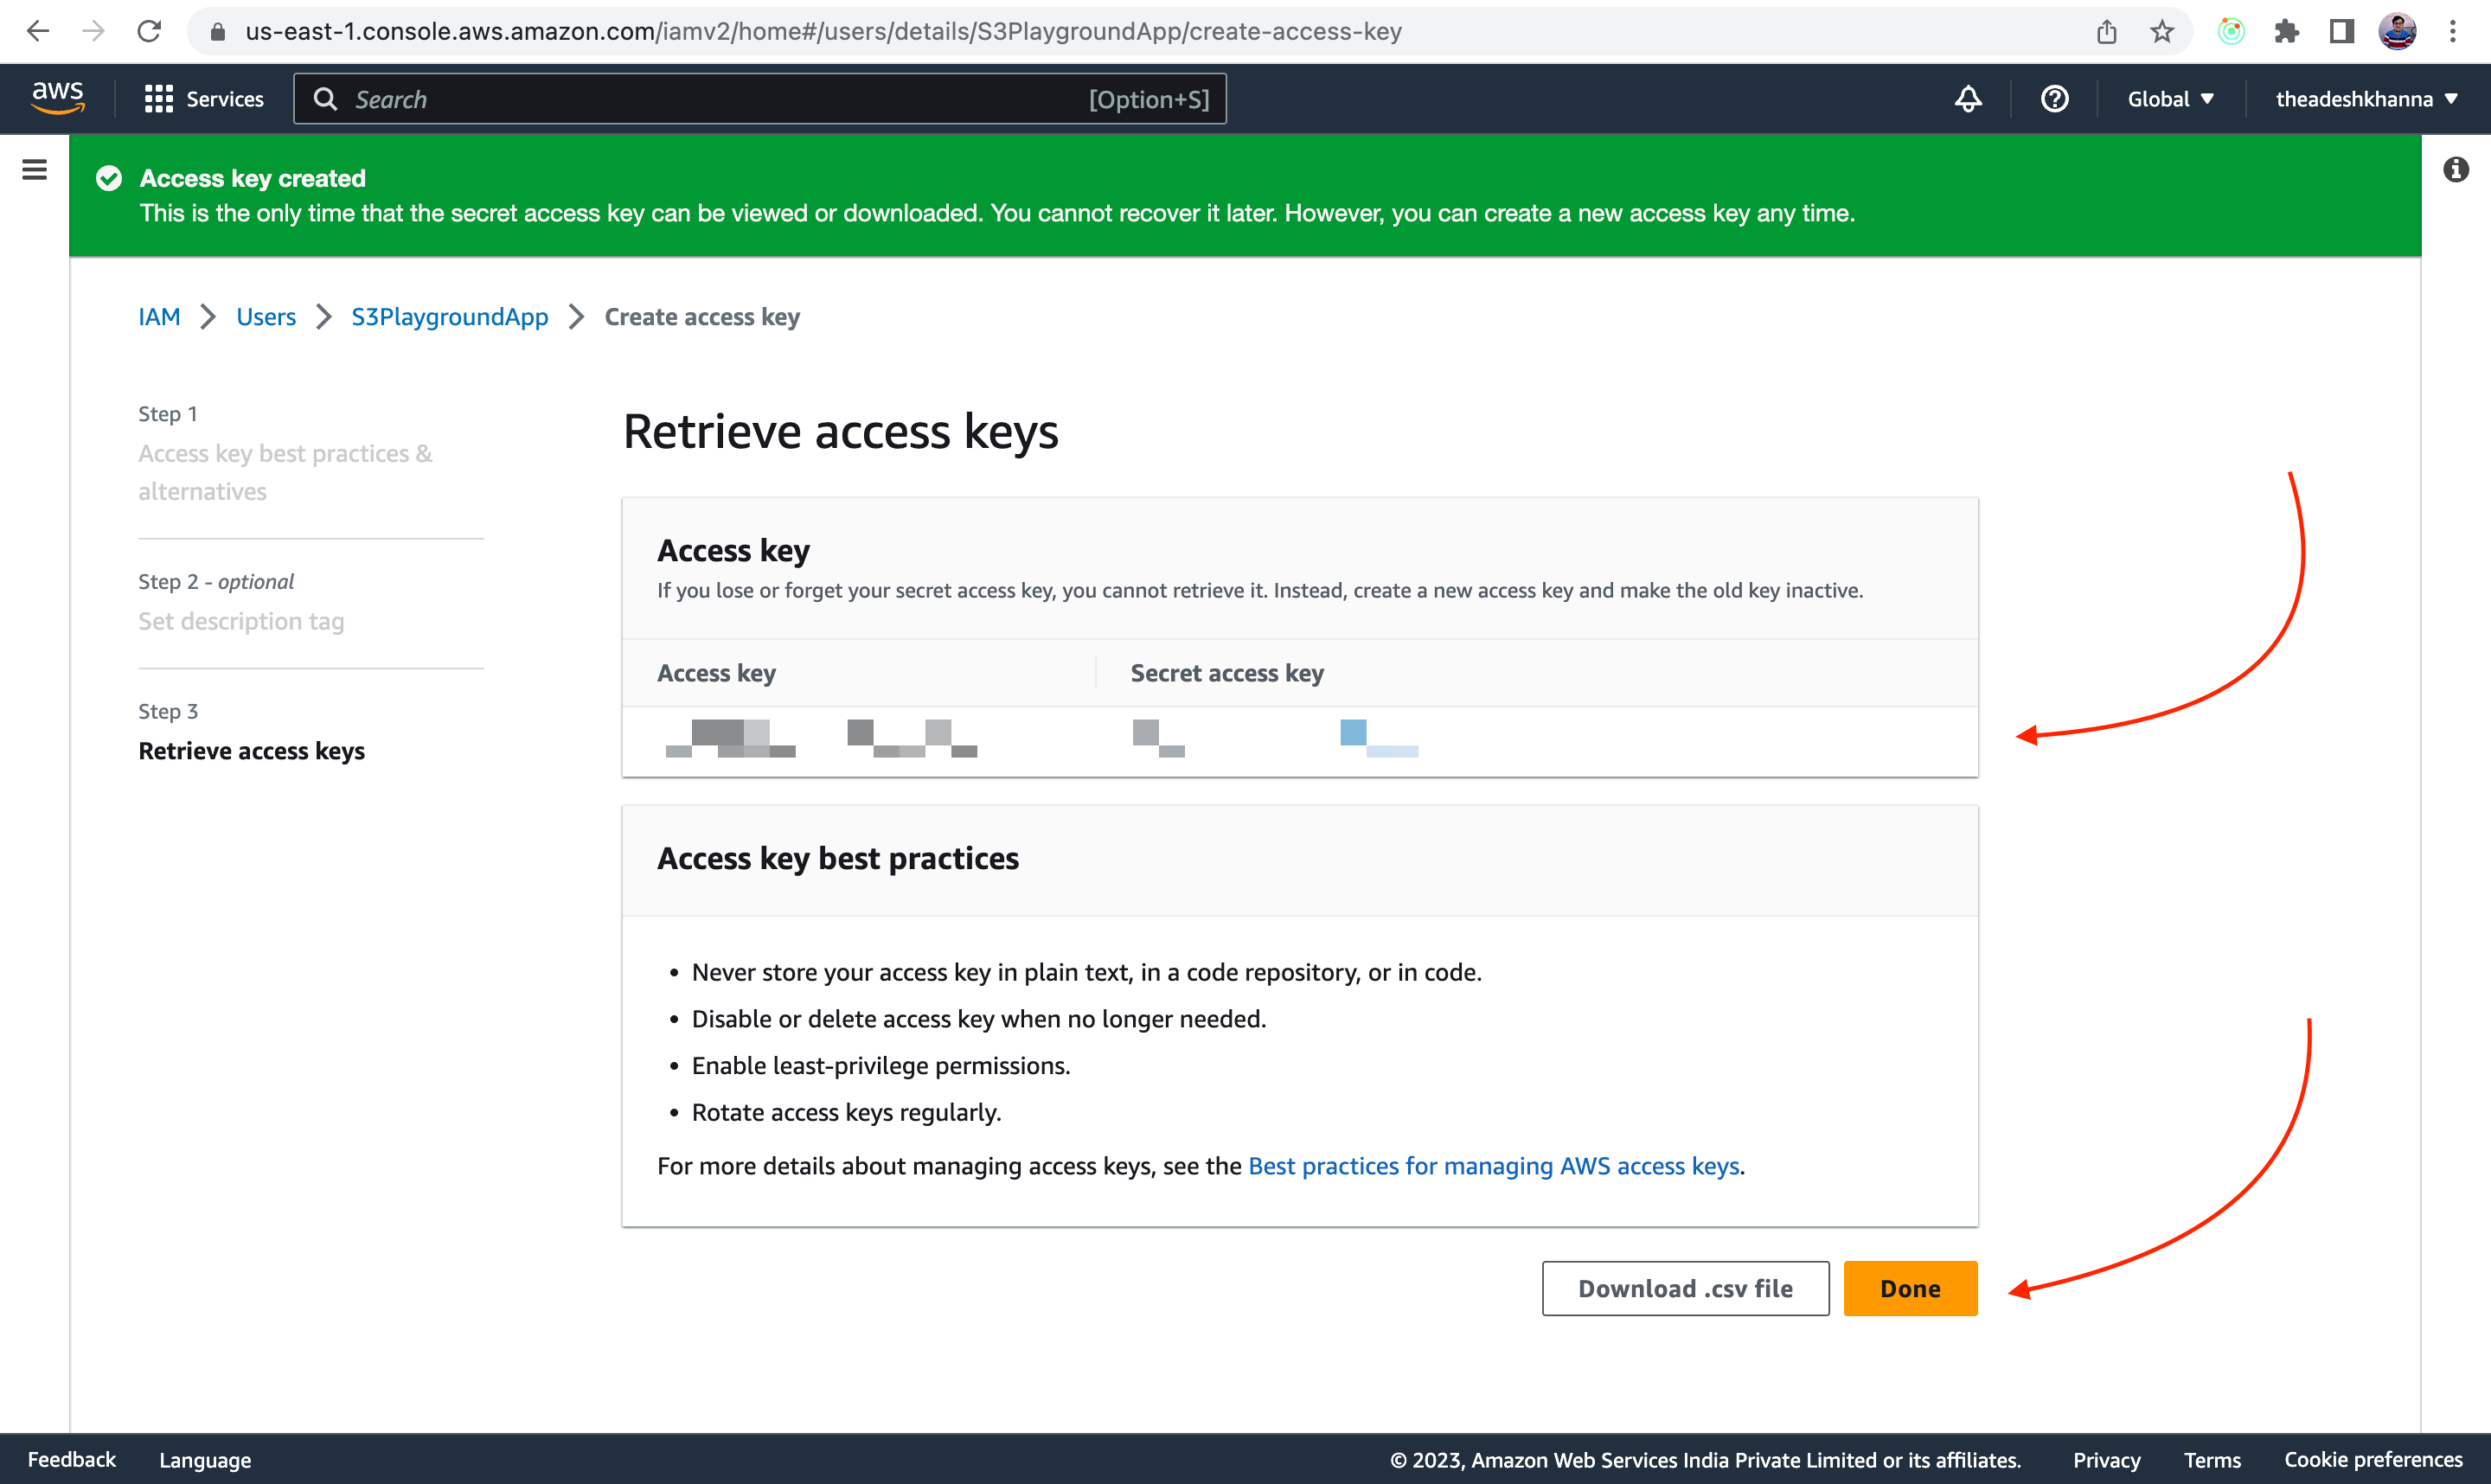
And it is best practice to copy them into your .env file because we will be using them from there.
Also, add two more values in your .env which are the name of the bucket and the region in which the bucket is created. To know the region open the S3 dashboard and there it will be written beside your bucket name.
.env will look something like this -
PORT=3000

AWS_BUCKET_NAME=test-bucket-adesh
AWS_BUCKET_REGION=us-east-1
AWS_ACCESS_KEY=*******************
AWS_SECRET=**************************************
STEP 3: Installing multer to handle files
Now, we need a library through which we can read form data, basically files in our case, so we will be using multer for that, we can install multer as :
npm i multer
now, to use multer for file uploading we have to let multer know from where it has to pick up the image. so we will create a public folder inside our directory and from there we will use multer to upload to S3.
After configuring multer, server.js will look something like this -
const express = require("express");
const multer = require("multer");
require("dotenv").config();

const app = express();
const port = process.env.PORT;
// we will be using upload variable to handle all the file uploads
const upload = multer({ dest: "public/files" });

app.listen(port, () => {
    console.log(`App is up and running at port ${port}`);
})
now we have to create an app.js file where our API logic will reside, and we will call it from server.js
so app.js will look something like this -
// Method created by name of uploadImage
const uploadImage = (req, res) => {
    res.json({"Hello": "World"});
}

// Exporting it so that other files can use it
module.exports = {
    uploadImage: uploadImage
}
Now we will create a route inside server.js as -
const express = require("express");
const multer = require("multer");
require("dotenv").config();

// Method is imported from app.js so that it can be used
const {uploadImage} = require("./app");

const app = express();
const port = process.env.PORT;
const upload = multer({ dest: "public/files" });

// A POST API which calls uploadImage method upon it's call,
// note: upload.single is used to upload a single file at a time
app.post("/upload", upload.single("file"), uploadImage)

app.listen(port, () => {
    console.log(`App is up and running at port ${port}`);
})
STEP 4: Installing aws-sdk to use AWS services
The first step is to install aws-sdk which will be used to upload the file to S3.
npm i aws-sdk
Now, we have to modify the upload method in app.js so that it can handle the incoming files and be able to upload them.
Before that, we have to create an S3 object which will be used to upload the image.
// Require S3 Module from aws-sdk as follows :
const S3 = require("aws-sdk/clients/s3");

// Create a s3 object as follows :
const s3 = new S3({
    region: process.env.AWS_BUCKET_REGION,
    accessKeyId: process.env.AWS_ACCESS_KEY,
    secretAccessKey: process.env.AWS_SECRET
})

const uploadImage = (req, res) => {
    res.json({"Hello": "World"});
}

module.exports = {
    uploadImage: uploadImage
}
Now, we have to read the file which was taken by multer and then upload that to s3. that will be carried out as :
const S3 = require("aws-sdk/clients/s3");
const fs = require("fs"); //To Read files and create stream for upload

const s3 = new S3({
    region: process.env.AWS_BUCKET_REGION,
    accessKeyId: process.env.AWS_ACCESS_KEY,
    secretAccessKey: process.env.AWS_SECRET
})

const uploadImage = (req, res) => {
    // Creating a file stream of the file
    const fileStream = fs.createReadStream(req.file.path)

    // Creating an object of file details to be uploaded
    const uploadParams = {
        Bucket: process.env.AWS_BUCKET_NAME,
        Body: fileStream,
        Key: req.file.filename
    };

    // Calling upload method of AWS to upload the file
    const response = await s3.upload(uploadParams).promise();
    res.json({"message": "file uploaded successfully"});
}

module.exports = {
    uploadImage: uploadImage
}
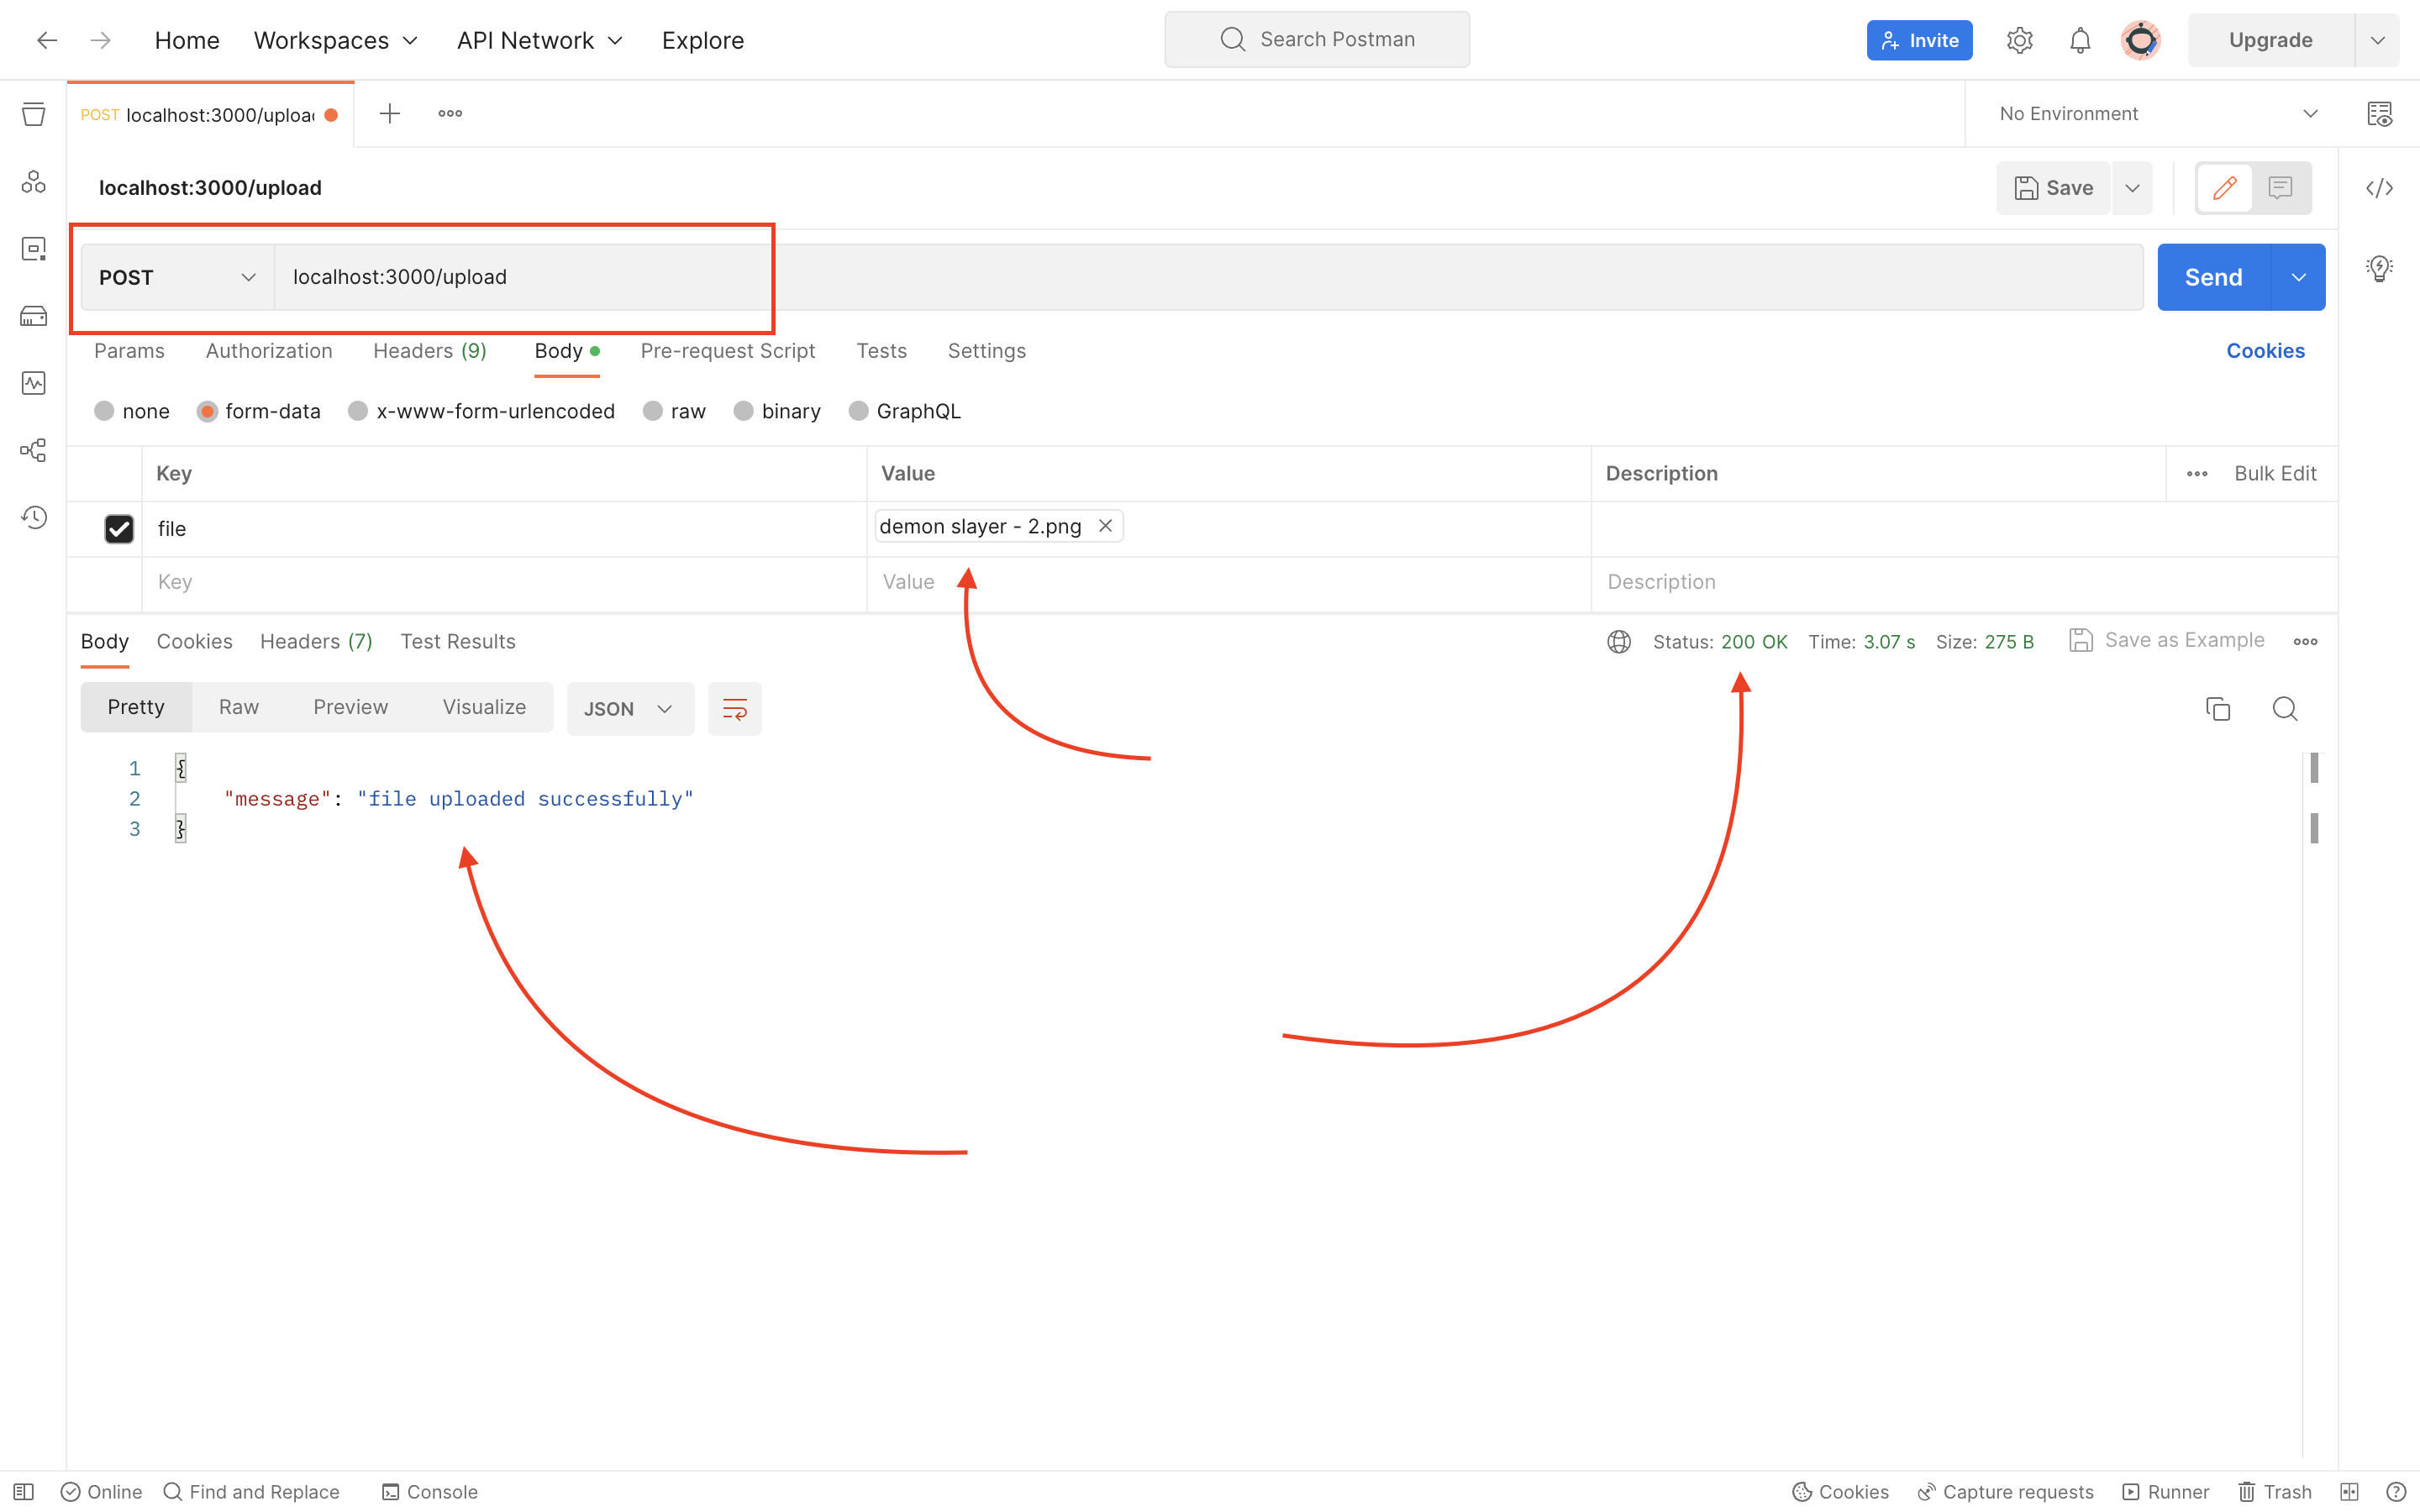
Now, after calling the API from postman we will get the above message as a response and the file will be uploaded to AWS.
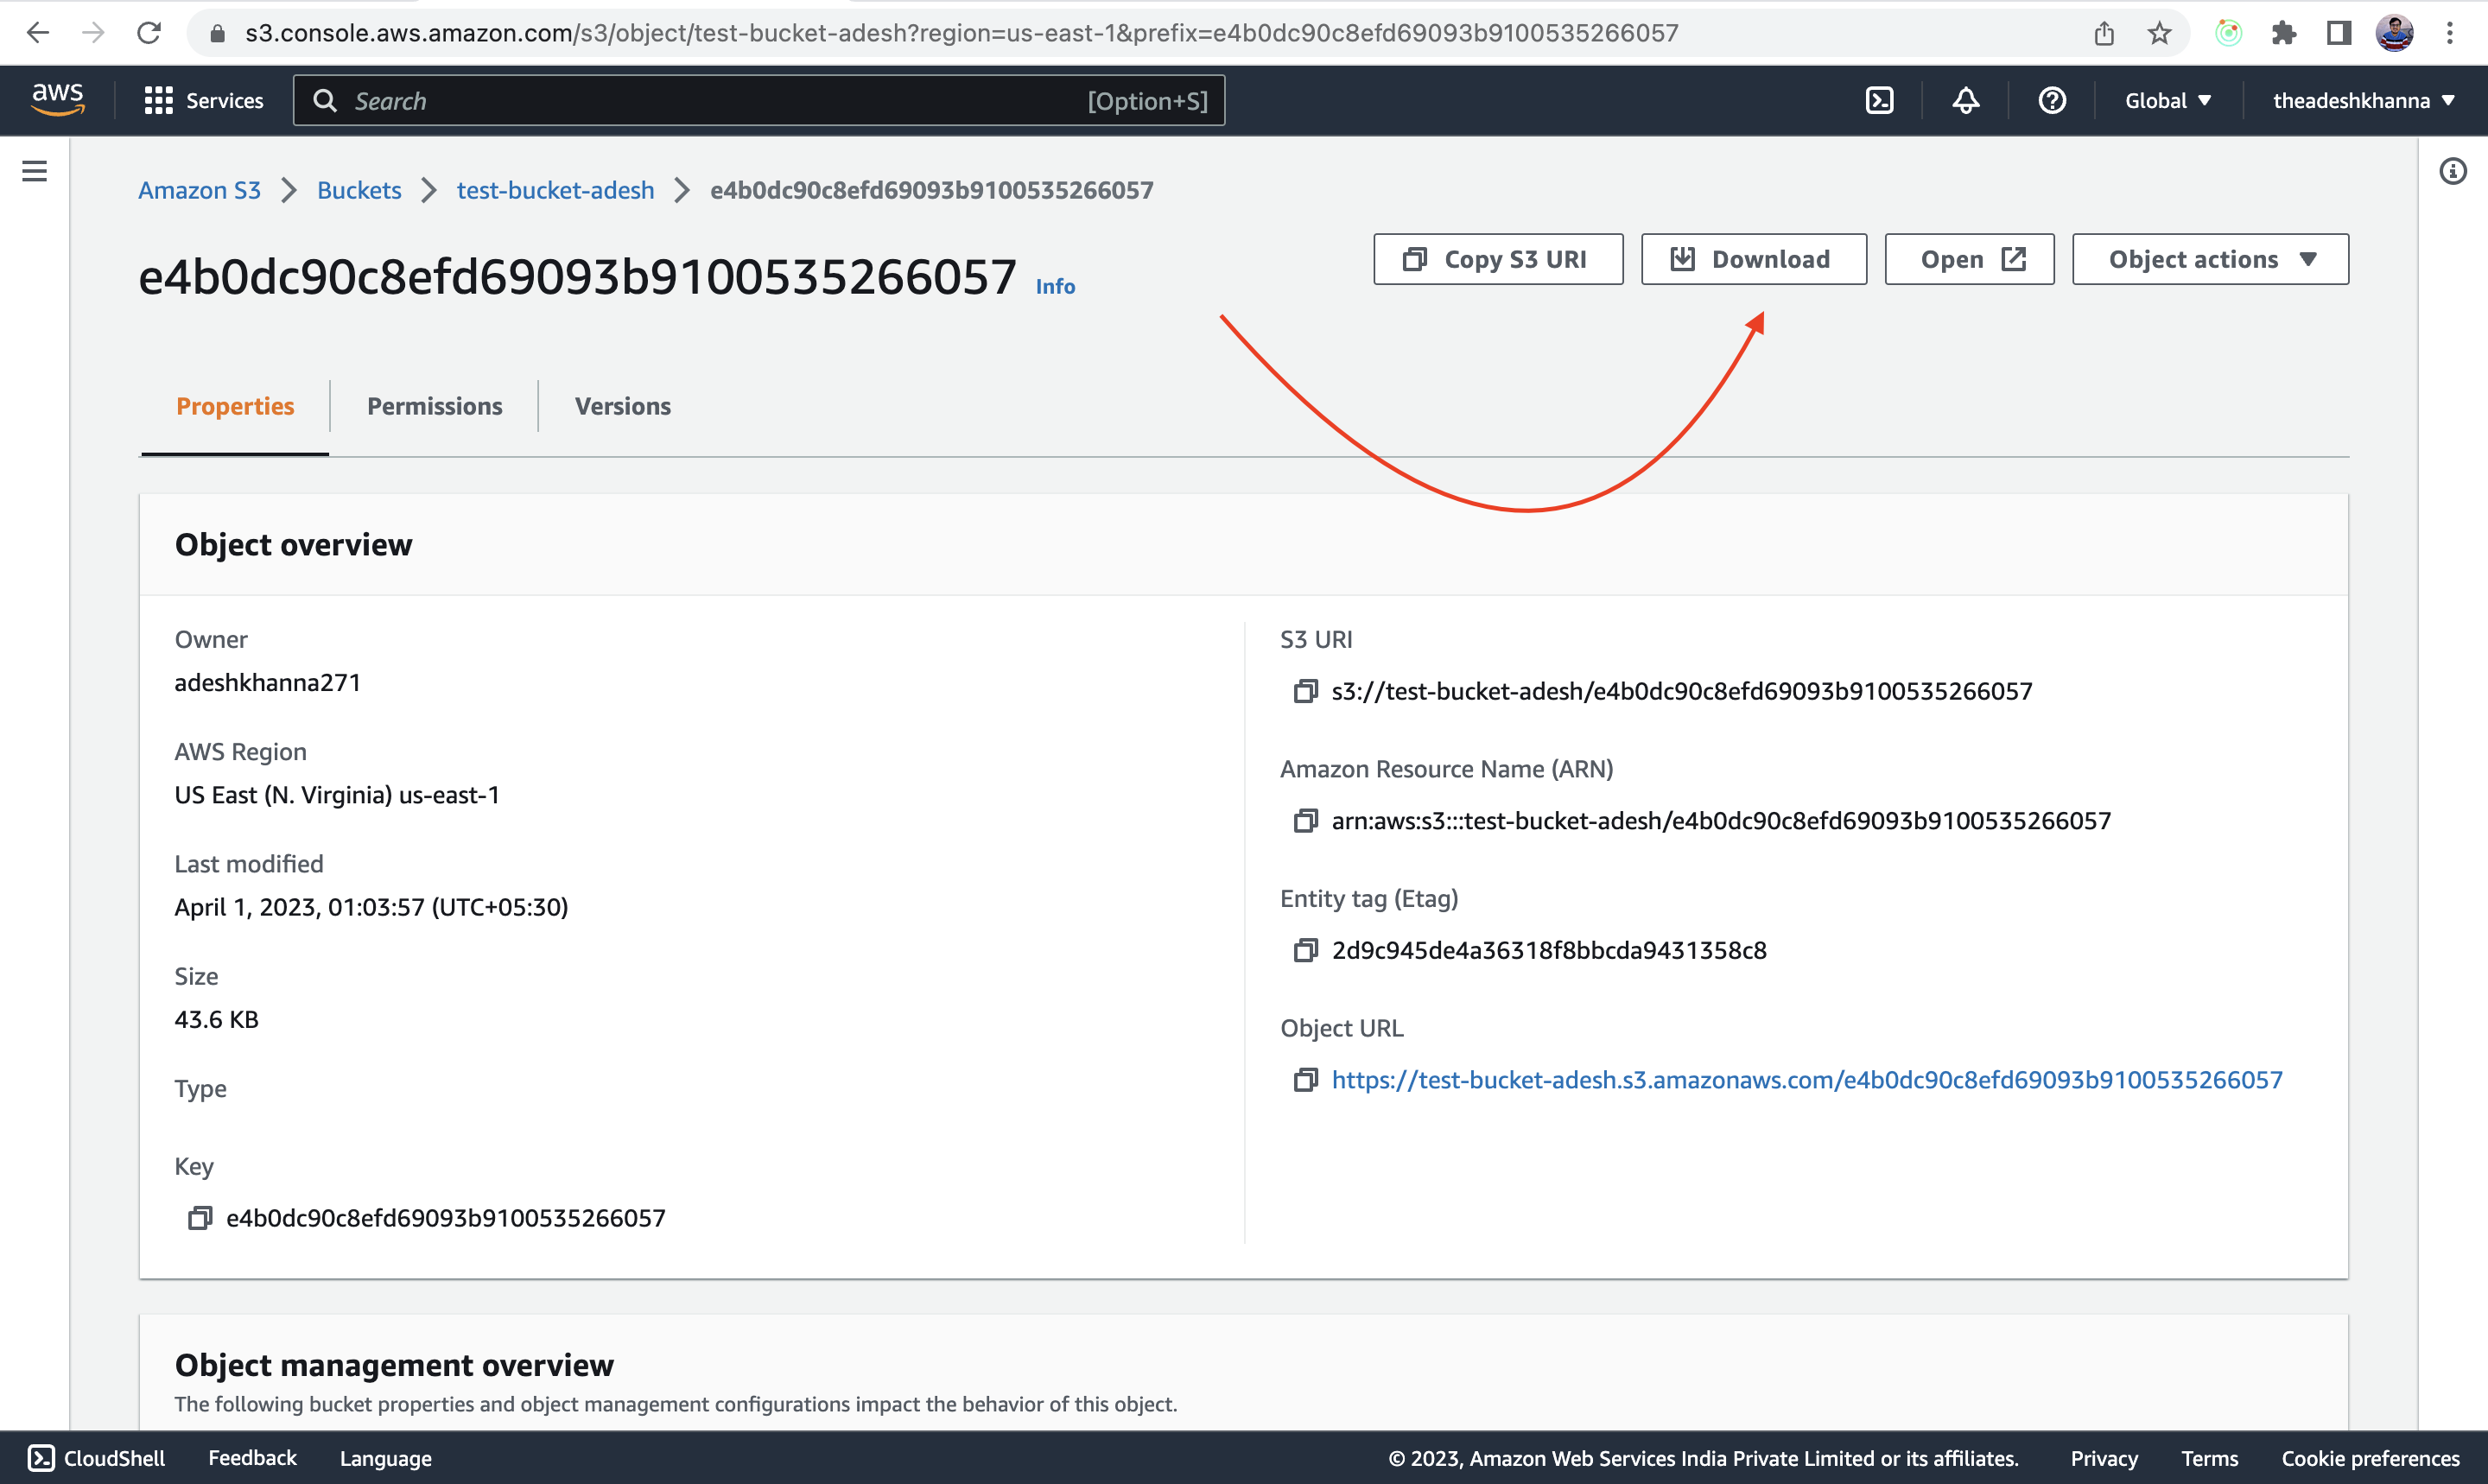
On opening the bucket it can be seen that the image is uploaded.
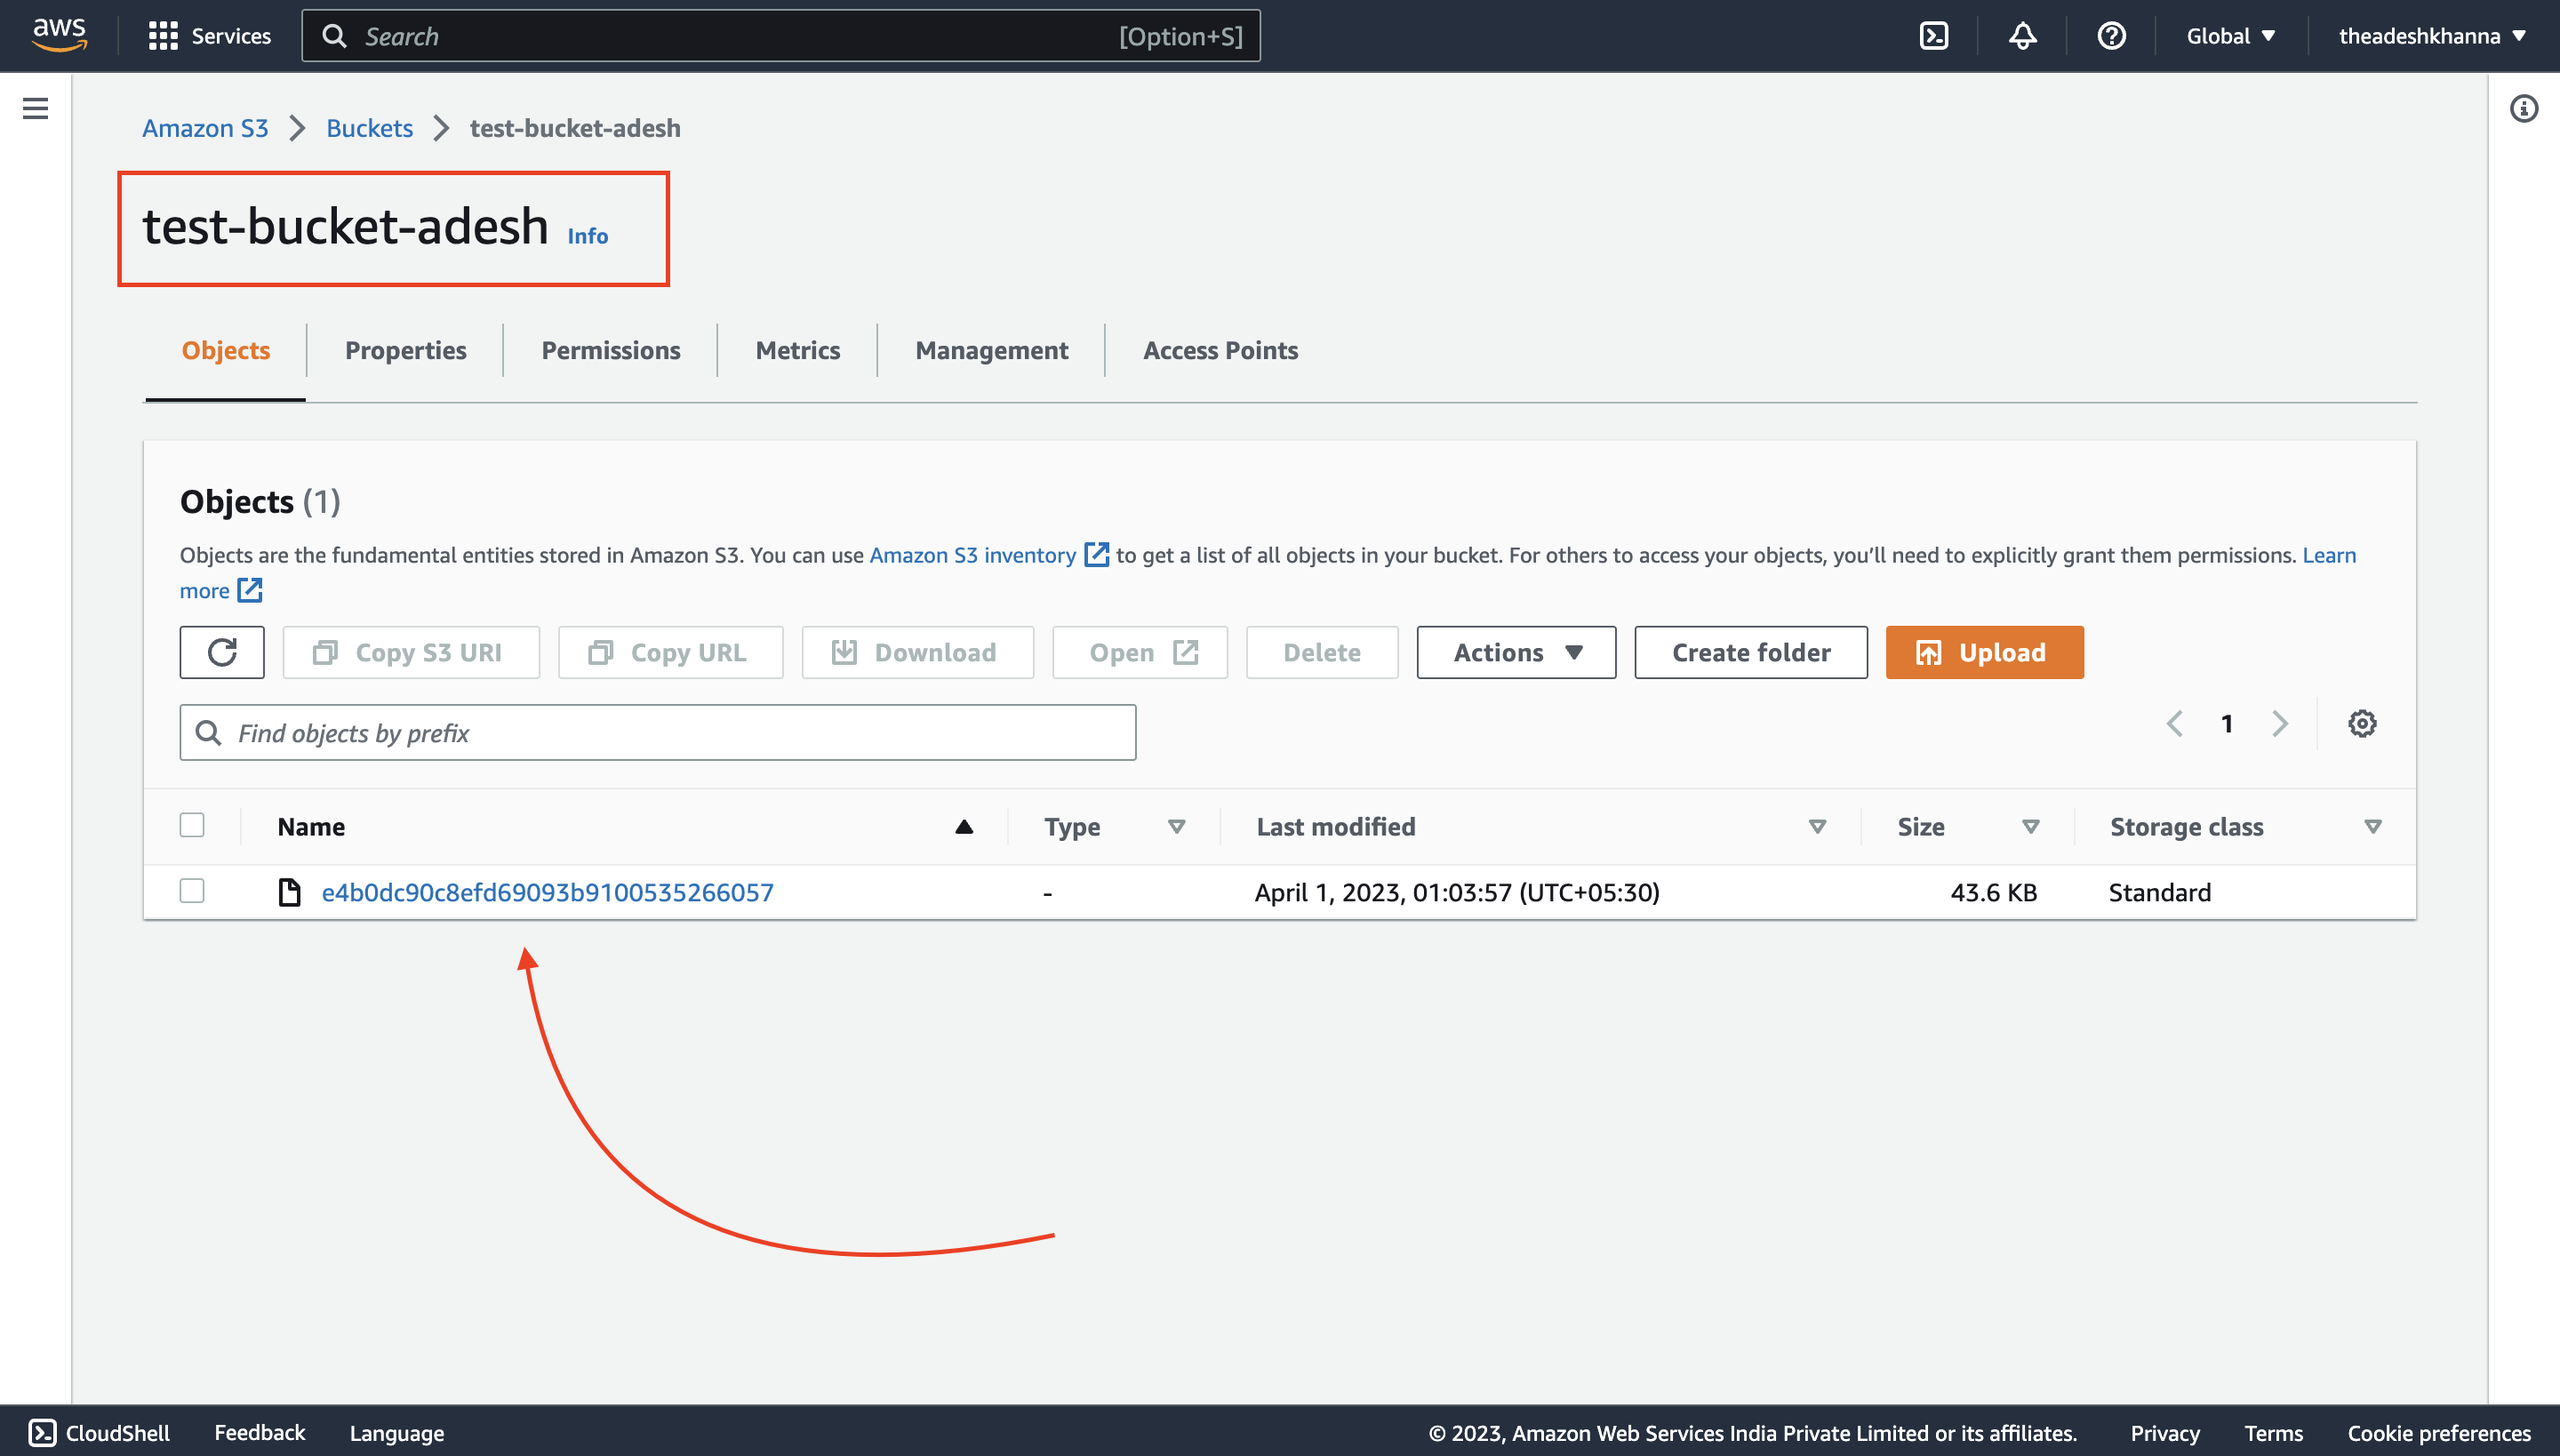
Now, you will not be able to open the image because when we created the S3 bucket then we disabled the ACL option. To open/see the image you have to download the image.
That's it, folks
Thanks for scrolling