Node.js Emailing Made Easy: A Beginner's Guide to Nodemailer

Hi, Nice seeing you here I am a Software Engineer with a background in Computer Science having in-depth knowledge of Backend Development, Frontend Development and DevOps. I Love building and deploying systems with my knowledge and create a product that is easily accessible to all. Really appreciate your time.
STEP 0: Creating an empty Nodejs repository
Go to your desired directory and run the below command to setup an empty directory with package.json
npm init -y
STEP 1: Creating a server
To create an express server we have to install express
STEP 1.1: Installing Express
npm i express
the above command will install the express library to your project.
STEP 1.2: Setting up the server
Create a new javascript file - you can name it anything, for the sake of simplicity let's call it server.js A node server can be set up by just three lines of code as :
const express = require("express");
const app = express();

app.listen(3000, () => {
    console.log(`App is up and running at port 3000`);
})
STEP 1.3: Install and configure dotenv
we will be using some high confidentiality passwords/keys in the project, so it will be beneficial to not save them as such in the project but to create a non-versioned file and store them in that.
to have this kind of feature we have to install dotenv
npm i dotenv
after that create a .env file in your project and for now, add the value of PORT there, we will use the value of port from there.
.env will look something like this, it stores data in key-value format.
PORT=3000
now to use this value of PORT from .env, we have to configure dotenv in the server.js file and use the value.
const express = require("express");
// This line is setting up the .env so that we can use it in our code
require("dotenv").config();

const app = express();
const port = process.env.PORT // This is how we can use it

app.listen(port, () => {
    console.log(`App is up and running at port ${port}`);
})
STEP 2: Creating an API to send email
Now we have to create an app.js file where our API logic will reside, and we will call it from server.js
so app.js will look something like this -
// Method created by name of sendEmail
const sendEmail = (req, res) => {
    res.json({"Hello": "World"});
}

// Exporting it so that other files can use it
module.exports = {
    sendEmail: sendEmail
}
Now we will create a route inside server.js as -
const express = require("express");
require("dotenv").config();

// Method is imported from app.js so that it can be used
const {sendEmail} = require("./app");

const app = express();
const port = process.env.PORT

// This line adds a middleware function to the Express app that will // be executed for every incoming HTTP request. This middleware
// function parses the request body of a JSON type, and adds a body
// property to the request object with the parsed JSON data.
app.use(express.json());

// A POST API which calls sendEmail method upon it's call
app.post("/send-email", sendEmail)

app.listen(port, () => {
    console.log(`App is up and running at ${port}`);
})
STEP 3: Installing and configuring Nodemailer
Now, to be able to send emails, we have to generate an app password and install nodemailer.
STEP 3.1: Generating the app password
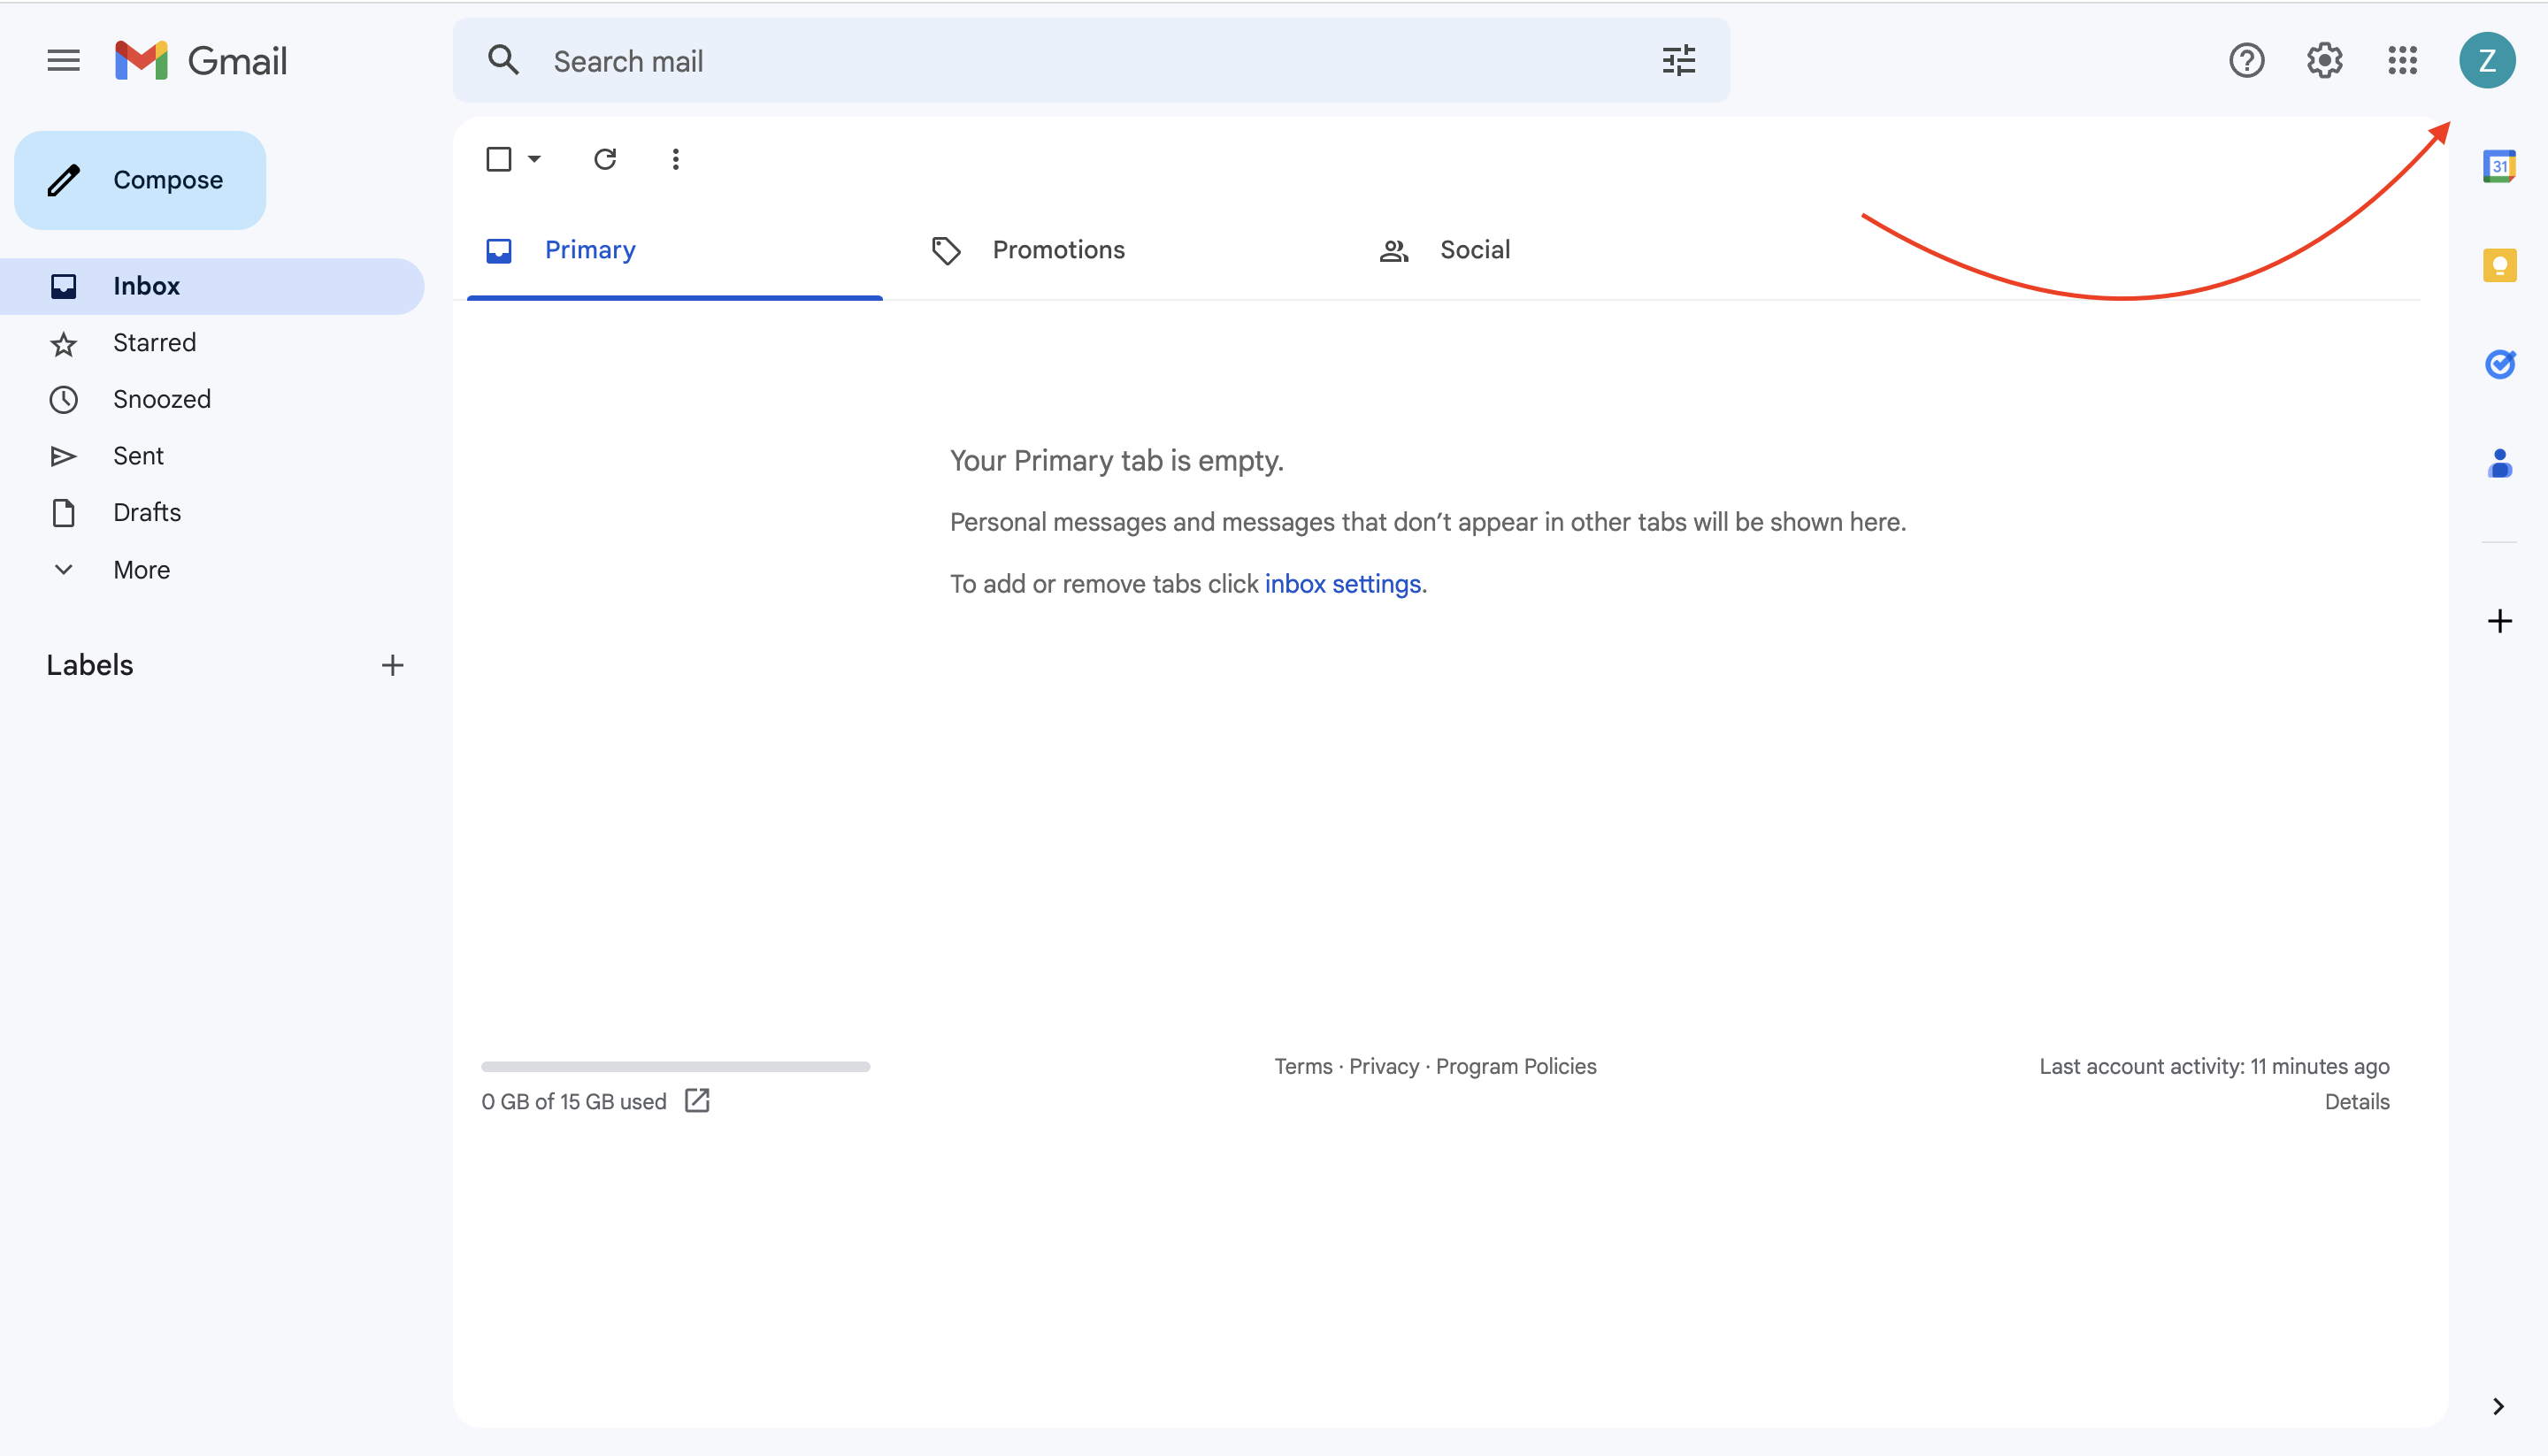
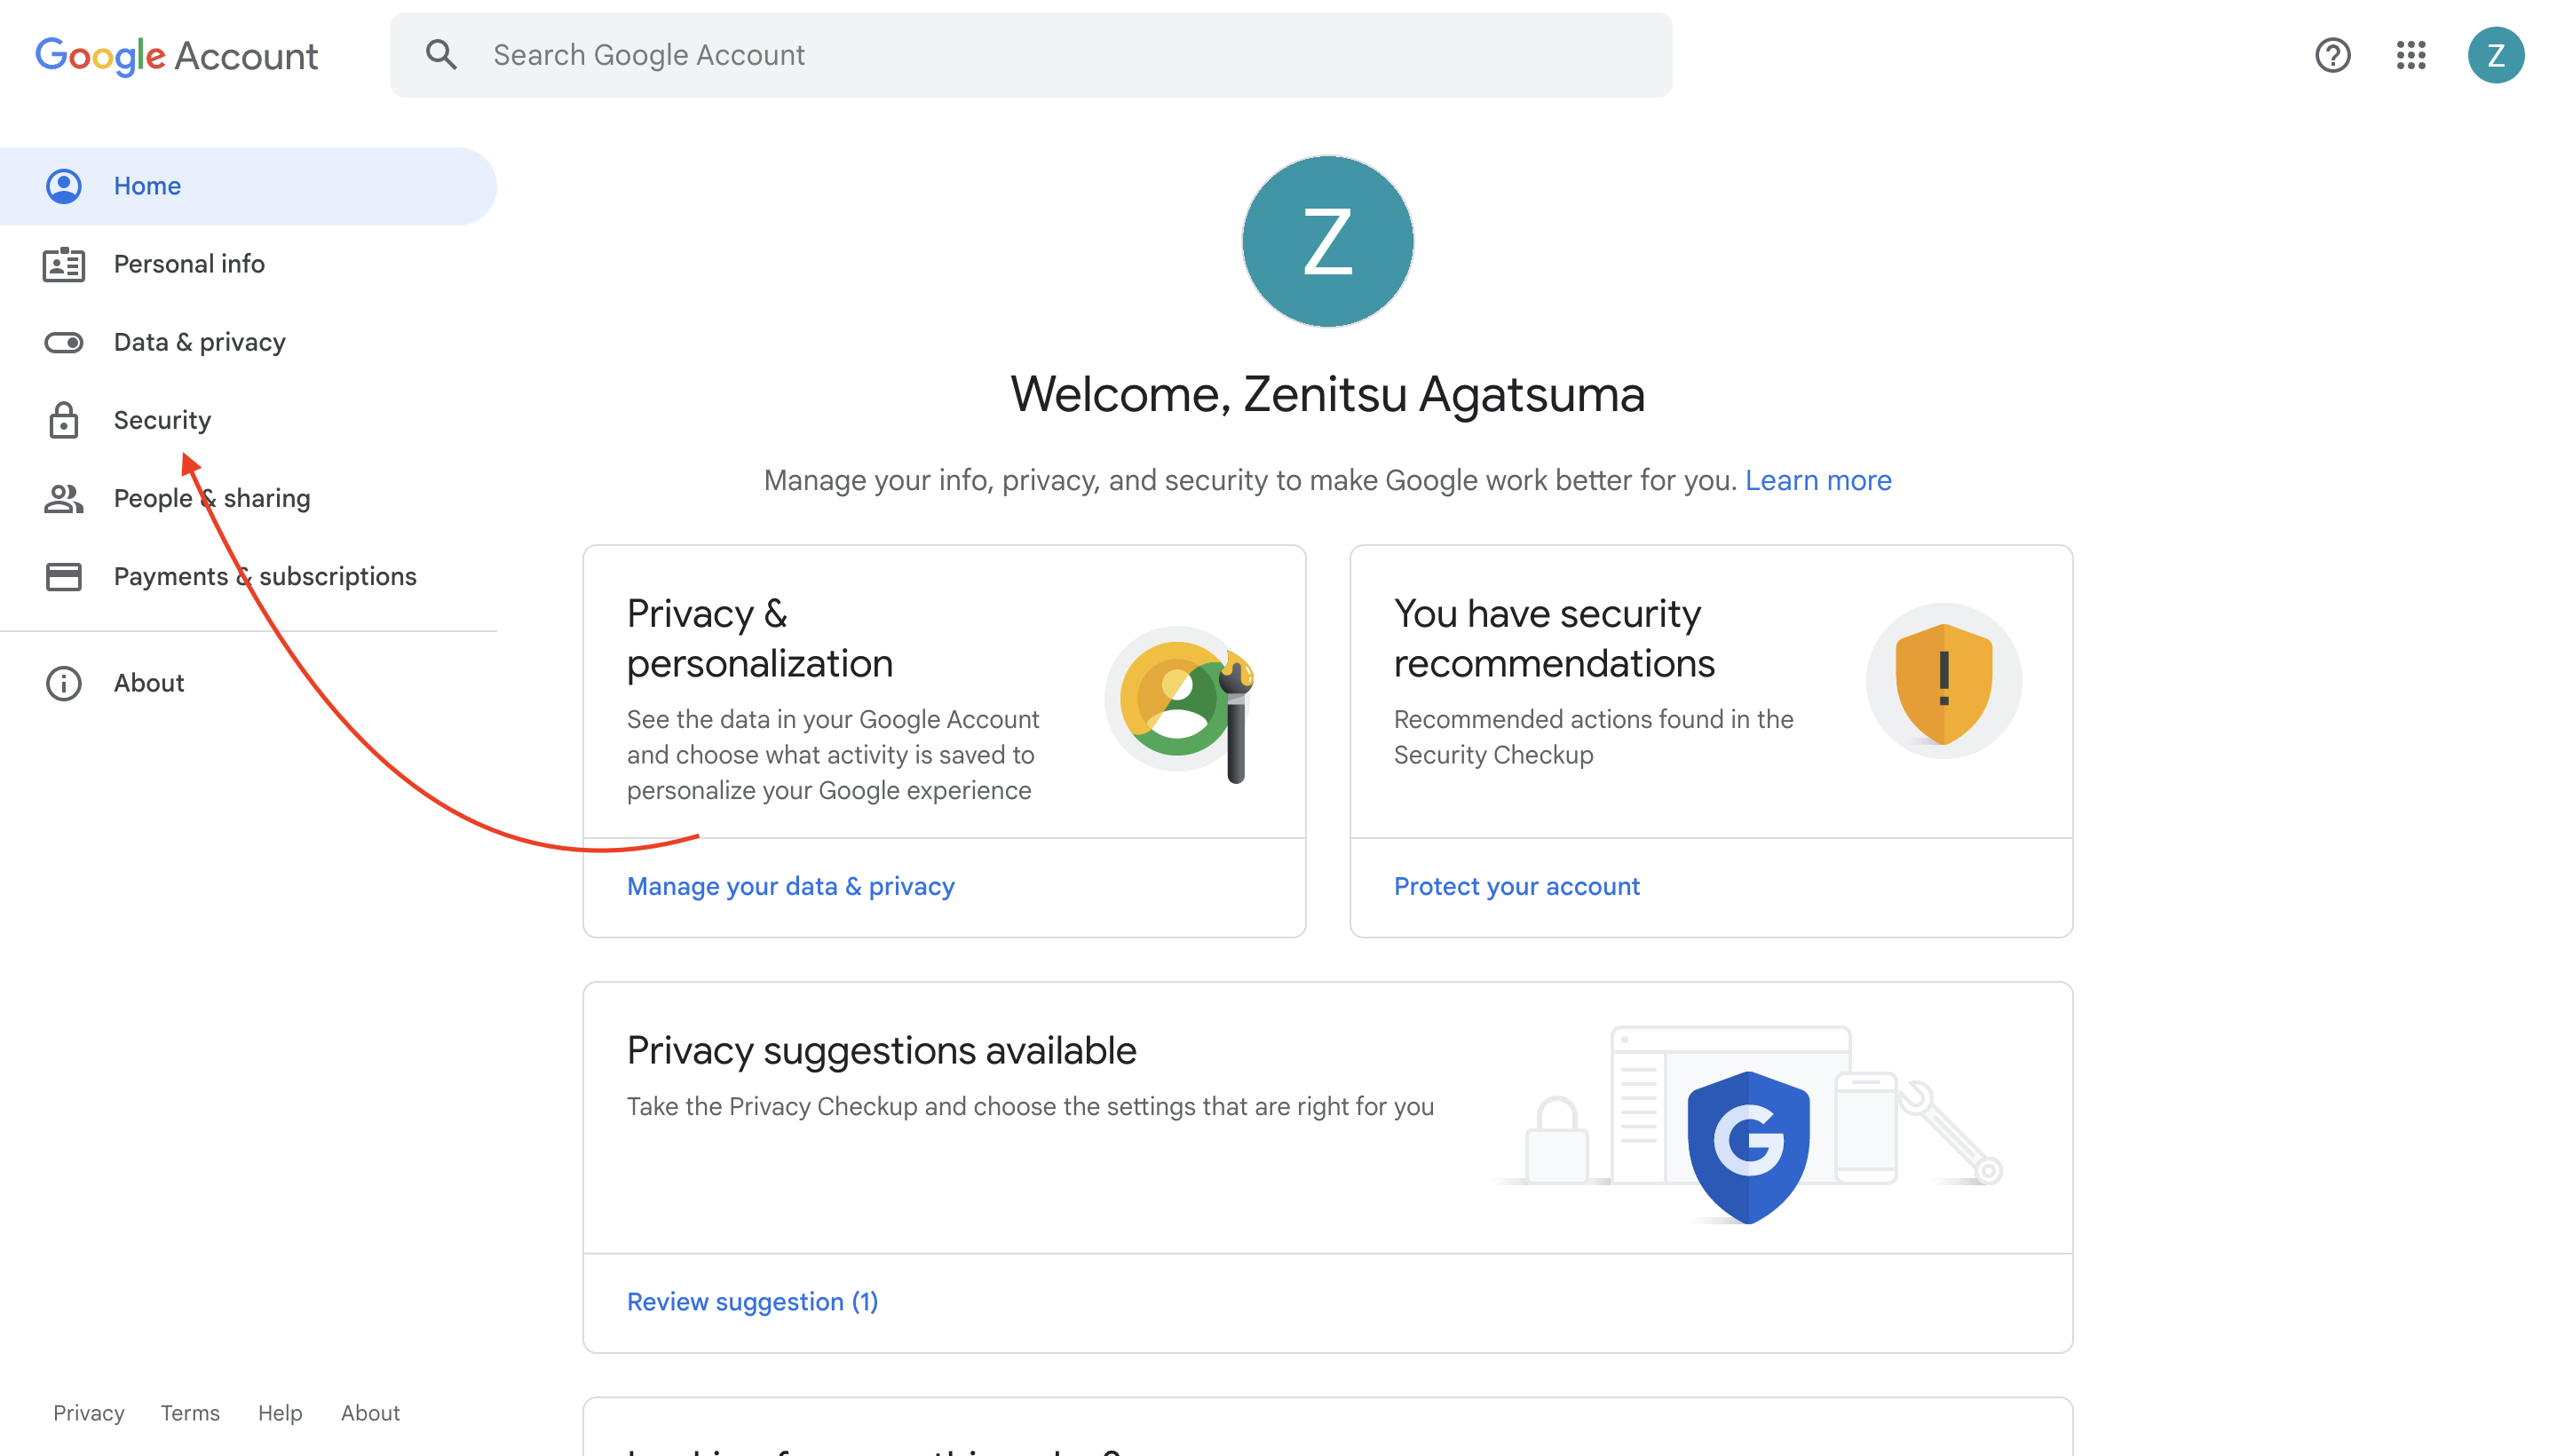
Open Gmail and click on the profile icon
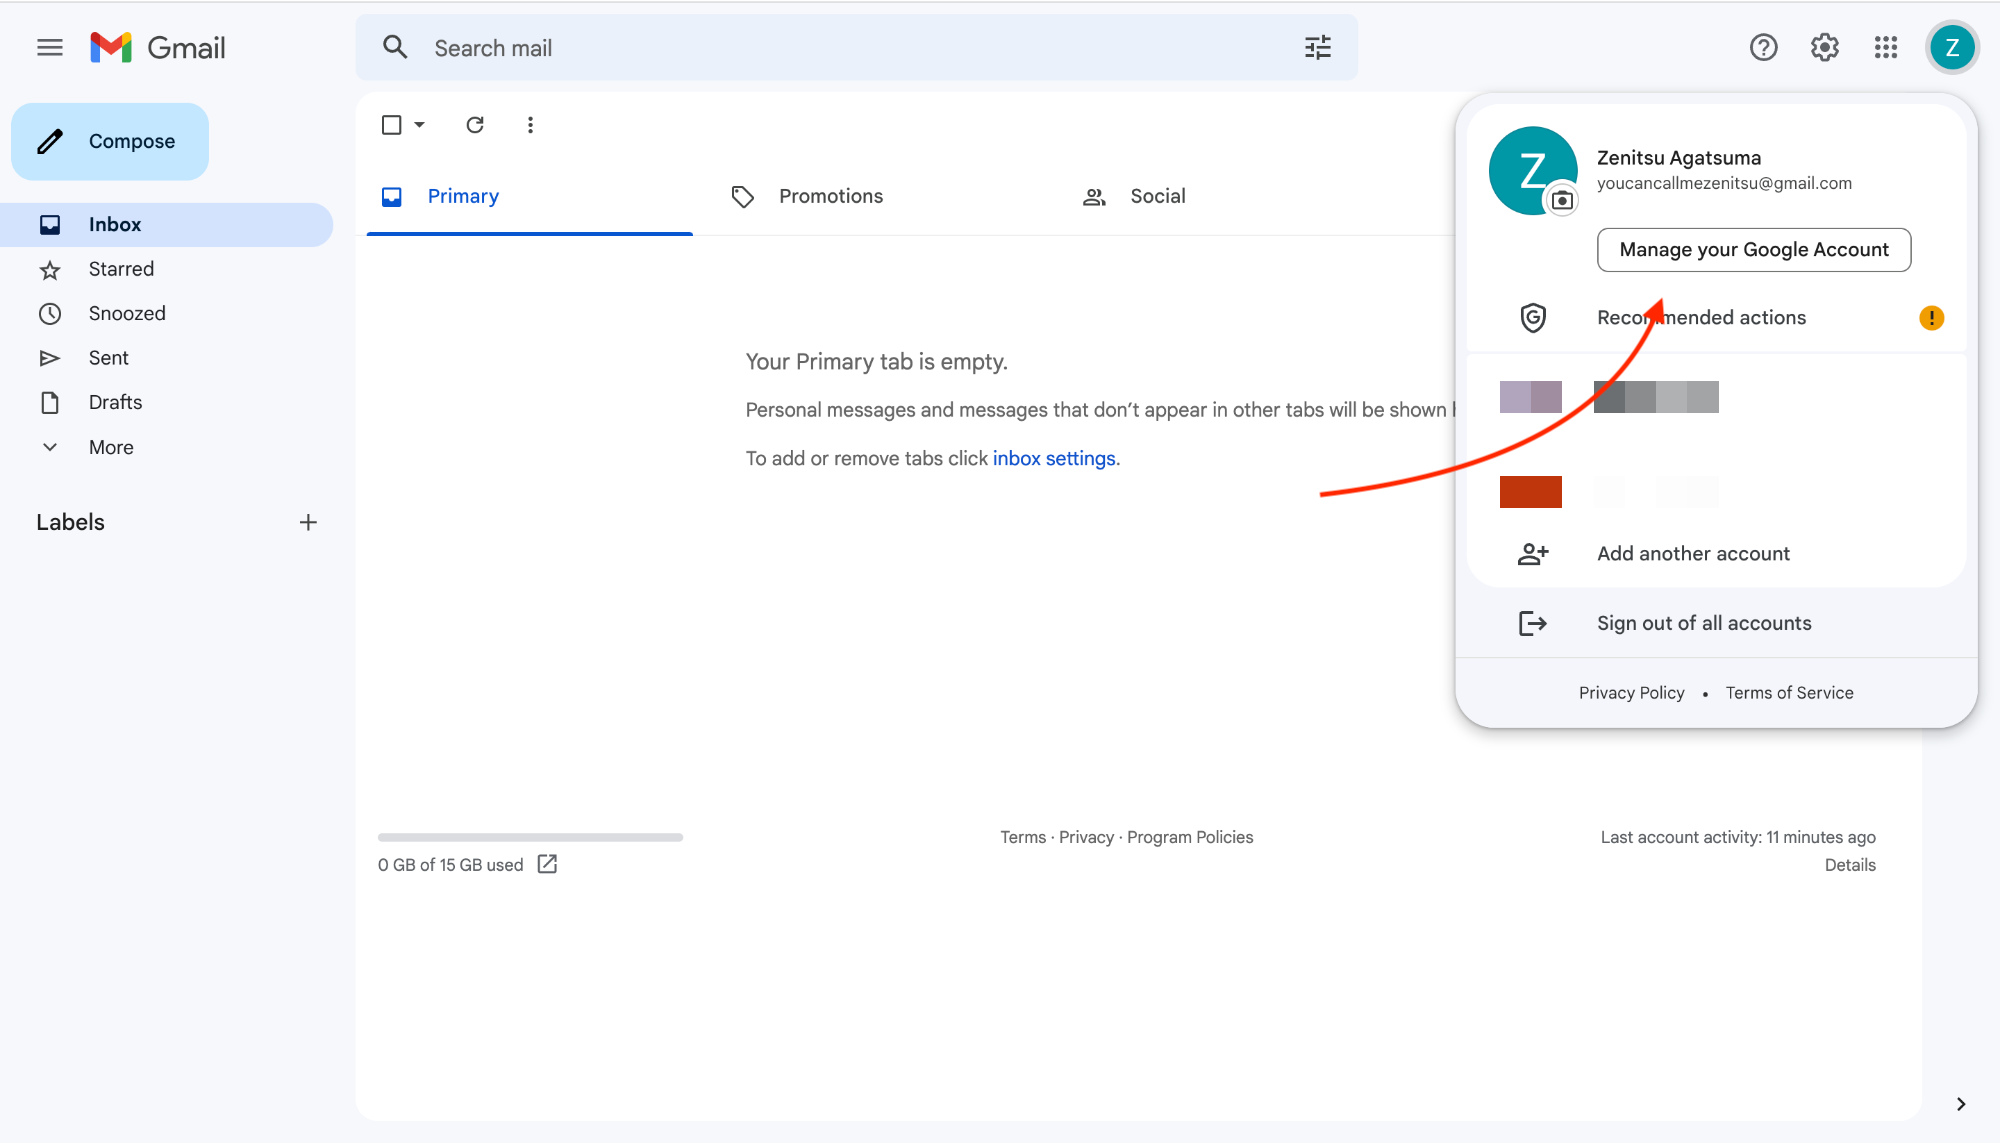
After that click on Manage Account
After that click on Security
Now, make sure you have 2-step verification active on your account, after that scroll down and click on the 2-step verification option
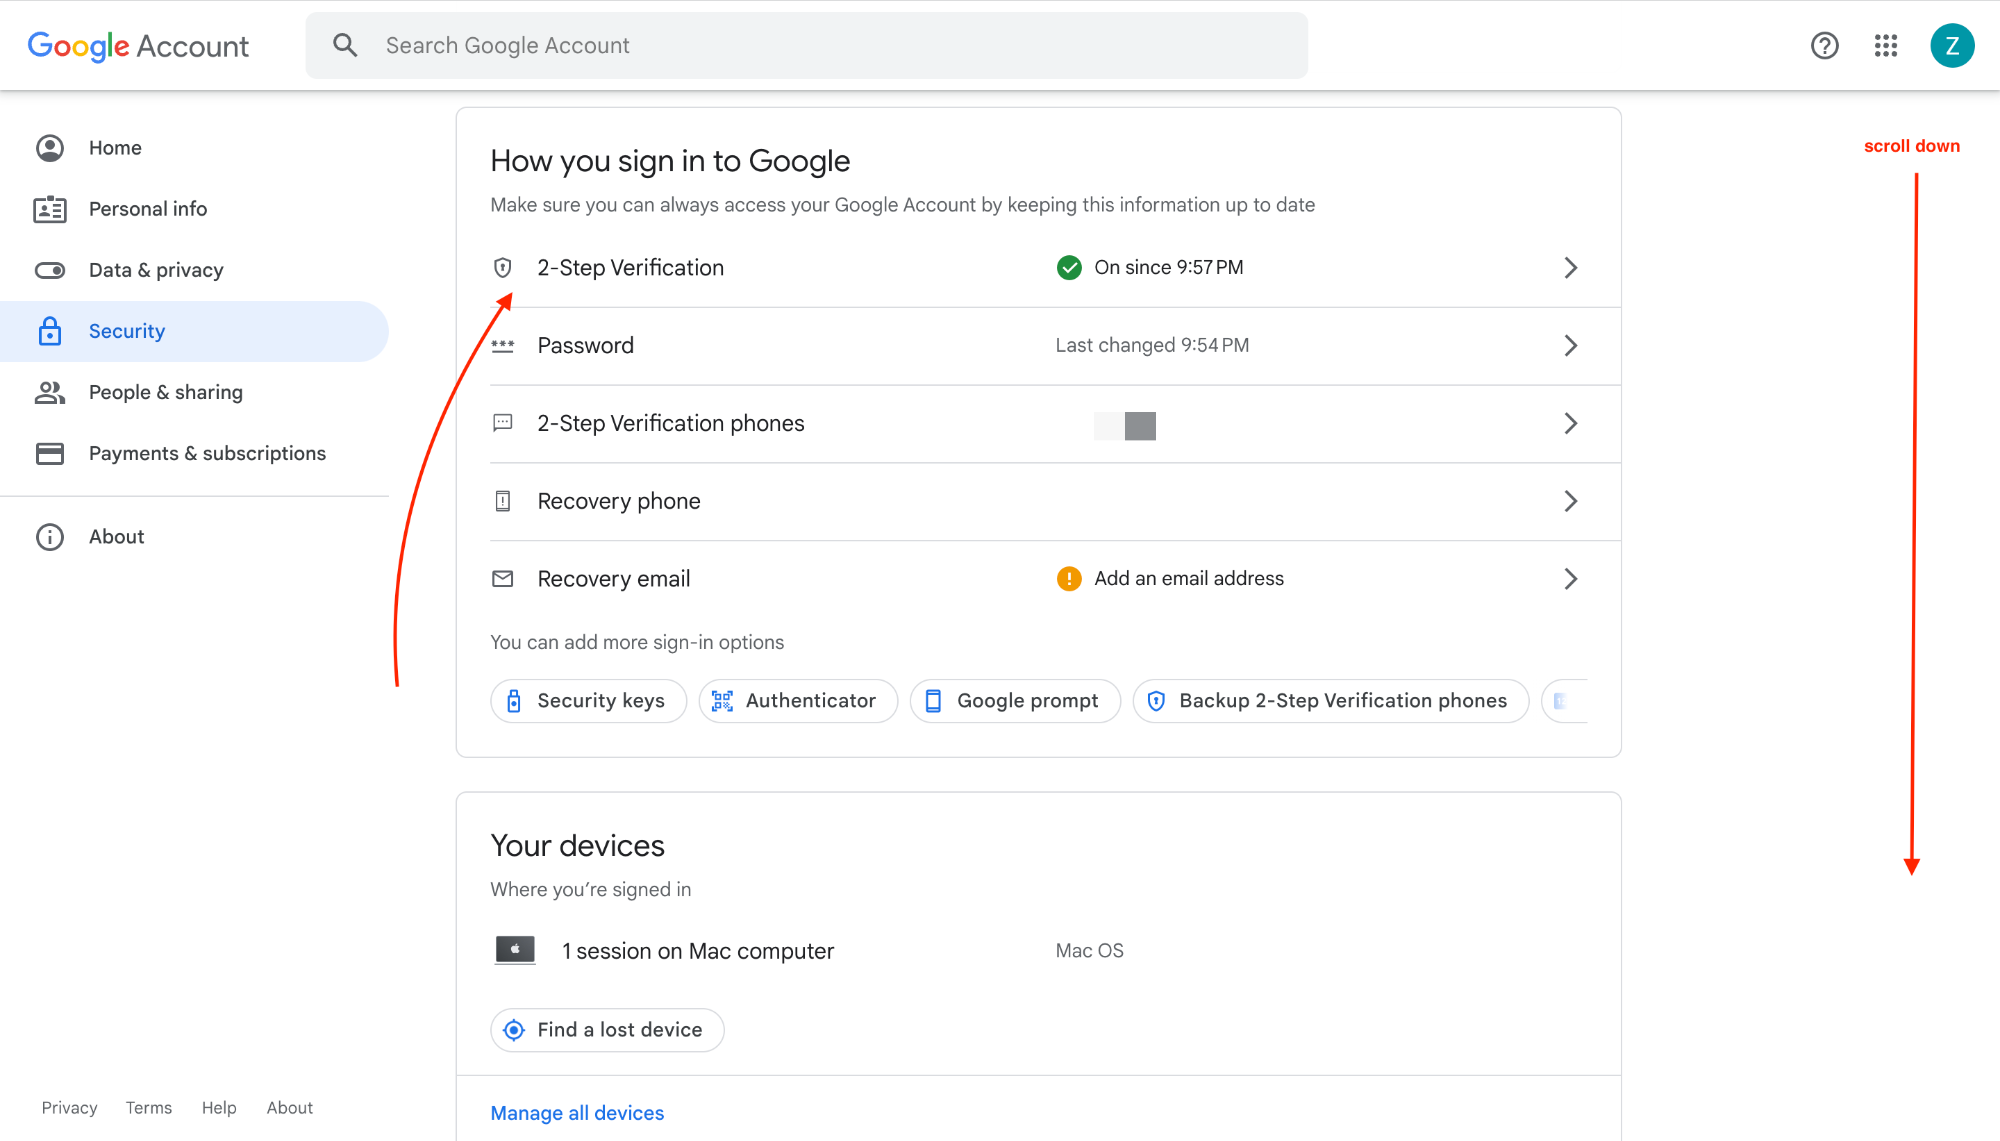
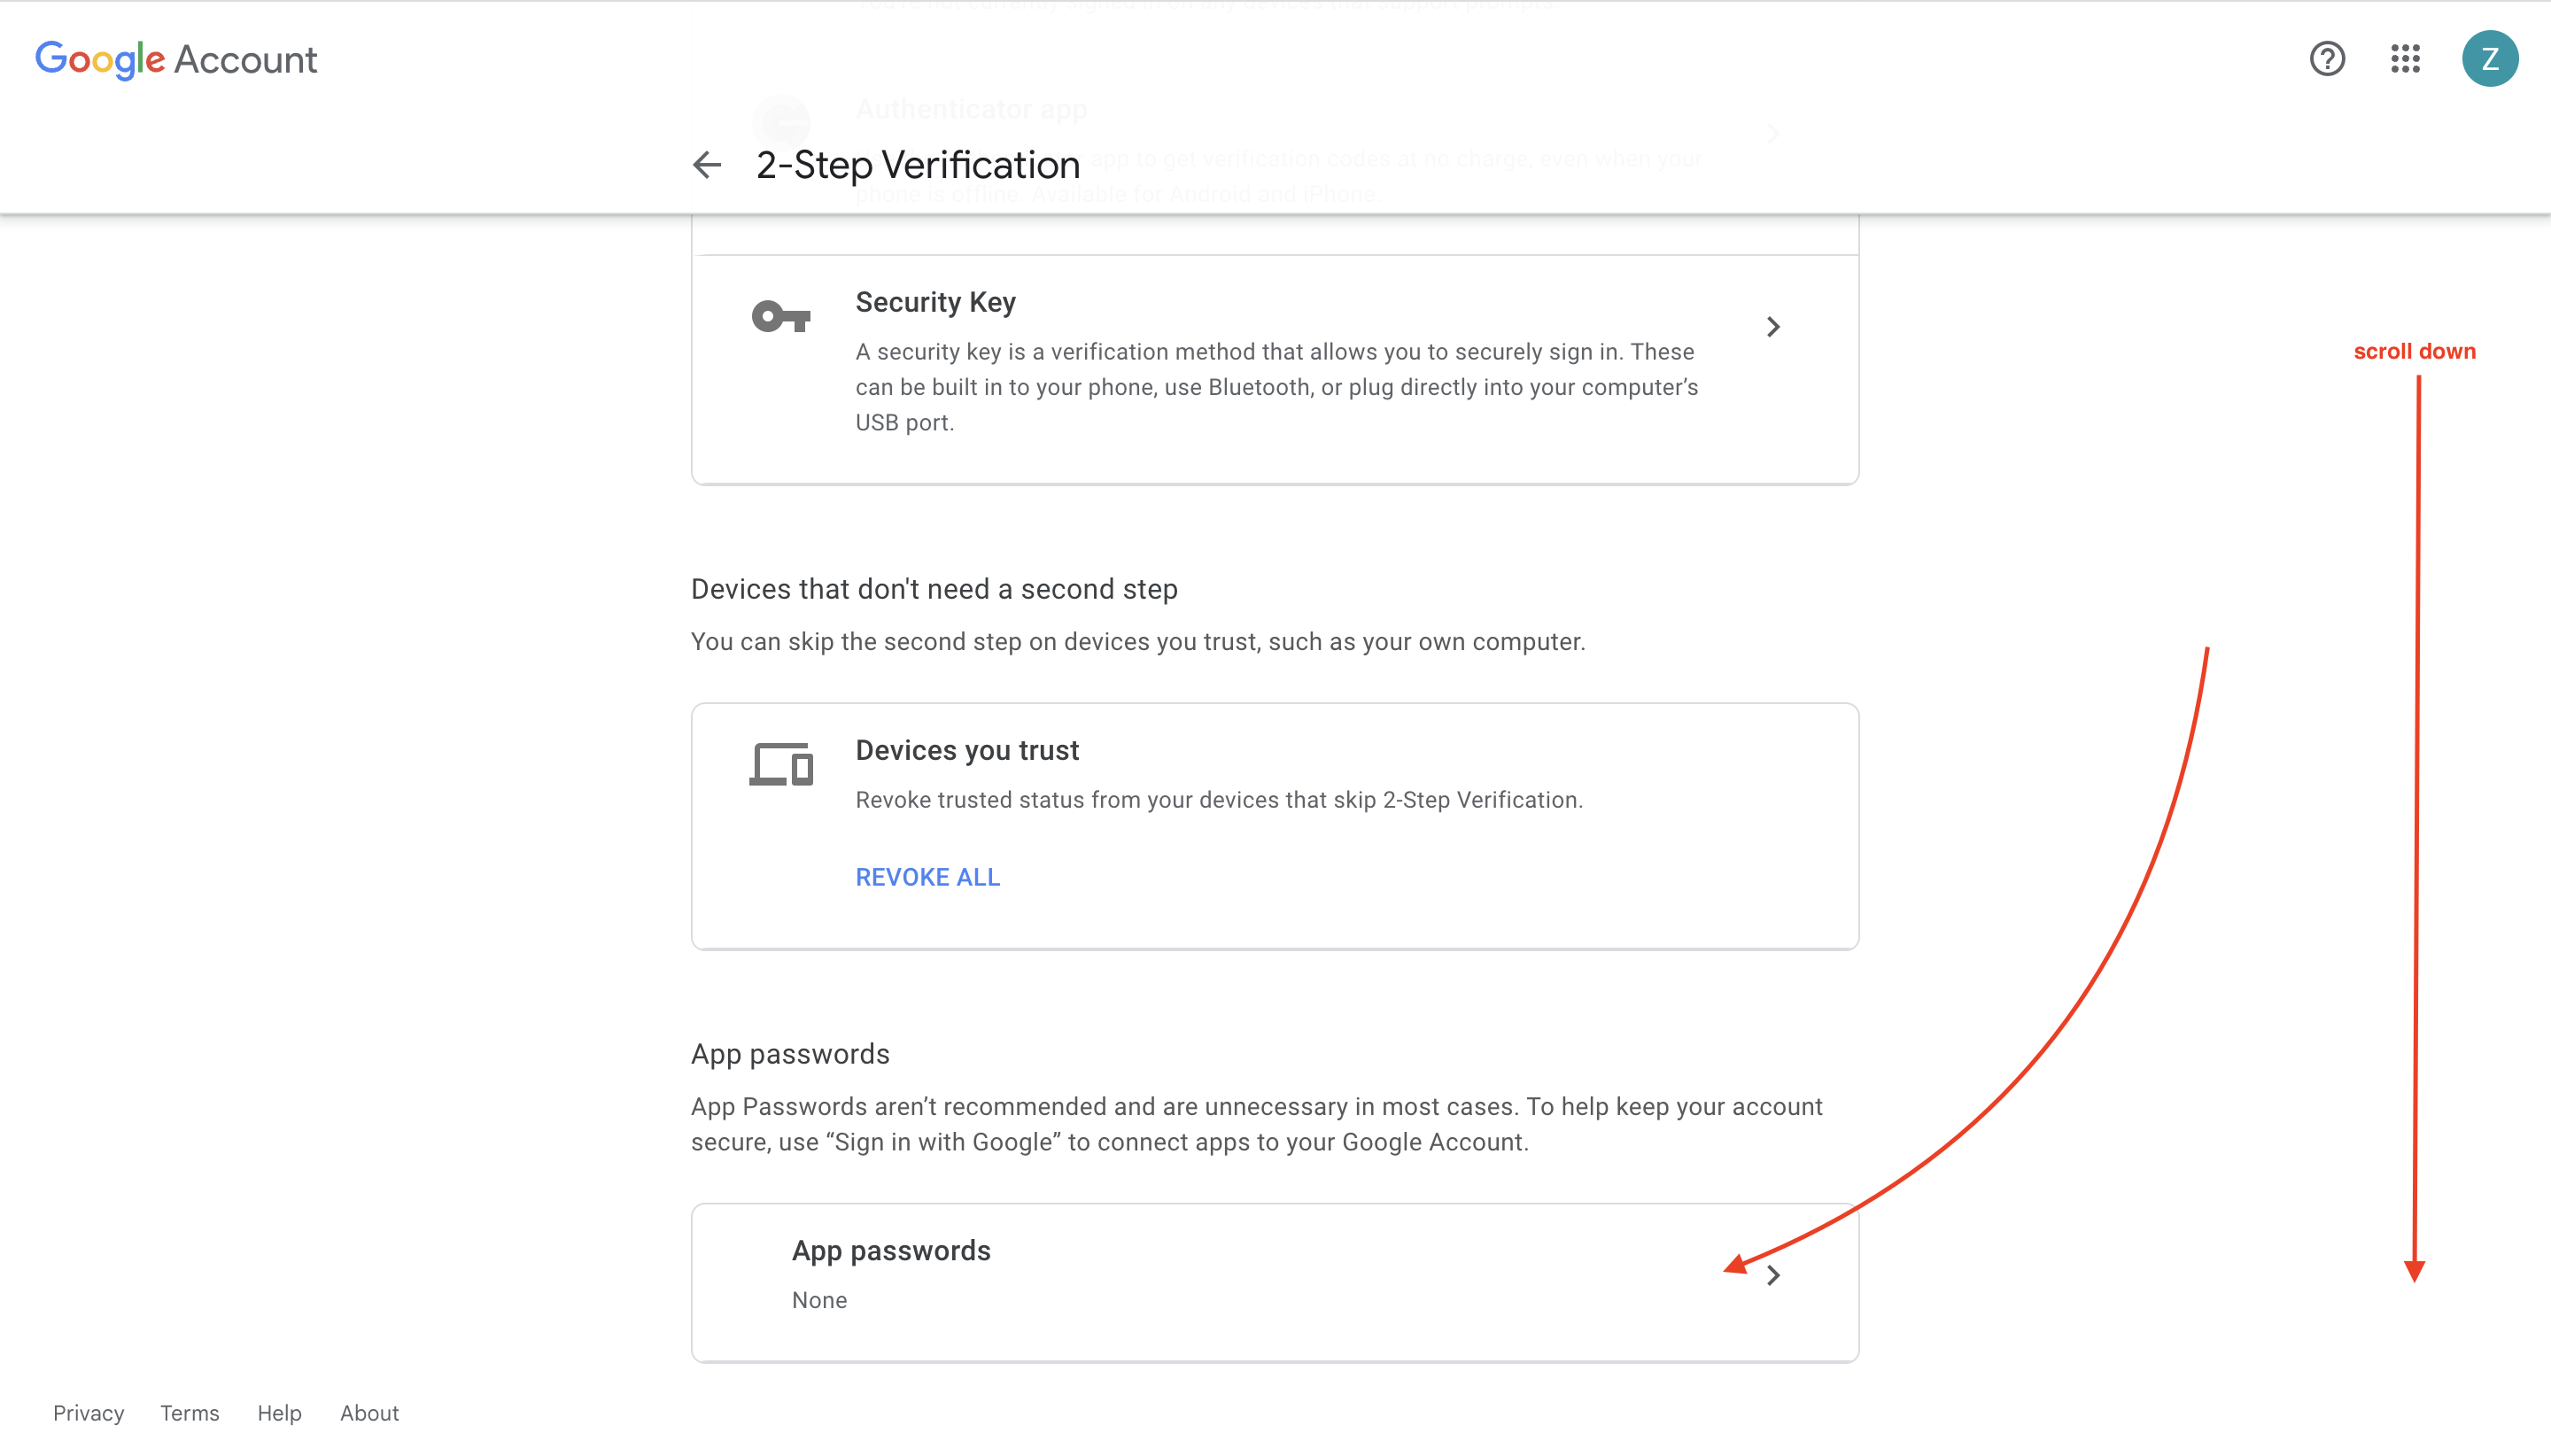
scroll down and click on App Passwords
On the Select app dropdown click on Other
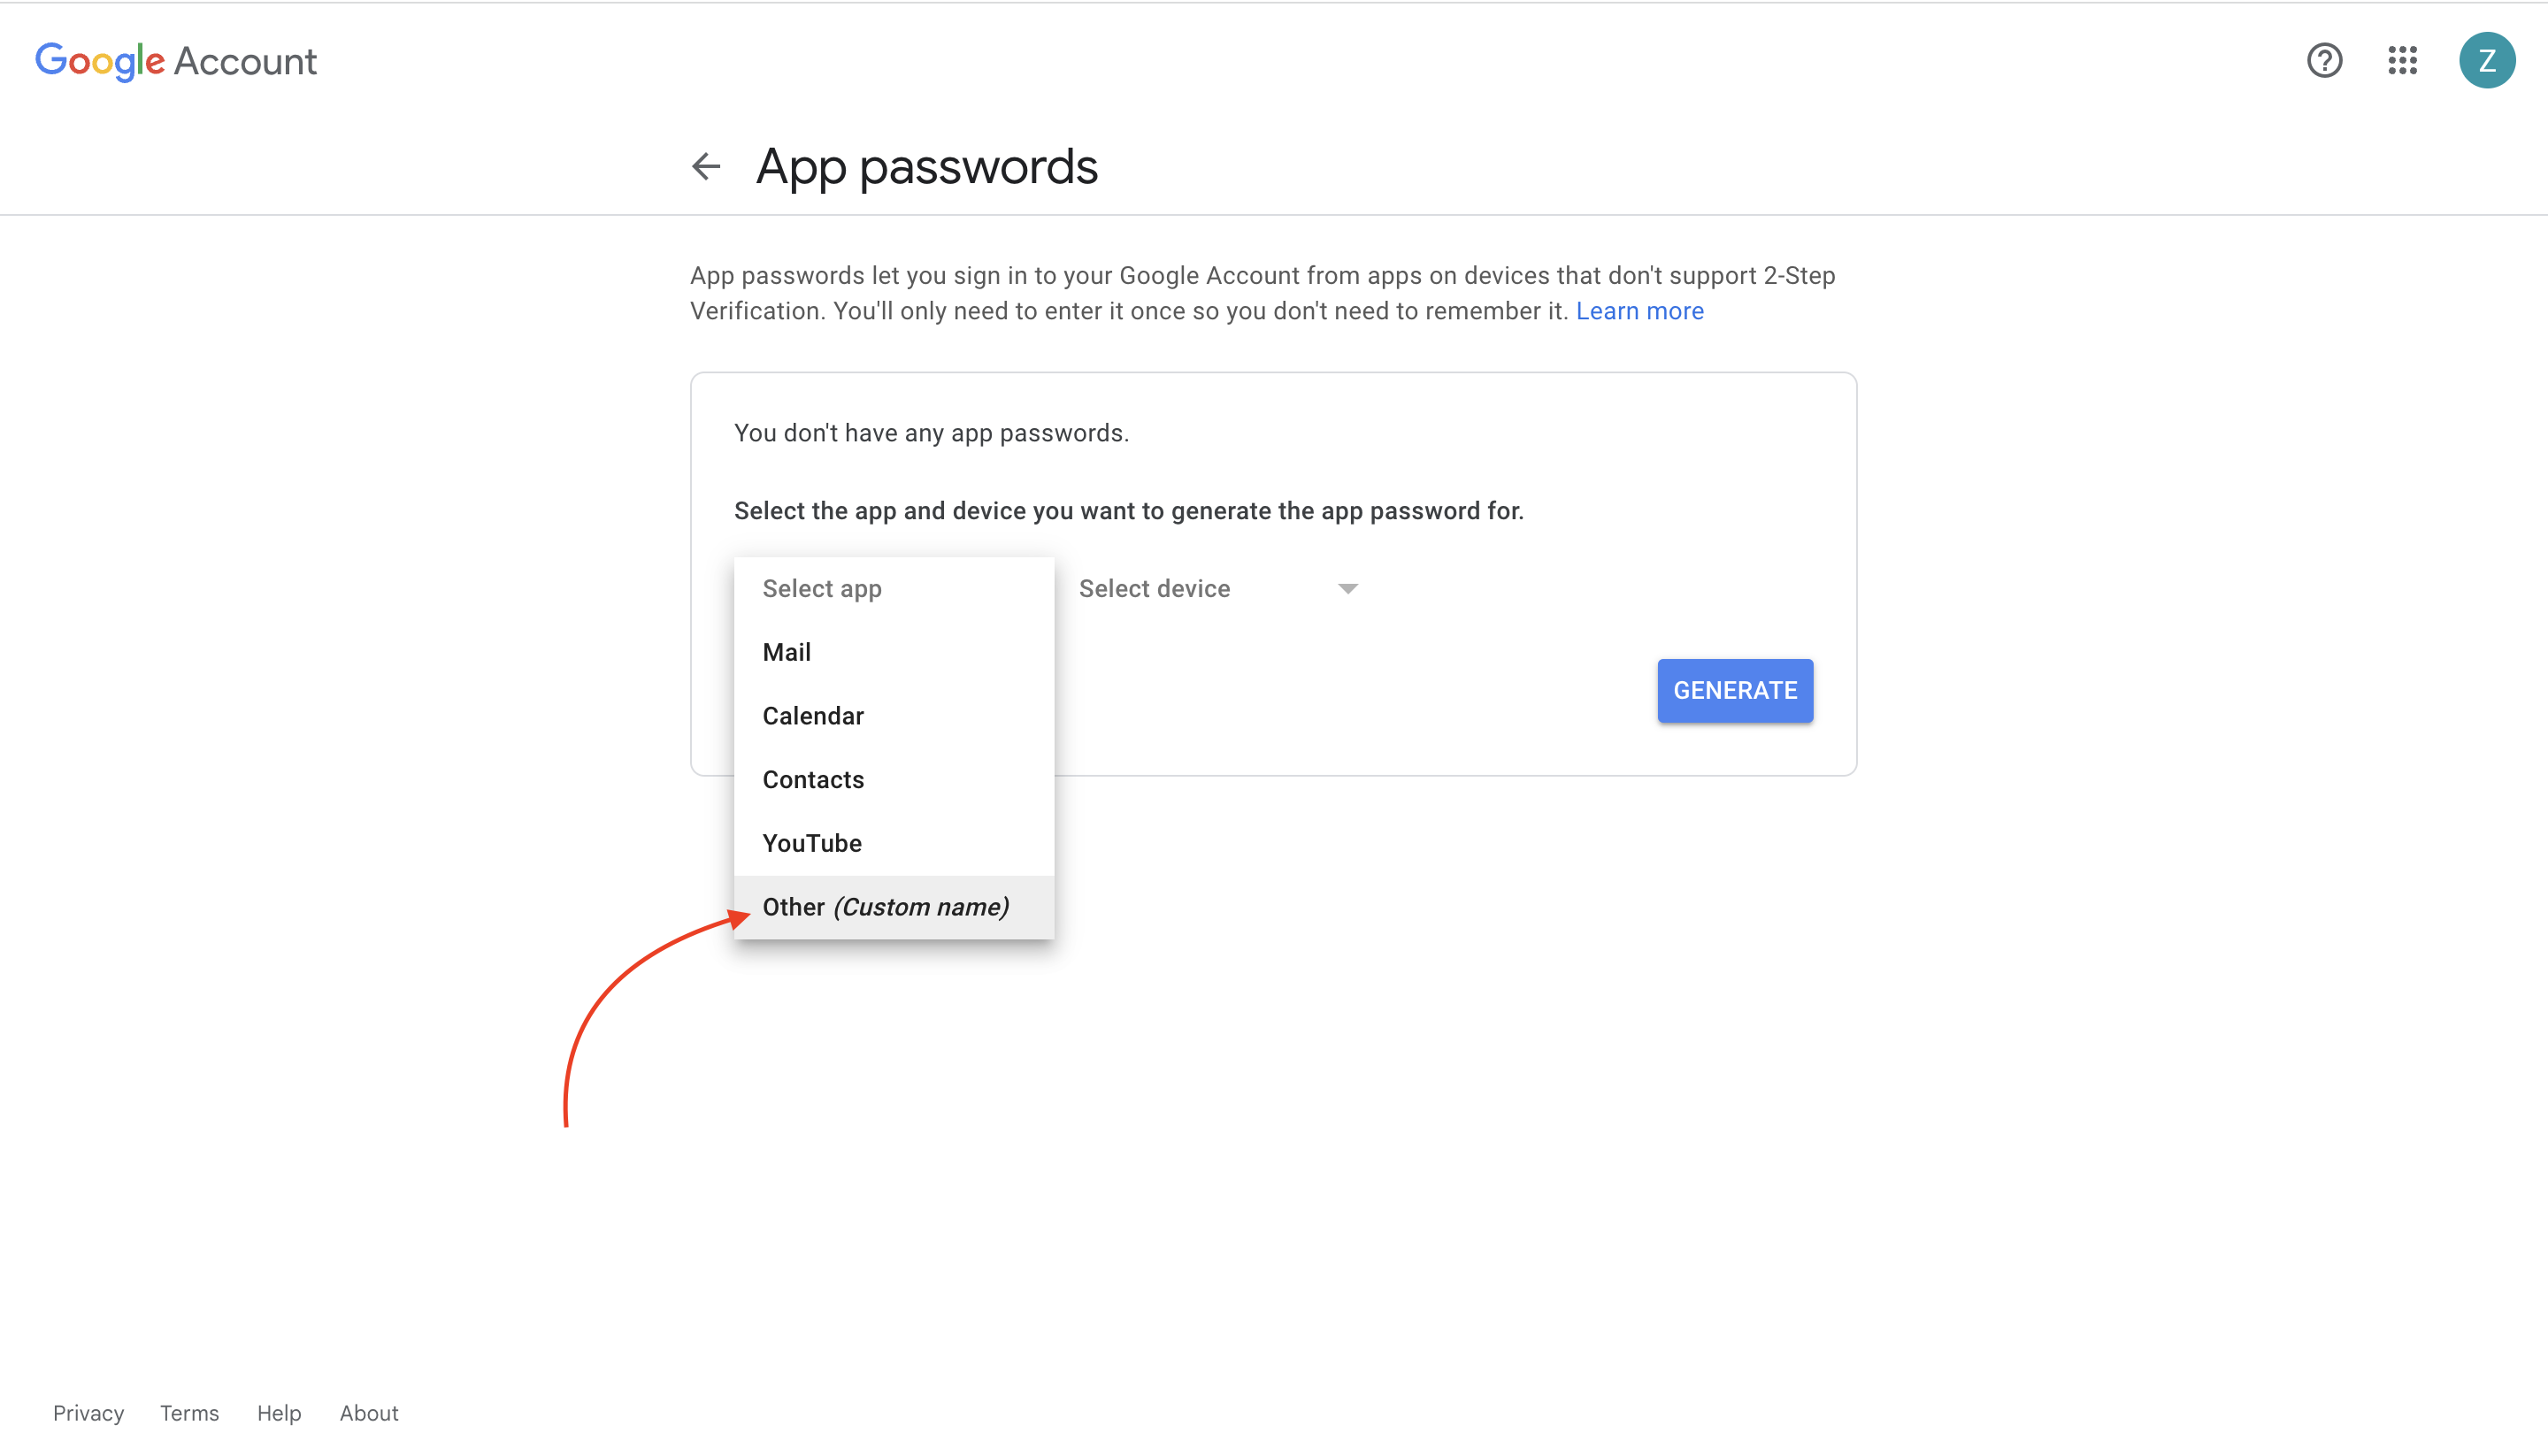
Name your app
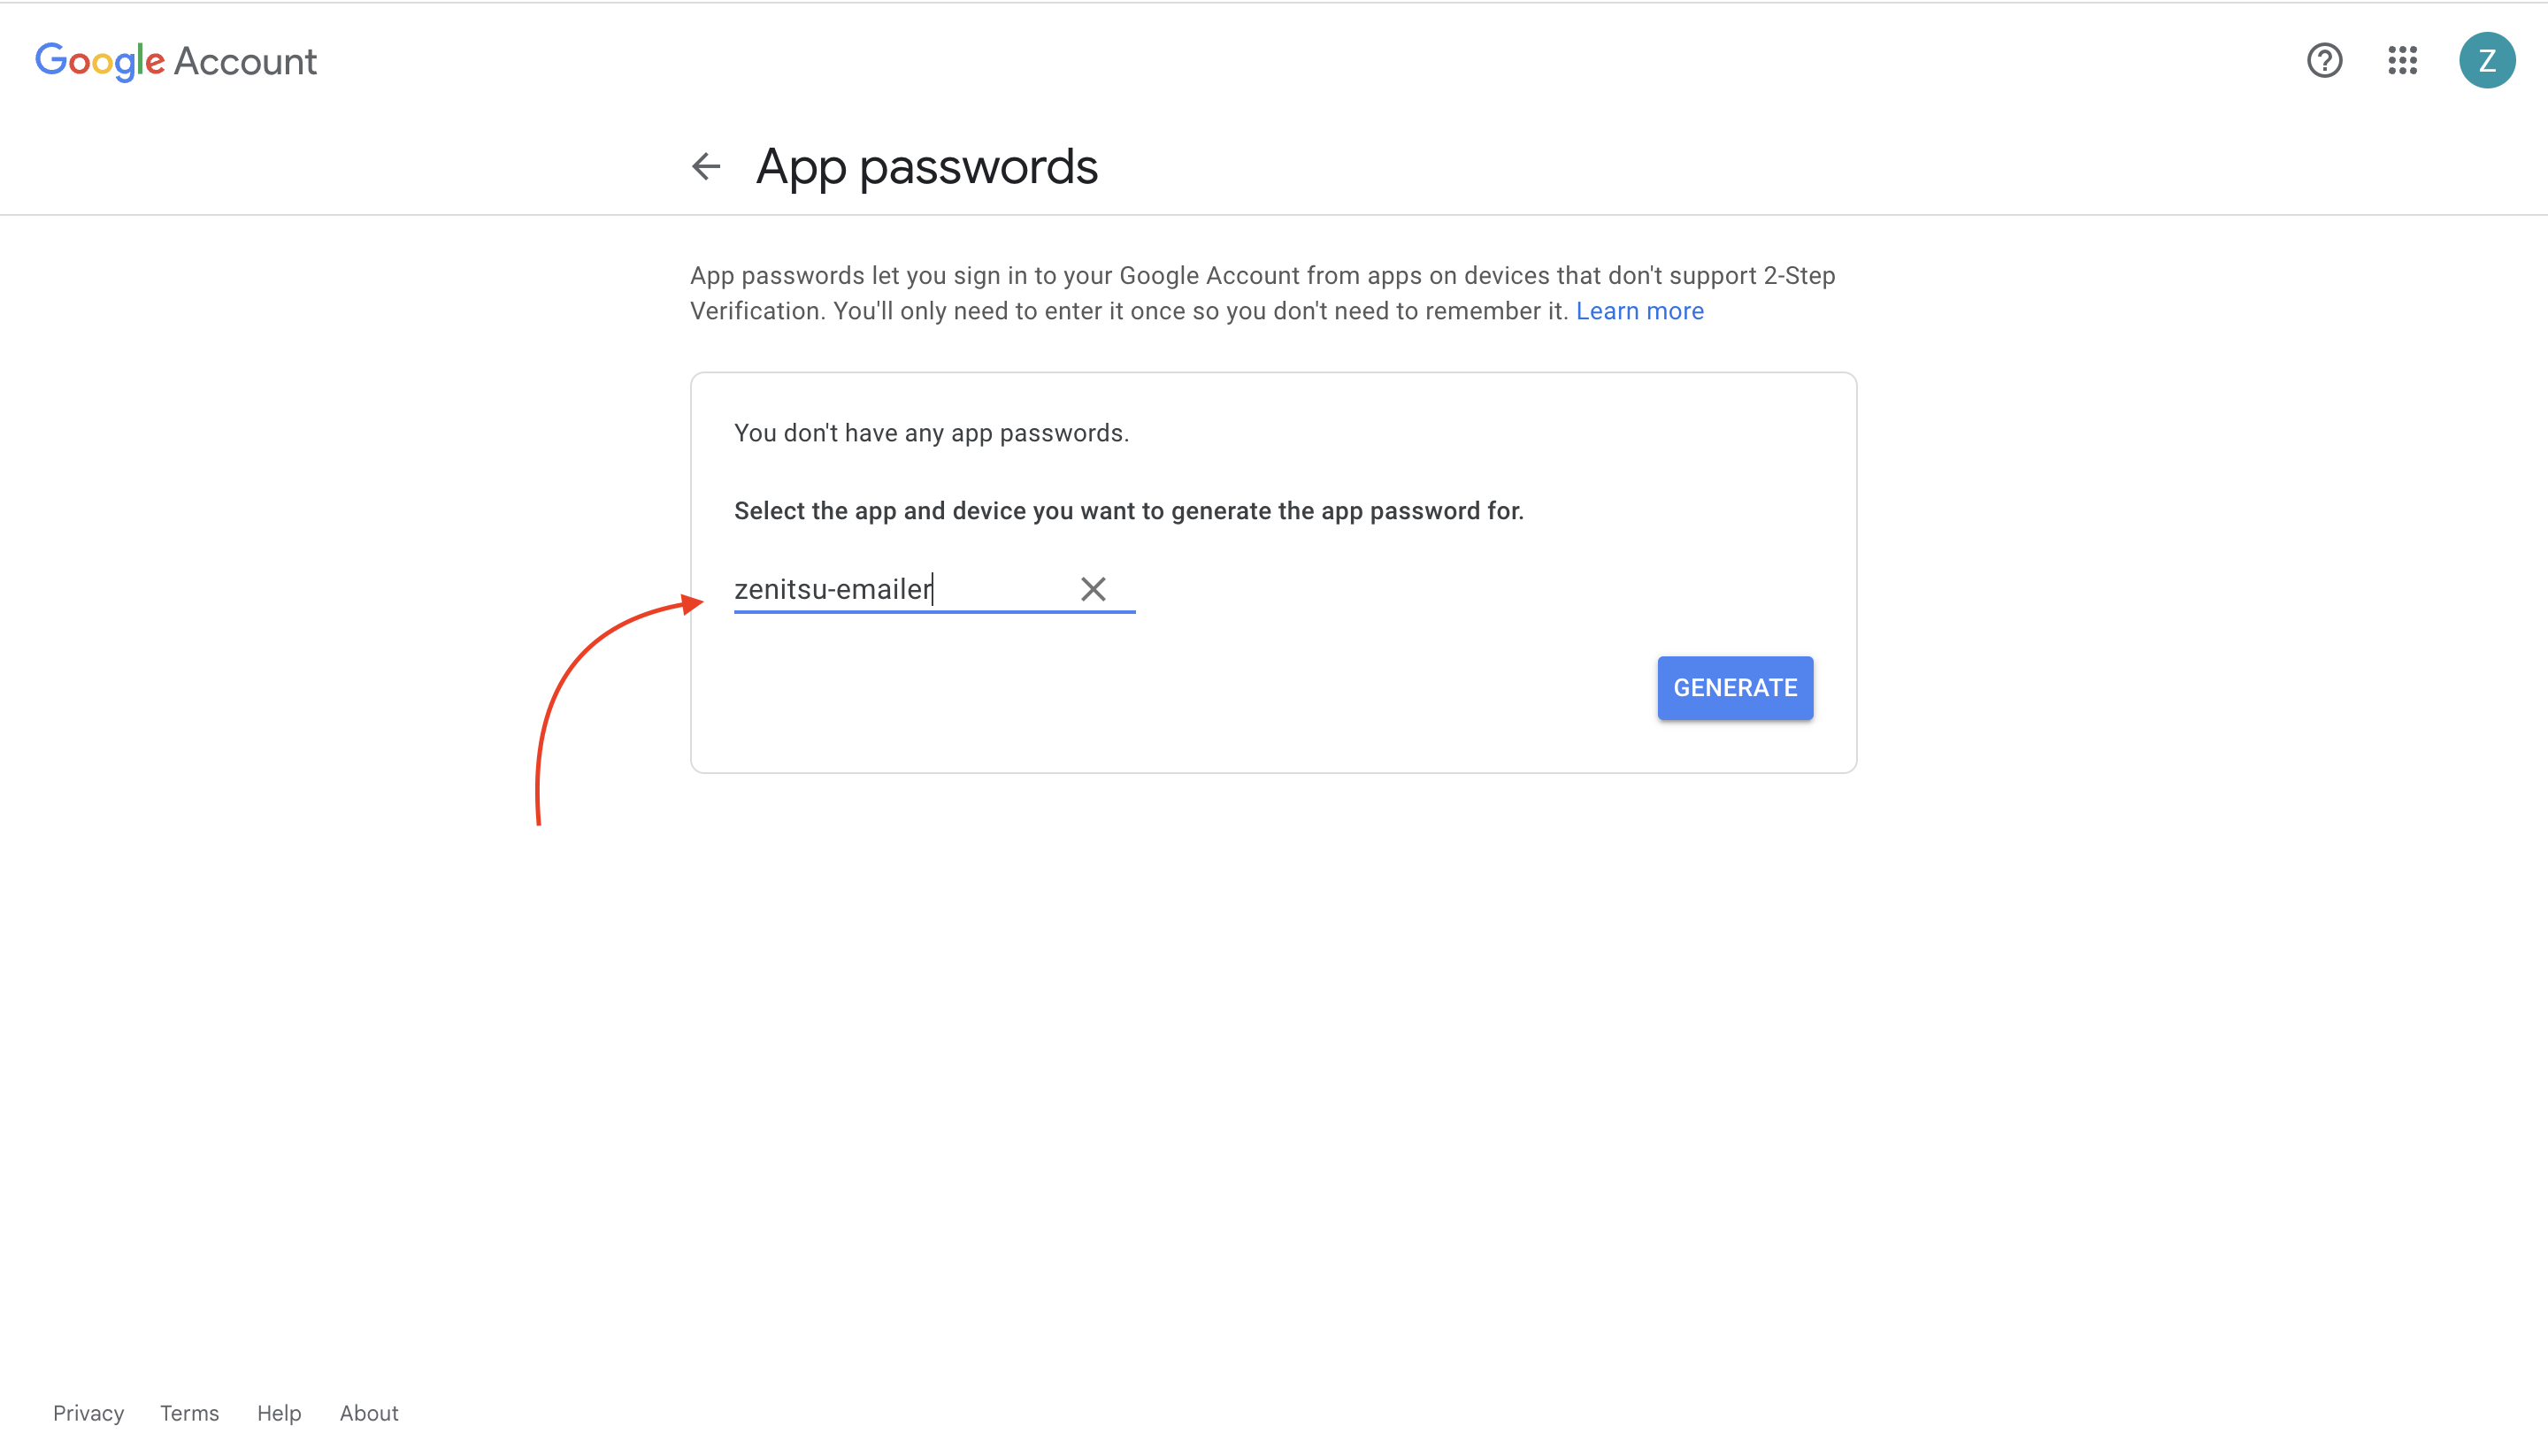
Now, your app password is generated, note this down and it will be used to send the email

Now, add the email and the generated app password to your .env file, from which we can use it.
PORT=3000

EMAIL=youcancallmezenitsu@gmail.com
PASSWORD=***************
STEP 3.2: Installing Nodemailer
Now, we need a library through which we can send an email, so we will be using nodemailer for that, we can install it as :
npm i nodemailer
STEP 3.3: Configuring Nodemailer
To use nodemailer for sending emails, we have to create a transport object using which we can send emails.
After creating the object, and making the required changes in API, app.js will look something like this -
const nodemailer = require("nodemailer");

// creating the transport object, which will be used to send emails
const transporter = nodemailer.createTransport({
    service: "gmail",
    auth: {
        // email from which email has to be send
        user: process.env.EMAIL,
        // app password which was generated
        pass: process.env.PASSWORD,
    }
})

// sendEmail method will have three parameters in body -
// 1. to : email of person to whom email has to be sent
// 2. subject : subject of email to be sent
// 3. text : the actual message body

// note: the message body can also contain HTML, which then be
// rendered as HTML in email
const sendEmail = async (req, res) => {
    const {to, subject, text} = req.body

    // the send email logic is wrapped in try...catch, so as to
    // catch the error if there are any
    try {
        await transporter.sendMail({
            from: process.env.EMAIL,
            to: to,
            subject: subject,
            html: text
        })
        res.status(200).json({message: "email sent successfully"})
    } catch(e) {
        console.log(`Error in sending email ${e}`)
        res.status(500).json({message: e})
    }
}

module.exports = {
    sendEmail: sendEmail
}
STEP 4: Time to test
Now, we will be calling the API from the postman and will see whether an email is received or not.
I have created a sample payload for the email, it can be modified as per specific use case.
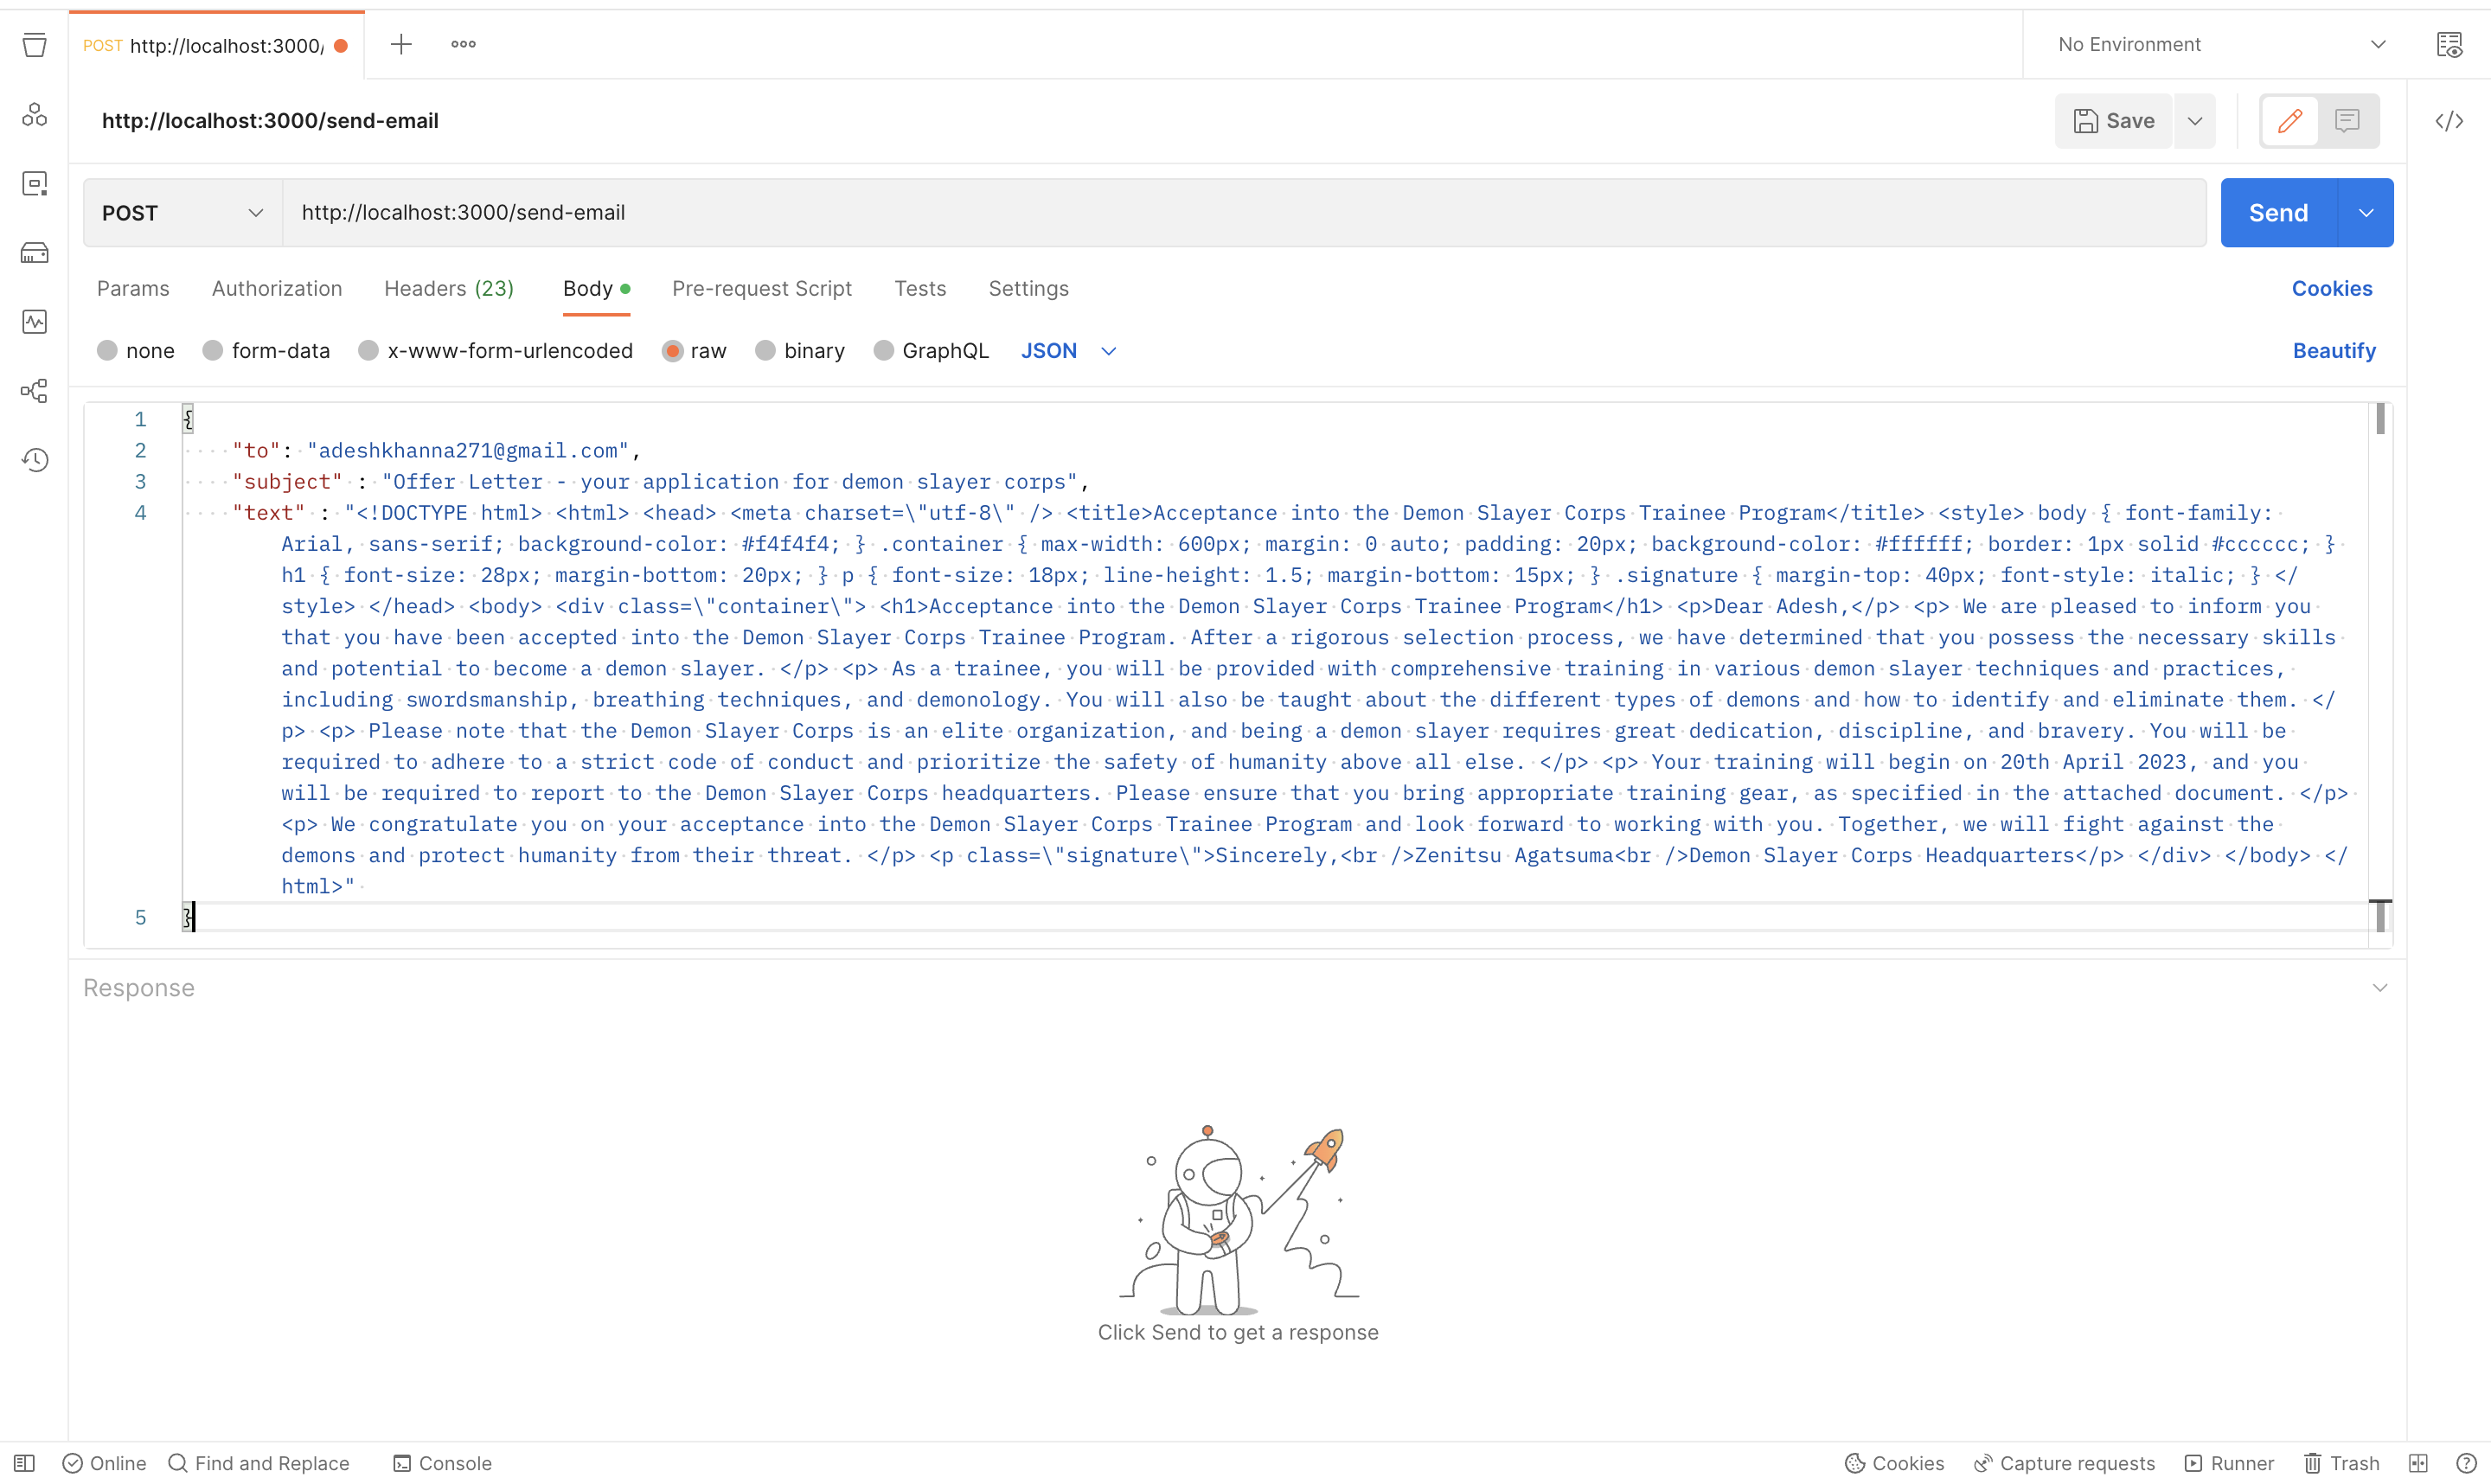
The Response is - "email sent successfully"

Now, on checking the mail
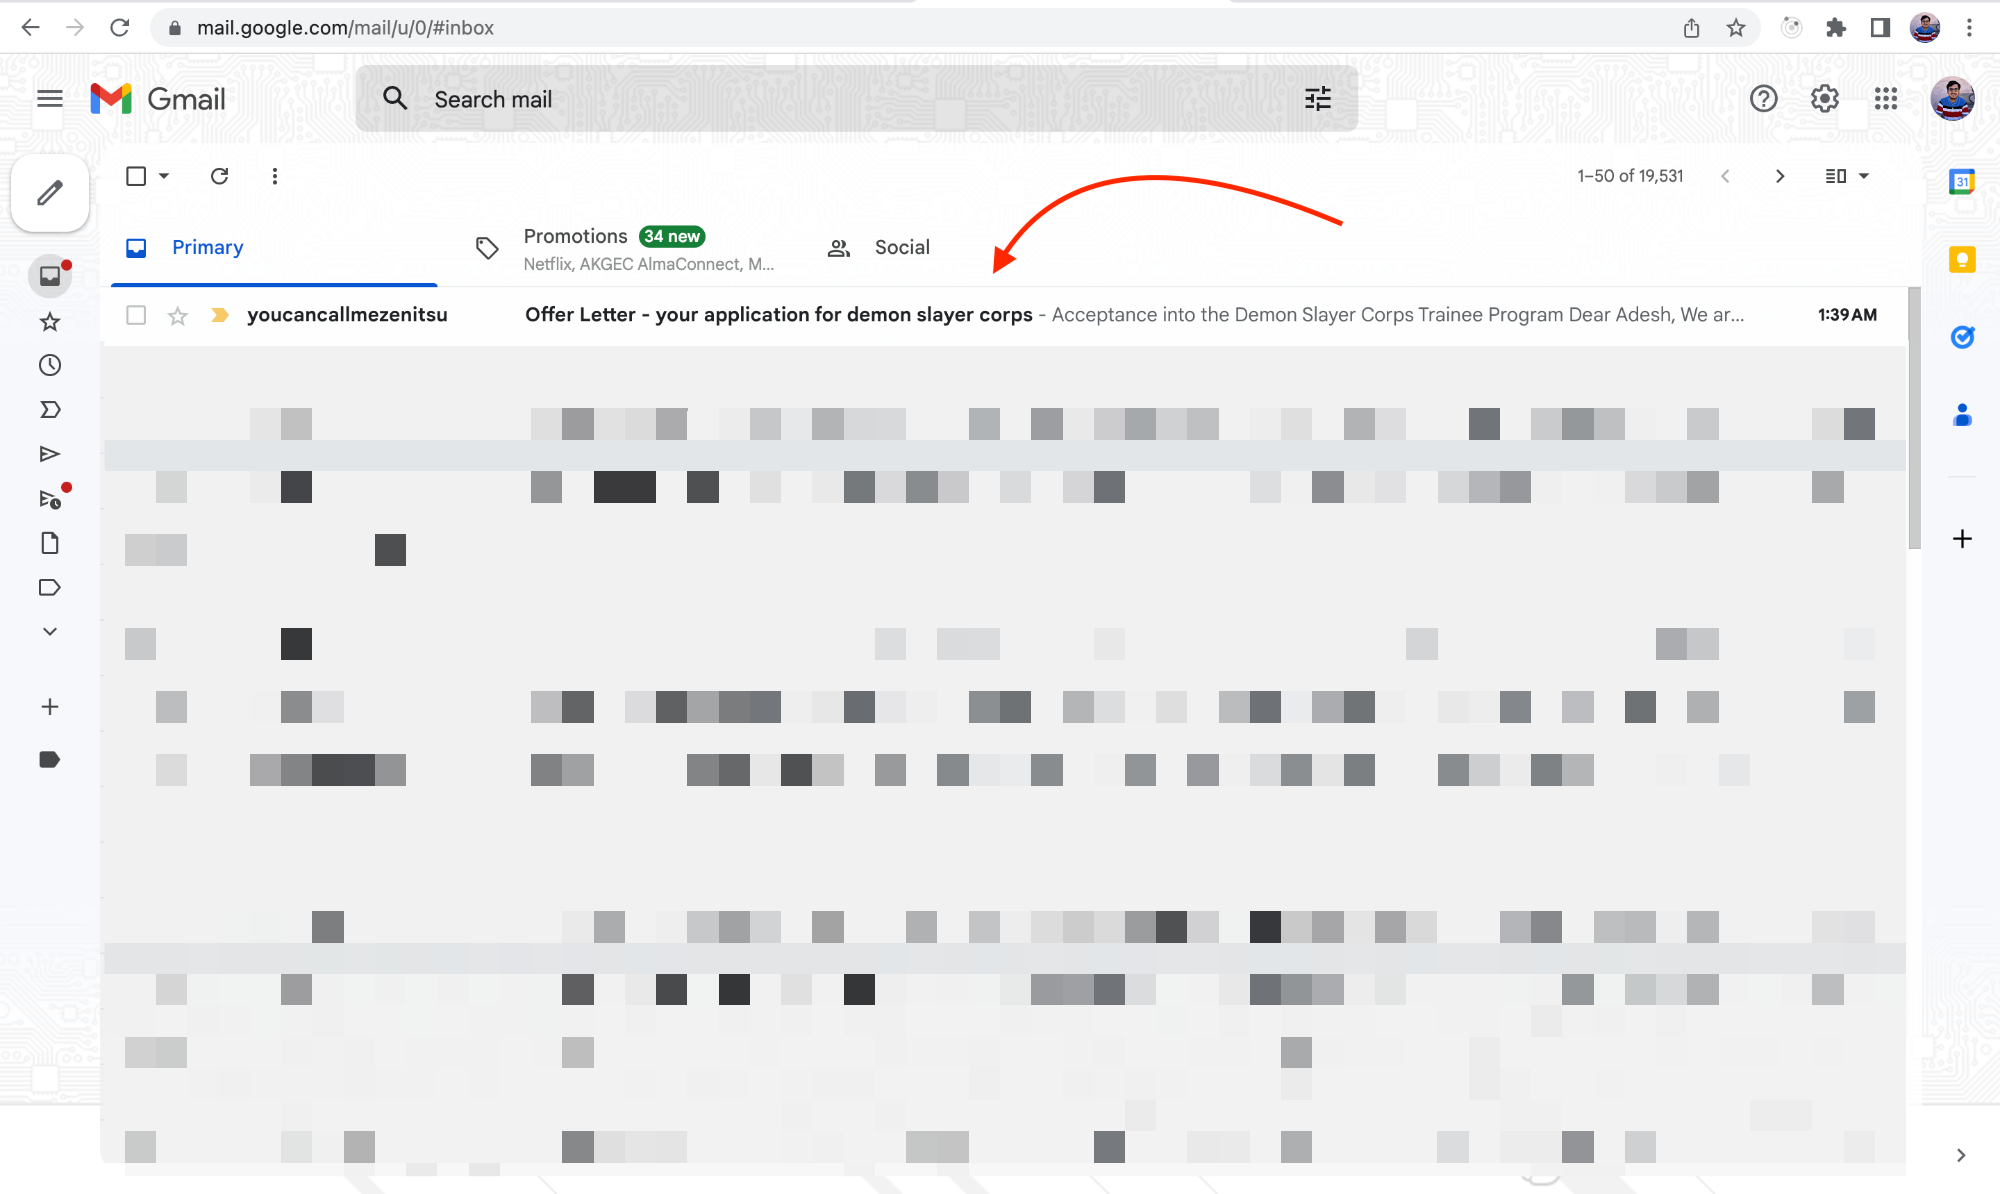
And since I had sent the text in form HTML, so I received the email in formatted form

Note: It is not healthy and good practice to always send the whole HTML or a big text in API, rather what can be done is we can create an HTML file locally and can make it dynamic by using variables.
Thanks for scrolling!